An Easier Path to Scalable AI: Intel Tiber Developer Cloud + MinIO Object Store

One of the biggest challenges facing organizations today for AI and data management is access to reliable infrastructure and compute resources. The Intel Tiber Developer Cloud is purpose-built for engineers who need an environment for proof-of-concepts, experimentation, model training, and service deployments. Unlike other clouds, which can be unapproachable and complex, the Intel Tiber Developer Cloud is simple and easy to use. The platform is especially valuable for AI/ML engineers developing models of all types. Using Intel’s cloud, AI/ML engineers can easily acquire compute and storage for running training and inference workloads, and deploying applications and services.
Intel selected MinIO as the object store for its cloud because it brings simplicity, scalability, performance, and native integration with the cloud and AI ecosystems. We are delighted to be the object store of choice and happy to produce this “how-to” post to accelerate your adoption of this platform. I’ll show how to train a model using an Intel Gaudi AI accelerator and how to set up and use MinIO (object storage) in the Intel Tiber Developer Cloud.
Let’s get started. The complete code demo for this post can be found here.
Creating an Account and Starting an Instance
Intel’s cloud documentation contains step-by-step guides for setting up your account and acquiring resources for your AI/ML experiments, optimizations, and deployments. The code presented in this post assumes you completed the following guides.
Get Started - This guide walks you through creating and signing into an account. It also shows you how to use the cloud’s Jupyter server. What is nice about the Jupyter Lab is that you do not need an SSH Key to start it up and use it.
SSH Keys - To create a compute instance, you will need to upload an SSH public key to your account. This guide shows you how to create the key according to the cloud’s specifications and upload it to your account. Be sure to save public and private keys in a safe place. You will need the private key to SSH into a compute instance. This guide also shows SSH commands for connecting to an instance.
Manage Instance - This guide shows how to select a compute node, start it, and shut it down when you are done with your experiments.
Object Storage - This guide walks you through creating a bucket within your account.
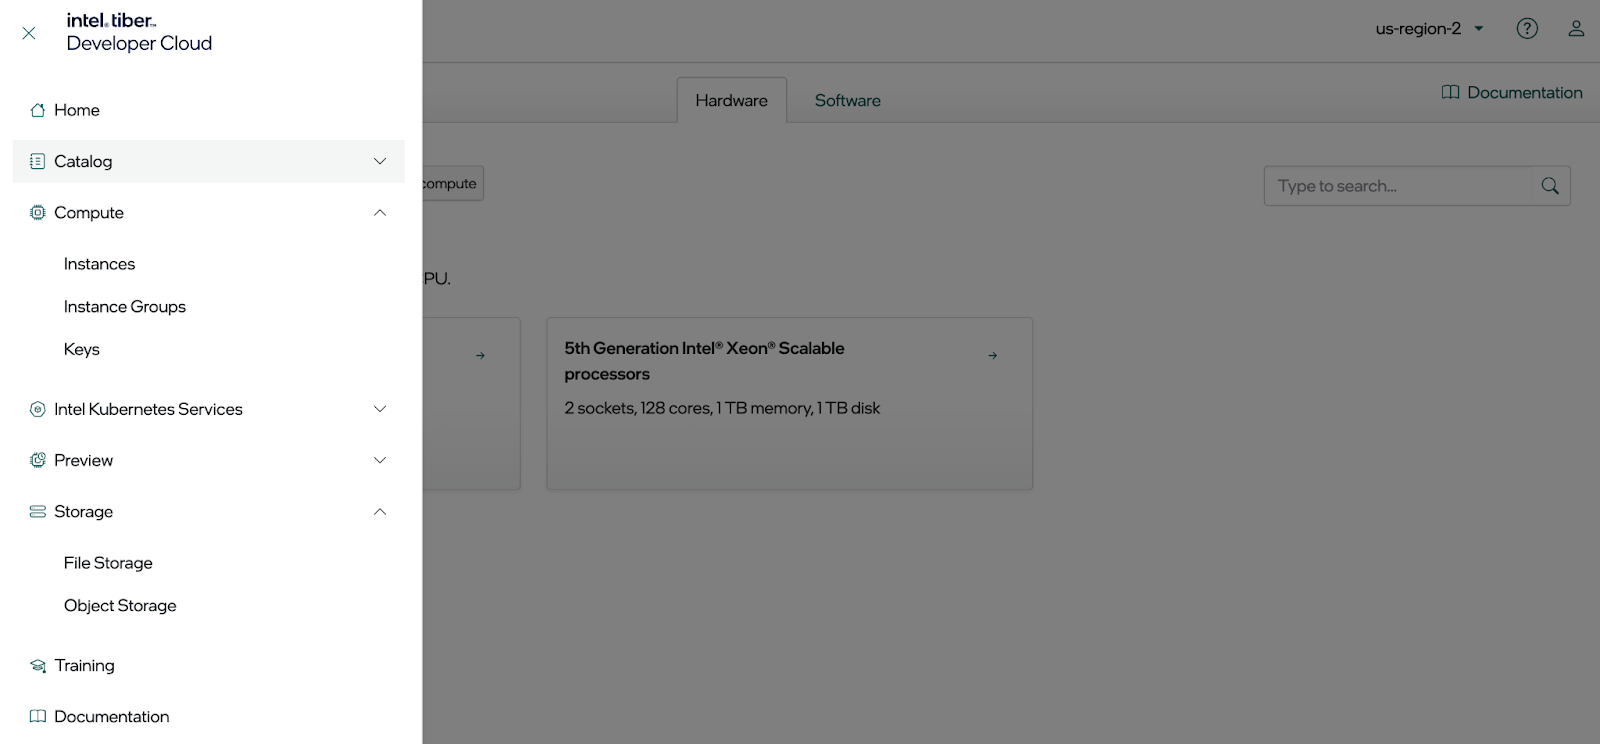
Once you have an account you will have access to the hardware, software, and service choices, as shown below. We will use a compute instance and object storage in this post.
Getting MinIO Ready for Programmatic Access
The screenshot below shows the dialog used to create a bucket. Notice that your bucket name is prefixed with a unique identifier. This is necessary because MinIO is a platform service for Intel’s cloud and it supports all accounts in the cloud’s region. Hence, the unique identifier prevents name collisions with other accounts.
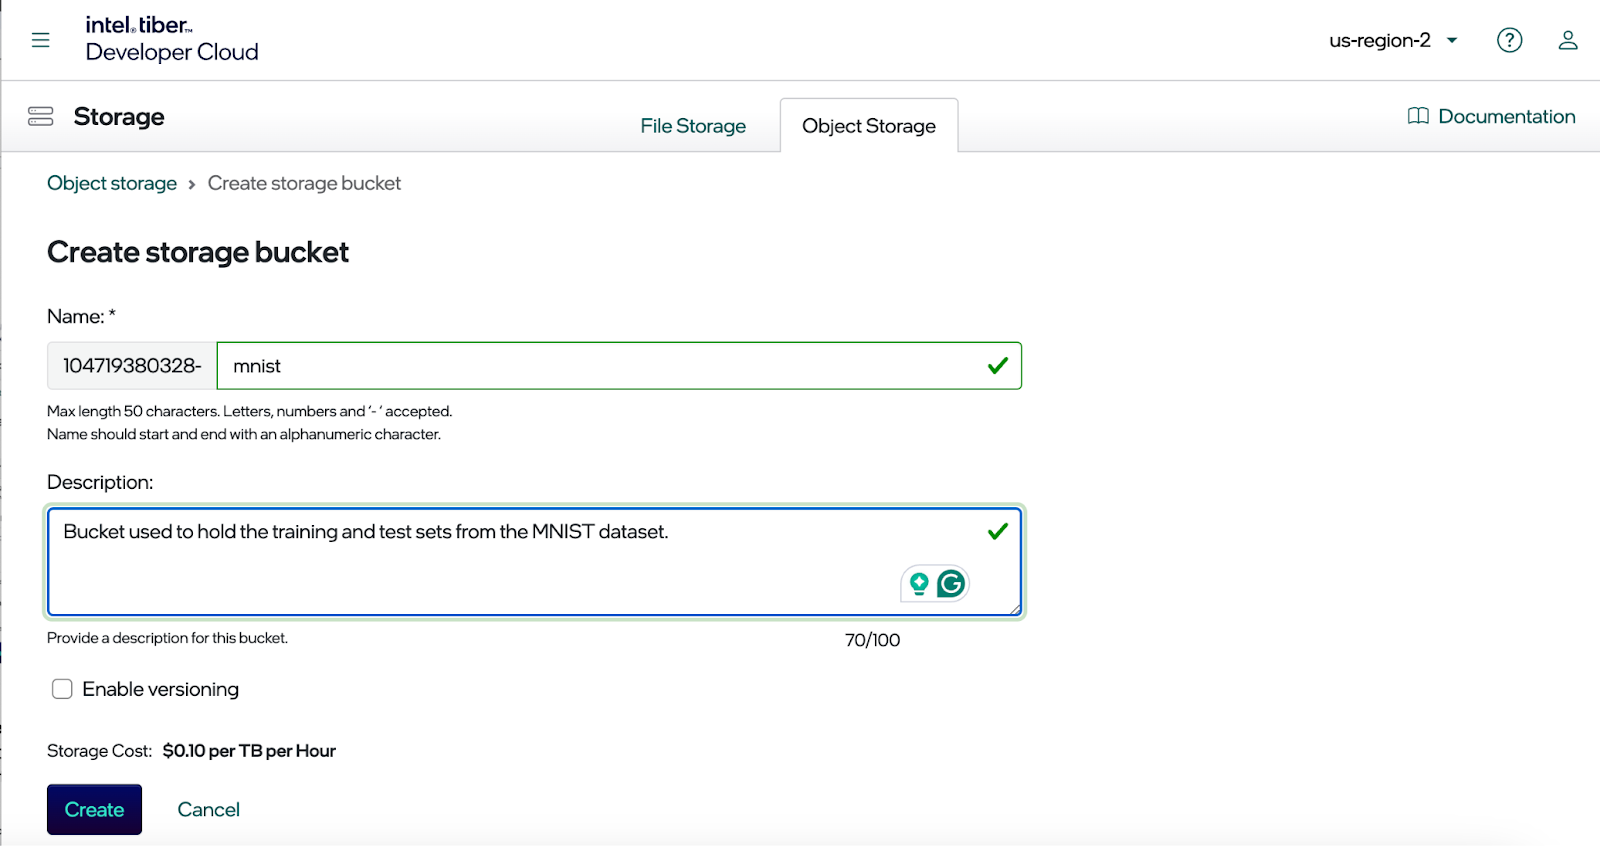
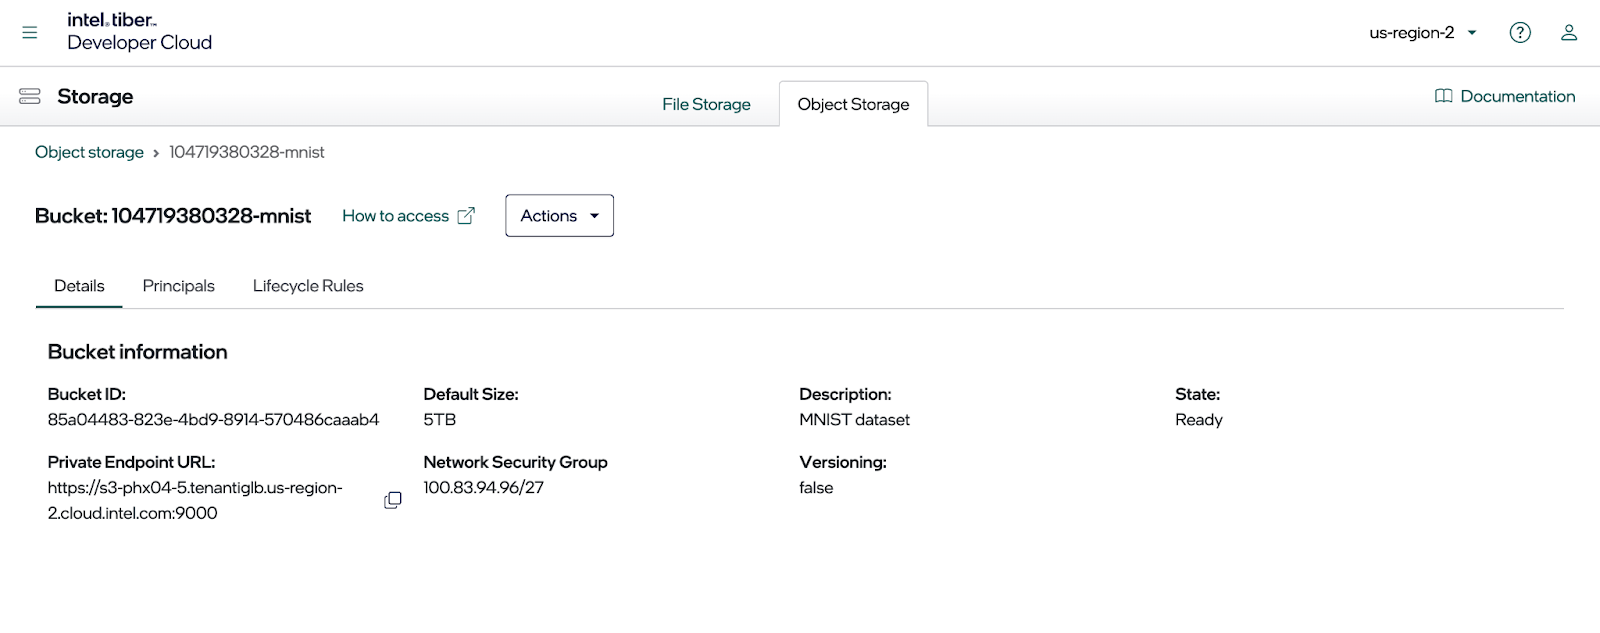
Enter a name for your bucket and enable versioning if needed. Once you click the Create button, you should see your new bucket, as shown below. This post will use the MNIST dataset and access it programmatically to train a model. Consequently, the endpoint is needed for accessing our new bucket, an access key and a private key.

To see the endpoint address, click on the new bucket and then select the Details tab as shown in the below image. Copy the private endpoint displayed in this dialog, as it is needed when setting up a MinIO SDK configuration file.
Since you need to access your bucket programmatically, create a principal and associate an access key and secret key with it. To do this, click on the Principles tab. All existing principles will show.
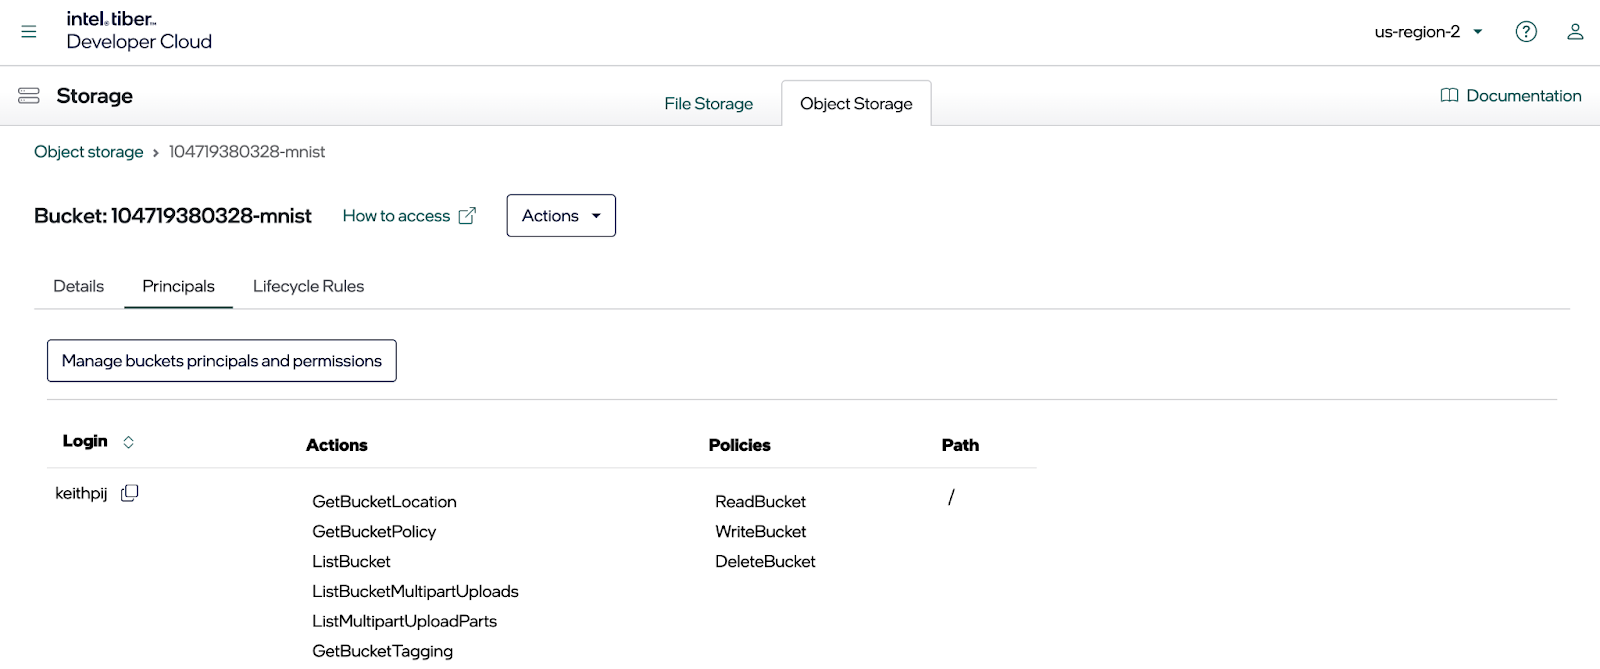
Next, click the Manage Principles and permissions button. This opens a dialog where you can edit the principles shown above.
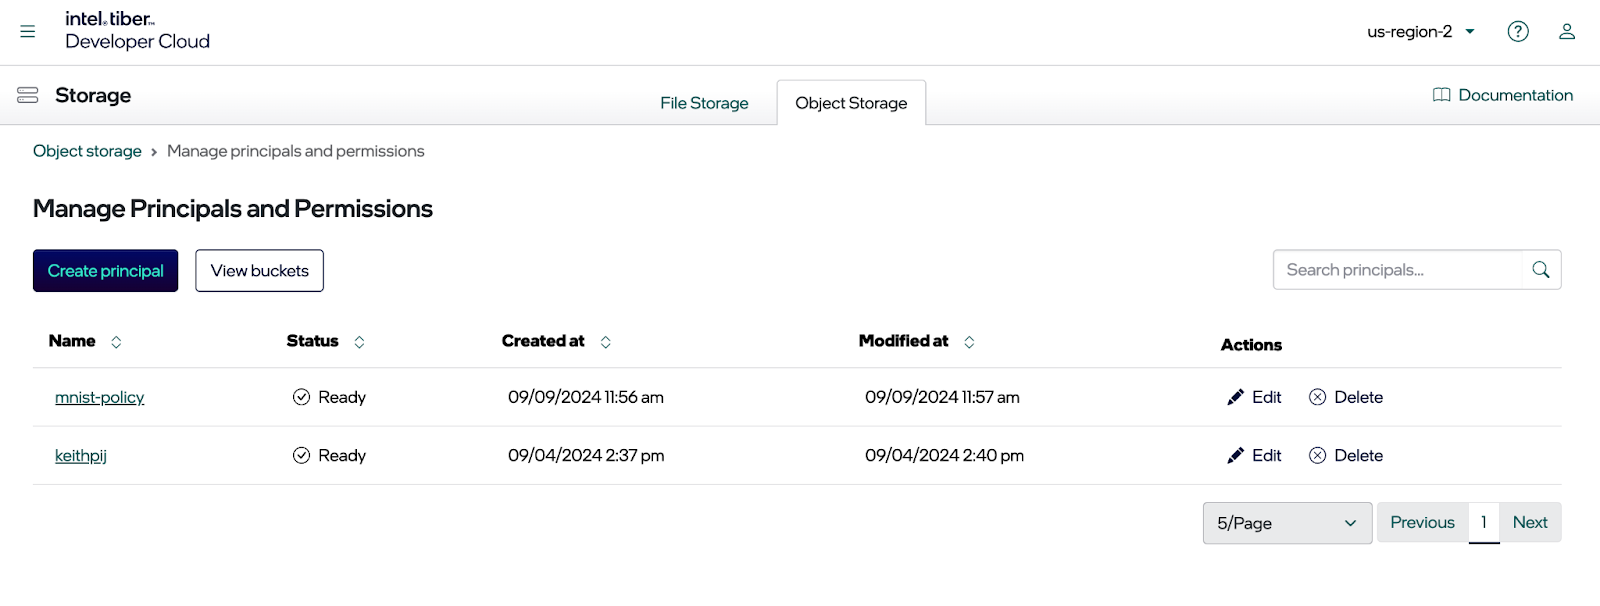
Click the Create principle button. You should now see the dialog for creating a principle (see below). Select the permissions you want for the new principle and click the Create button.
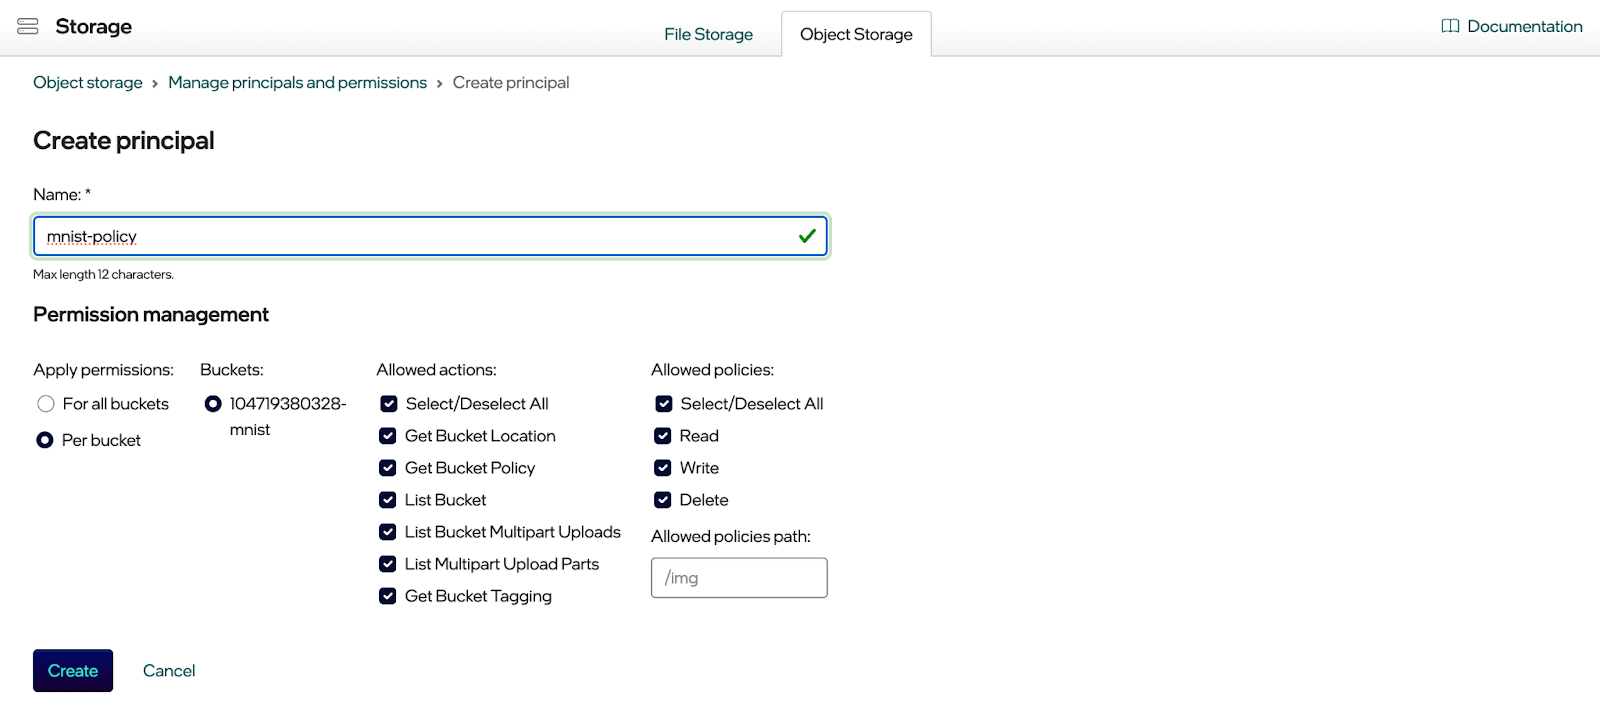
Once the principal is created, go to the Manage Principals and Permissions page and click on the newly created principle.

Once you click on the principle, you should see a dialog like the one below.
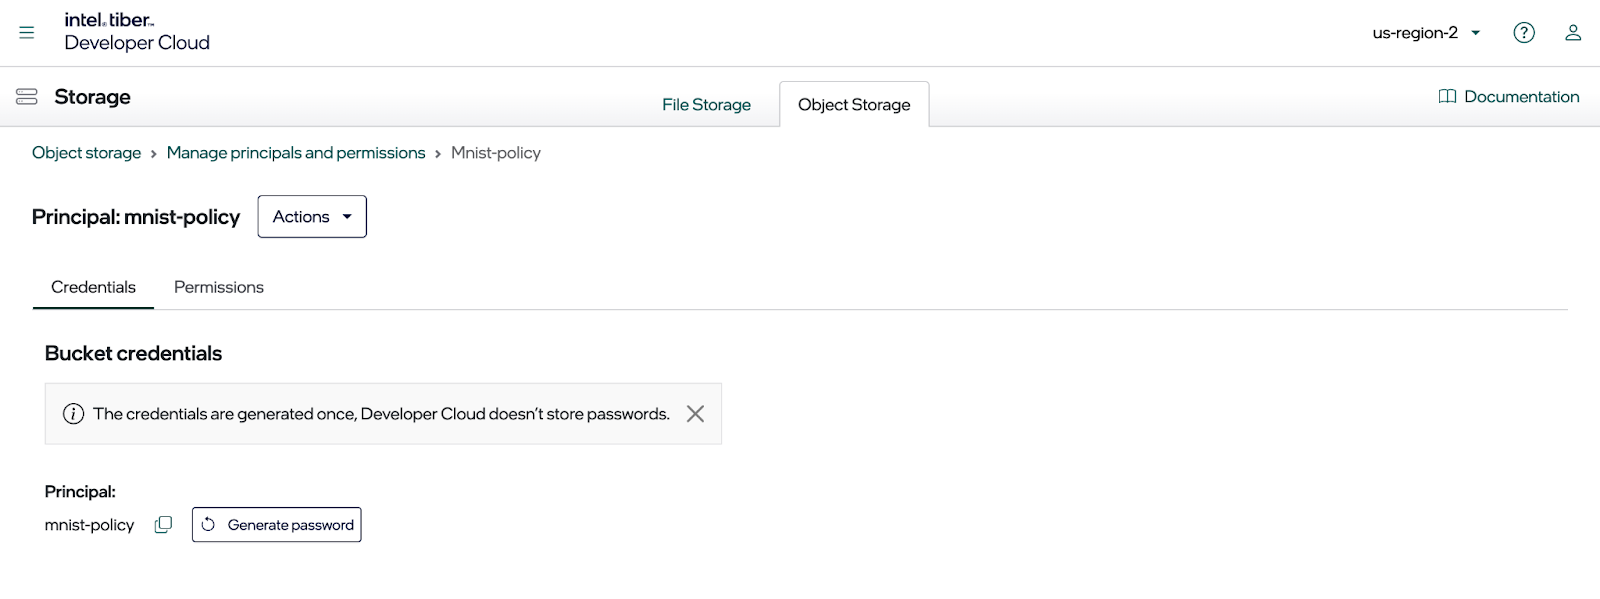
This is where you create the access key and the secret key to access the bucket using the MinIO SDK (or any other S3 complaint library). Click the Generate password button to create the keys, as shown below. Copy them to a configuration file immediately, as you cannot display them again.
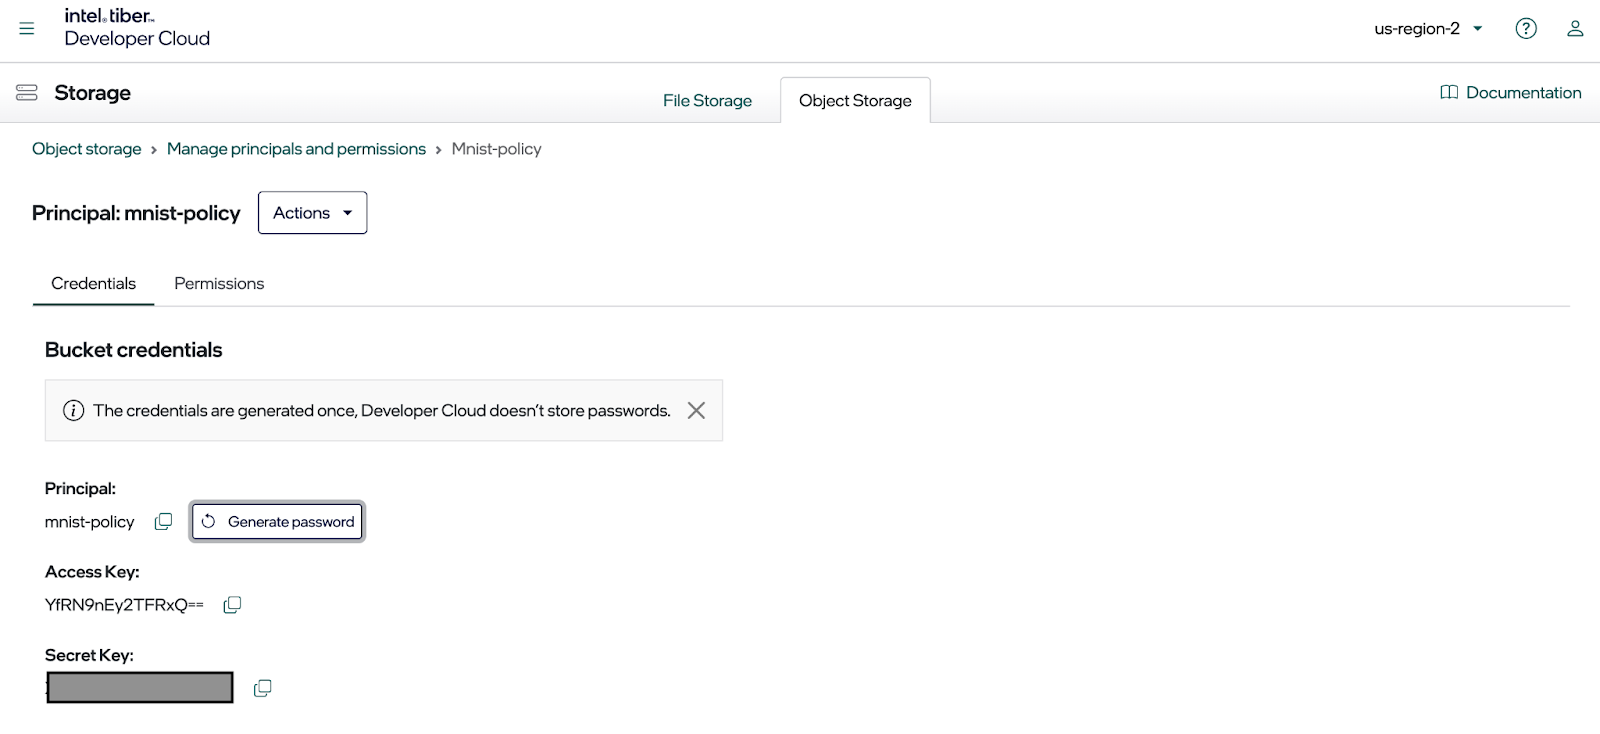
The configuration file used by the code sample for this post is a .env file for setting up environment variables. As shown below, put your private endpoint, access key, secret key, and bucket name in this file.
Now, once you created a compute instance and a bucket for your training data, you are ready to write some code. Let’s upload the MNIST dataset to our new bucket.
Uploading Data to MinIO
The torchvision package makes retrieving the images in the MNIST dataset easy. The function below uses this package to download a compressed set of files, extract the images, and send them to MinIO. This is shown in the code sample below. A few supporting functions were omitted for brevity. The complete code can be found in the data_utlities.py module within the code download for this post.
Now that your dataset is loaded into your bucket let’s look at how to access it to train a model.
Using MinIO from a Data Loader
Within your model training pipeline, there are two places where you can load data from durable storage. If your data fits entirely into memory, you can load everything into memory at the beginning of your training pipeline before calling a training function. (We will create this training function in the next section.) This works if your dataset is small enough to fit entirely into memory. If you load data in this fashion, your training function will be compute-bound since it will not have to make any IO calls to get data from object storage.
However, if your dataset is too large to fit into memory, you will need to retrieve data every time you send a new batch of samples to your model for training. This results in an IO-bound training function.
Since we want to demonstrate the benefits of model training using Gaudi accelerators, we will create a training function that is compute-bound. The Pytorch code to create a custom Dataset and load it into a Dataloader is shown below. Notice that all data is loaded in the constructor of the ImageDatasetFull class. All the MNIST images are retrieved from MinIO and stored in the properties of the object created from this class. This all occurs when the object is created for the first time. If we wanted to load the images every time a batch of data is sent to our model for training then we would need to create this object with just a list of object names and move the loading of the actual images to the __getitem__() function.
Now that we have data loaded into memory, let’s look at how we can use Gaudi2 and the Intel Developer Cloud to train a model.
Using Intel Gaudi accelerators from PyTorch
The PyTorch HPU package supports Intel’s multiarchitecture processing (HPU) utilities. In general, HPU allows developers to write PyTorch applications optimized for Intel's range of hardware, such as CPUs, Gaudi accelerators, GPUs, and any future accelerators Intel may build. The HPU abstraction uses a common interface provided by PyTorch. Consequently, developers can write code that dynamically switches between different hardware accelerators without extensive refactoring. This post will use it to detect Gaudi and move tensors to Gaudi’s memory.
A common coding pattern when using accelerators of any type is to first check for the existence of a GPU or AI accelerator, if one exists, then move your model, training set, validation set, and test set to the processor’s memory. This is usually done within a function that trains your model. The function below is from the code download for this post. (This function is the training function I referred to earlier.) The highlighted code shows how to check for the existence of Intel accelerators and move the model and training set to the device. For this check to work correctly with Gaudi you will need the following import. You will not use this module directly but it needs to be imported.
import habana_frameworks.torch.core as htcore
Notice that moving the tensors that hold the features and labels from your training set is done within the batch loop. The PyTorch data loaders do not have a “to” function for moving an entire dataset to a target device. There is a good reason for this: large datasets would quickly use up a processor’s memory. This is especially true for older GPUs with less memory than newer ones. It is best practice to move only the tensors needed for the current batch of training to the accelerator just before the model needs them for training.
Now that we know how to move a model and tensors from our data loaders to Gaudi and have a way to get data from object storage, let’s put everything together and run a couple of experiments.
Putting it all together
The function below pulls everything together. It will create our data loaders and pass them to our train_model function. Notice that everything is instrumented to get performance metrics from our code. Once we run this function, we will see IO time vs. compute time. We will also be able to run this same code using only the CPU and then again using Gaudi.
The snippet below will invoke this function and pass in the appropriate hyperparameters.
Running the setup function above on our compute instance with use_gpu = False results in the following output.
Running the same code using Gaudi results in output that shows our compute time is significantly reduced.
The results above are especially interesting because a fast accelerator can turn a compute-bound training workload (compute takes the longest) into an IO-bound training workload (data access takes the longest). Proof that fast accelerators must be used hand in hand with fast networks and fast storage.
Summary
In this post, I showed how to set up Intel Tiber Developer Cloud for machine learning experiments. This entailed creating an account, setting up a compute instance, creating a MinIO bucket, and setting up an SSH key. Once our resources were created, I showed how to write a few functions to upload and retrieve data. I also discussed data loading considerations for small datasets that can fit into memory and large datasets that cannot.
Using Intel’s Gaudi accelerator is straightforward, and developers will recognize the interface of the hpu package found in PyTorch. I showed the basic code to detect Gaudi and move tensors to it. I concluded this post by training an actual model using both a CPU and a Gaudi accelerator. These two experiments demonstrated Gaudi's performance gains and made a case for using fast storage and fast networks with fast accelerators.


