Building an on-premise ML ecosystem with MinIO Powered by Presto, R and S3 Select Feature
Abstract:
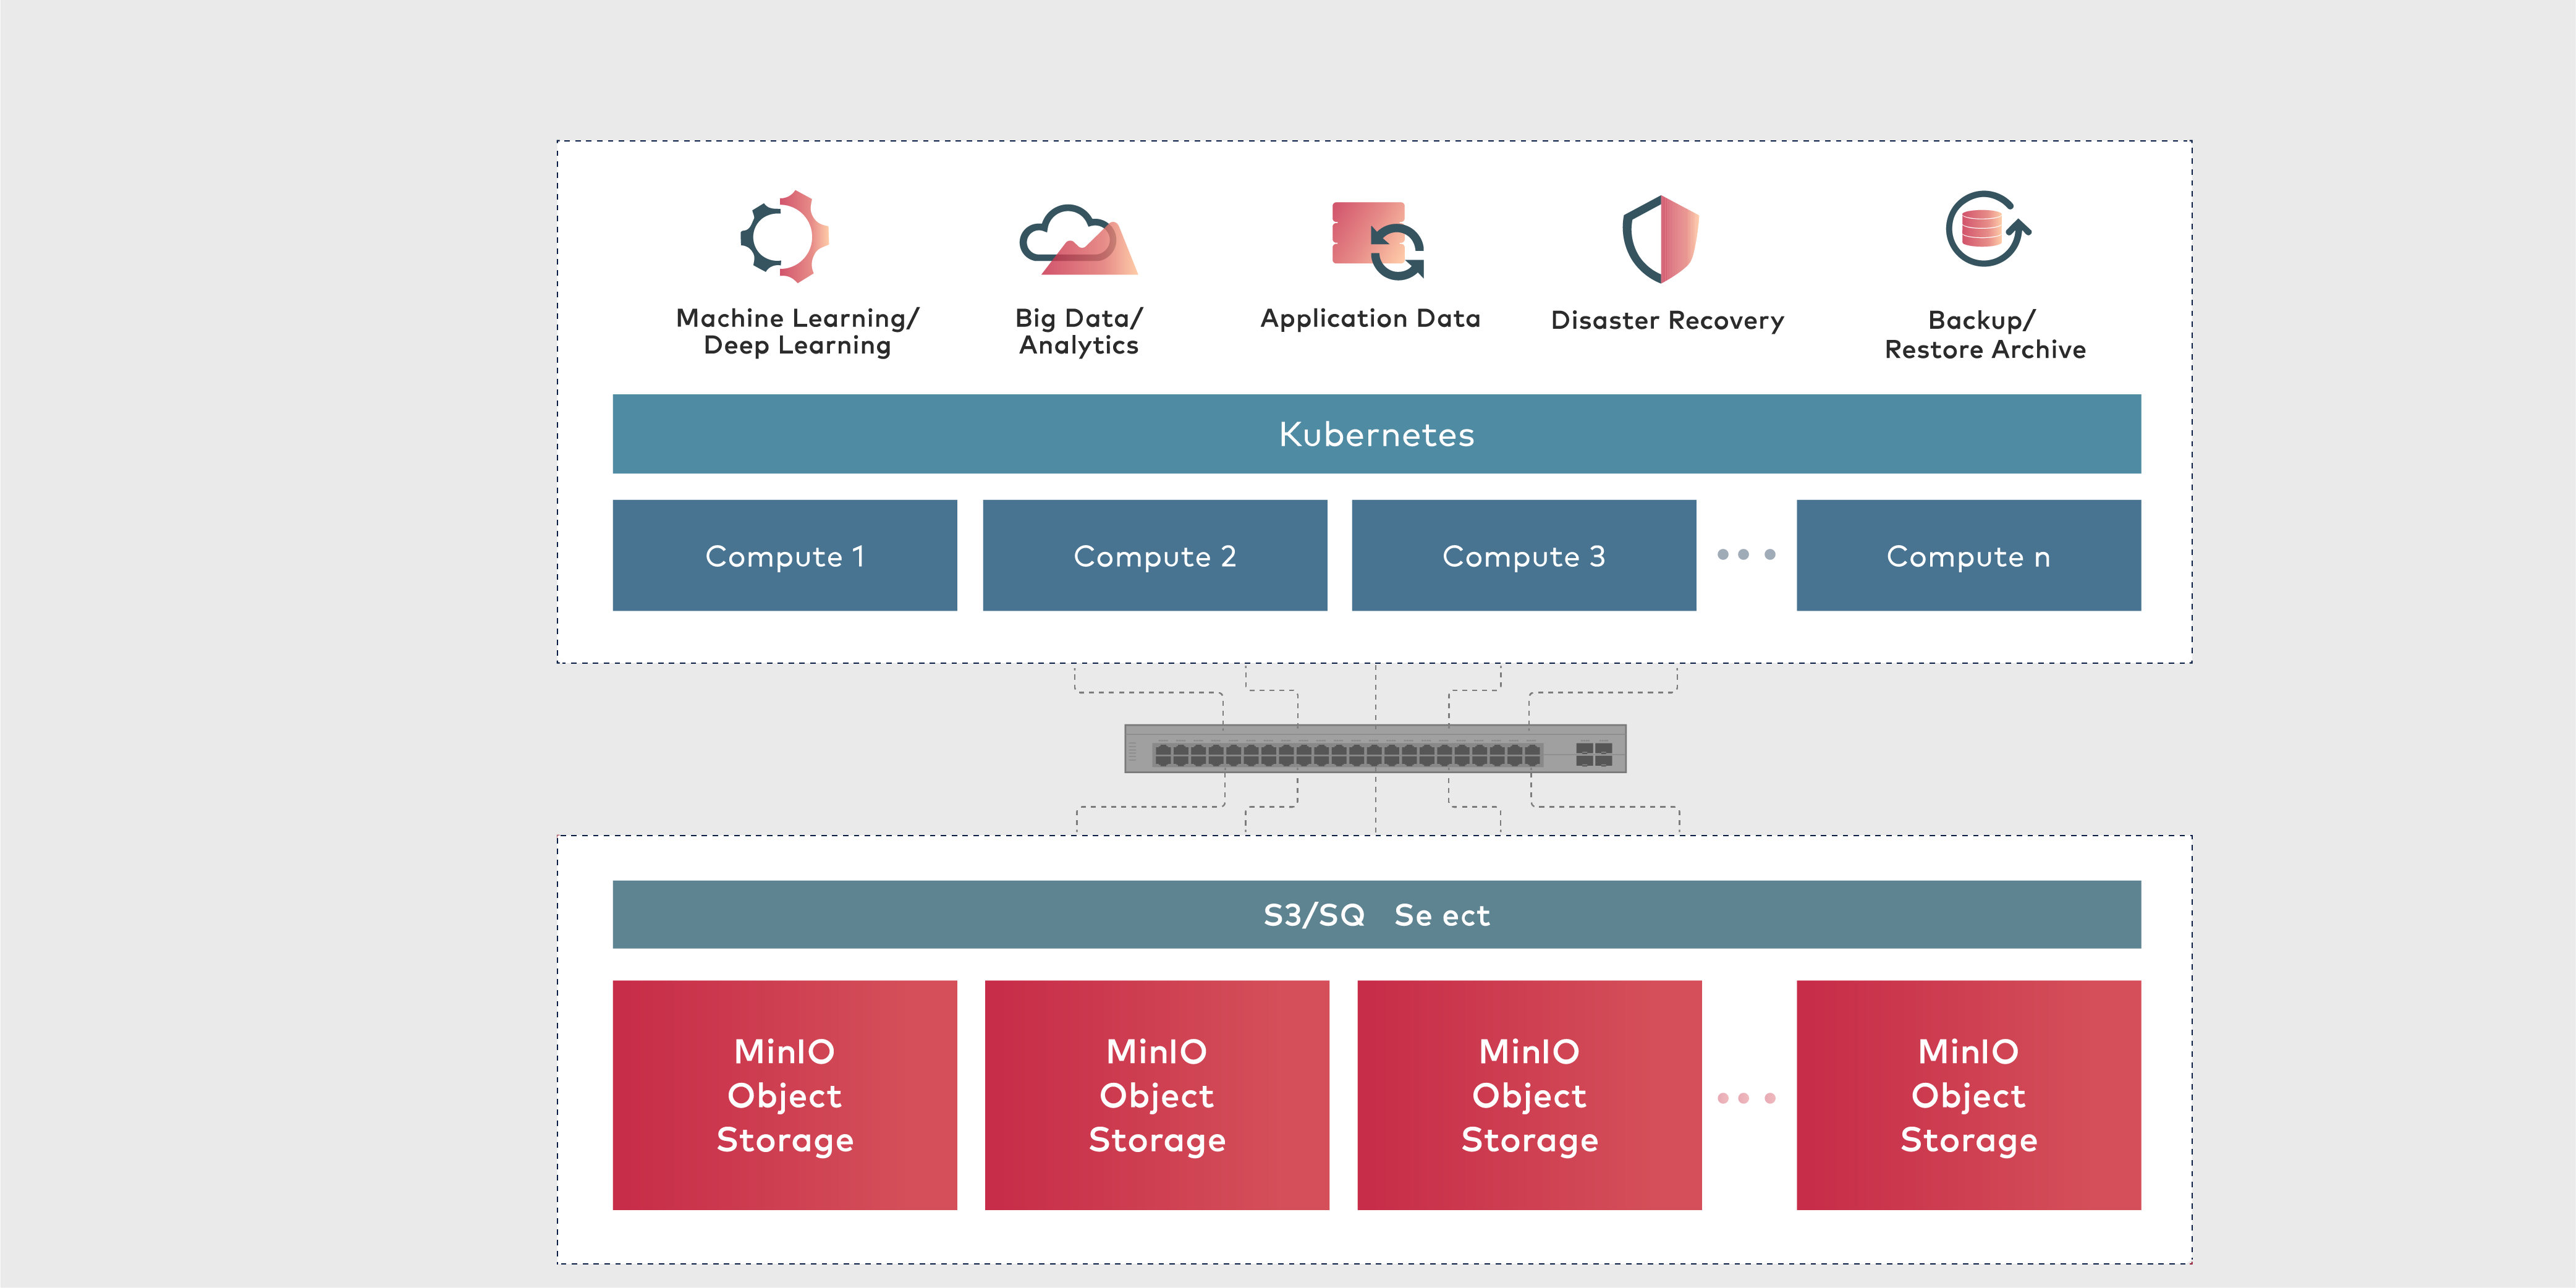
One of the key challenges in any digitization journey is the adoption of machine learning techniques. Given the explosion of tools and frameworks, it can be difficult to know where to start and what choices preclude other choices down the road. The enterprise wants to co-optimize for scalability, maintainability, security and cost.
This article is designed to empower enterprises to begin using ML or AI with a path toward future growth. This post assumes some knowledge of Java. Together we will do some code development, some integration work, and some configuration.
Throughout this article we will compare and contrast with Hadoop — understanding why that level of complexity and maintainability isn’t necessary. To be clear, I am not against Hadoop, I love Hadoop, but there are better, simpler and more modern ways of achieving enterprise-grade analytical performance. These more modern approaches relieve teams of the tedious weekend hours required to rebalance the file system, to maintain erasure coding, to have the need and understanding of external tools (examples: Apache Ranger, Apache Sentry, etc.) for peripheral security and so on and so forth. For metadata management, you will need to seek help from some more tools like Apache Atlas.
Have you ever seen any stable database in the world, whose metadata is in another database? I am not quite sure, why the Hive was designed so. You need to configure an external database as your Hive metastore — may be Derby or MySQL. If your data is lost in HDFS, your mega metastore remains!. Let’s say a big “no” to all these nuisances and let’s try to store metadata along with data and avoid installing Hadoop or Hive in our proposed ML platform. Yes, we will use Hive, just for acting as an interface for projecting our data as well defined relations and tuples ( For laymen, these are tables and rows).
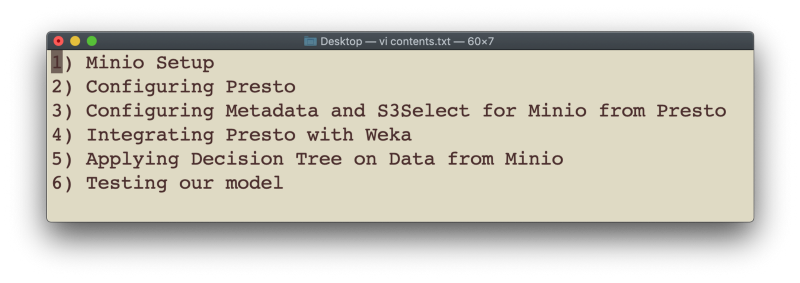
We will divide the content of this article as follows
1. MinIO Setup
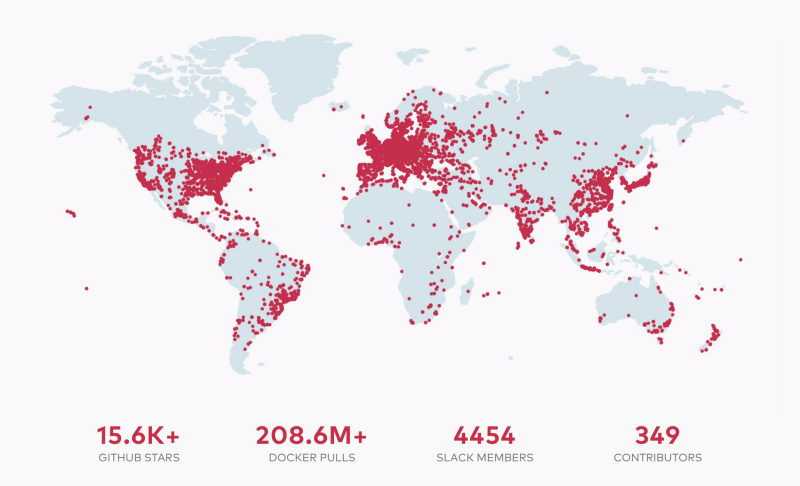
I am not going to spend any time on this , one of the reasons MinIO is the world’s fastest growing on-premise object storage system is that it is incredibly simple to get up and running — in any number of configurations. MinIO is stable, scalable, fault tolerant, secure and sustainable. You don’t do disk balancing for MinIO :). You don’t need to worry about erasure coding or security — these features are inbuilt with keys and secrets and by combining proper ACLs, you can have a robust system. MinIO is fully compliant with the AWS S3 API.
For those that are new to MinIO, I recommend my other two articles, part 1and part 2 for a detailed walkthrough on the technology.
If you don’t have it installed yet, grab the right download and follow the quick start guide.
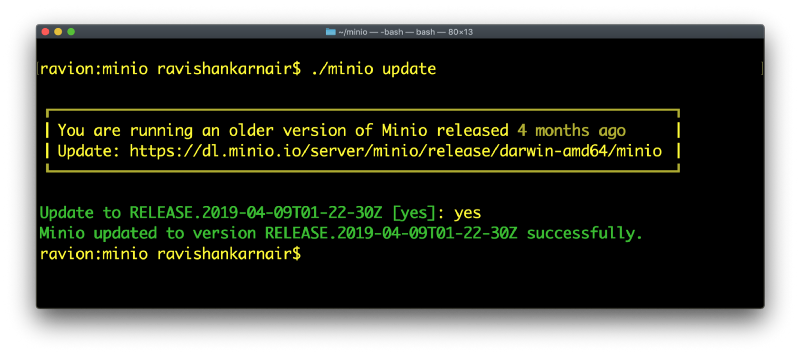
This presents the first Hadoop compare/contrast moment. What’s the time frame your organization spent or going to spend when you want to upgrade a Hadoop based ecosystem? Months? That probably assumes everything goes perfectly. MinIO — even for peta/exascale infrastructure takes minutes.
See, what happened when I started MinIO? I had an old copy. It took less than a minute to update to the latest version and start working.
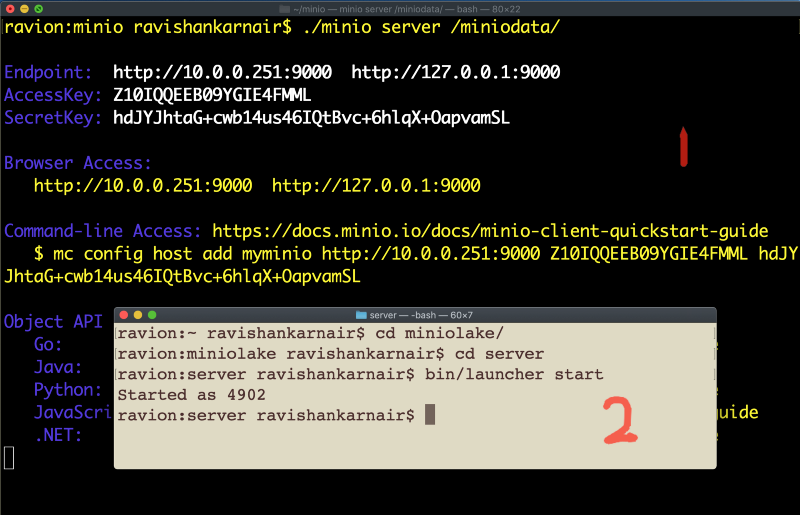
Now you can start the server following the guidelines:
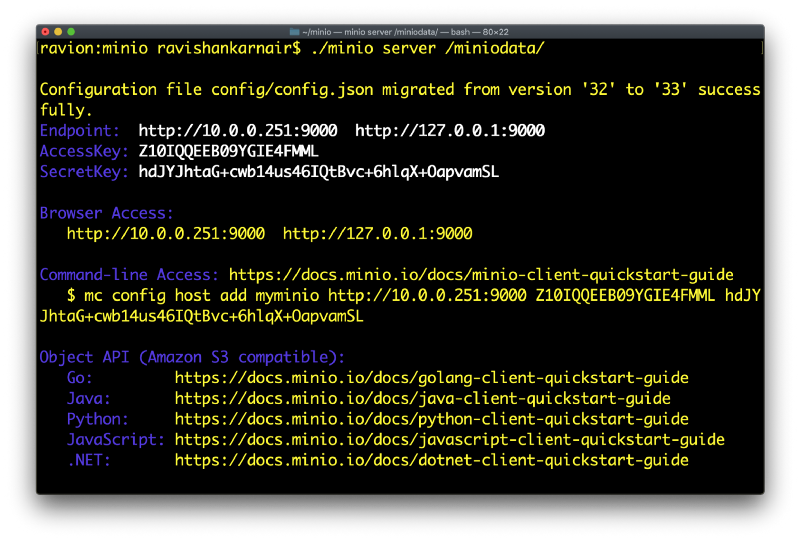
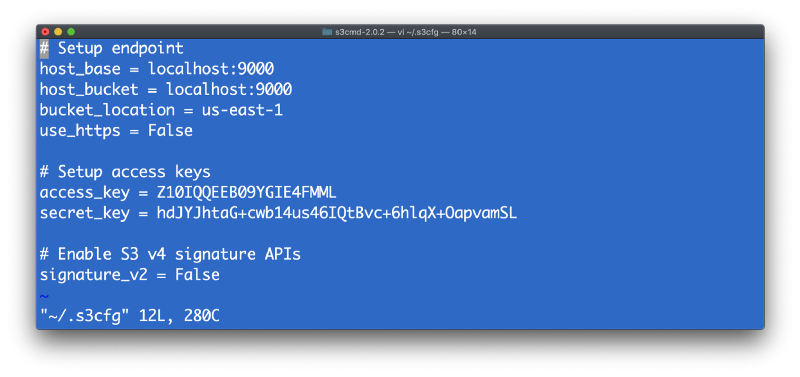
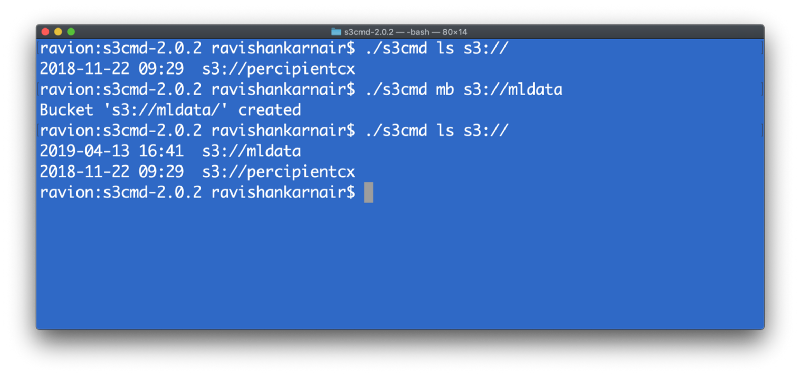
Either you can use the MinIOClient (mc) or S3CMD to create buckets and use MinIO. In my earlier article, I have used “mc”. Here I am using s3cmd to demonstrate the flexibility of MinIO. Let’s create a new bucket called “mldata” using s3cmd. Do not forget to create .s3cfg file in your local machine with MinIO server details that you have on above screen.
Now create a directory and make sure it’s existing by listing down:
Later in this post, we will be using a file for machine learning, specifically for decision trees. We are not going to explain anything on ML, as there is plenty of documentation on machine learning.
I am using past basketball statistics outcomes for my training to predict whether a future game will be a “win” (outcome yes) or a “loss” (outcome no).
Here is a snapshot of the file. For demonstration purposes, we are using a small file. In ideal cases, this may be tens and hundreds of millions of tuples.
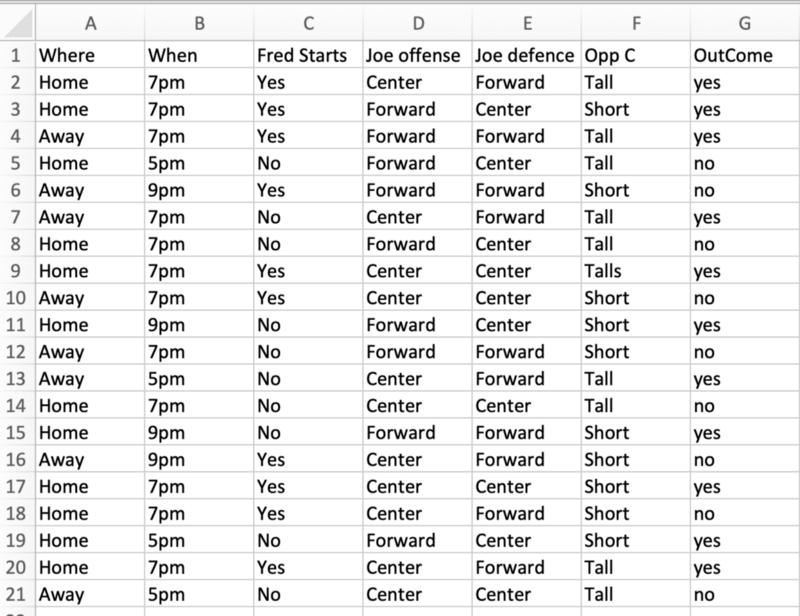
Next step is to put this data into our bucket. For easy table creation, we can skip the header row and call our CSV file as input.csv. Little Unix commands like sed will help us here.
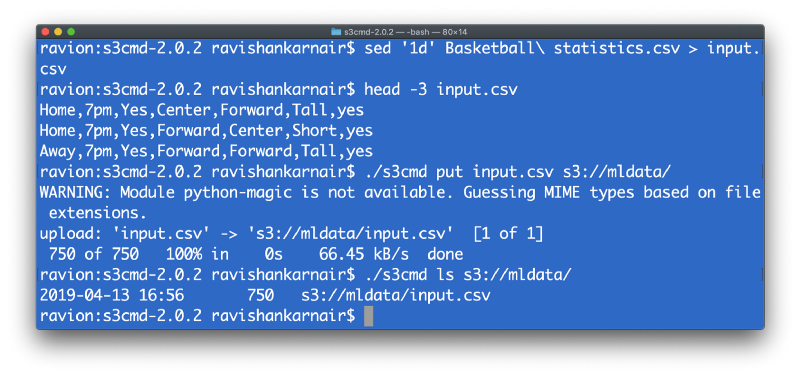
You may delete this data, as we will use Presto later in the article to create the table on the fly from MySQL.
2. Presto Setup
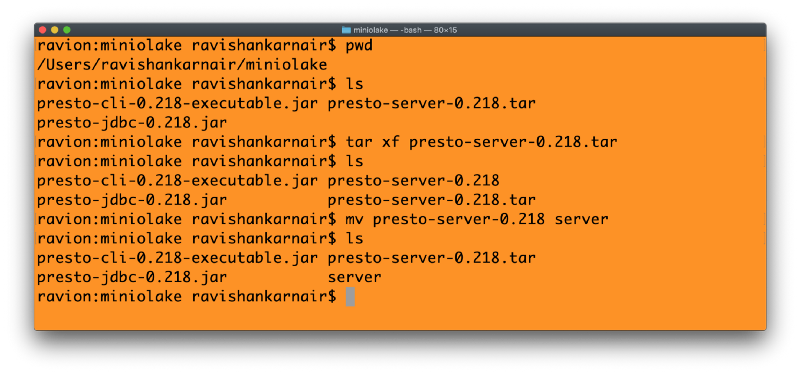
The next thing we will do is with Presto. To get started, go to Presto’s GitHub page and download the following files into your system.
I am placing these files in a directory called “MinIOlake”. Extract the server (1) above into this folder. There are good instructions here to follow. Steps are shown below:
You will need to have three configuration files, and one directory named “catalog” within a new directory “etc” which must be created within extracted server folder. The steps and files are shown below.
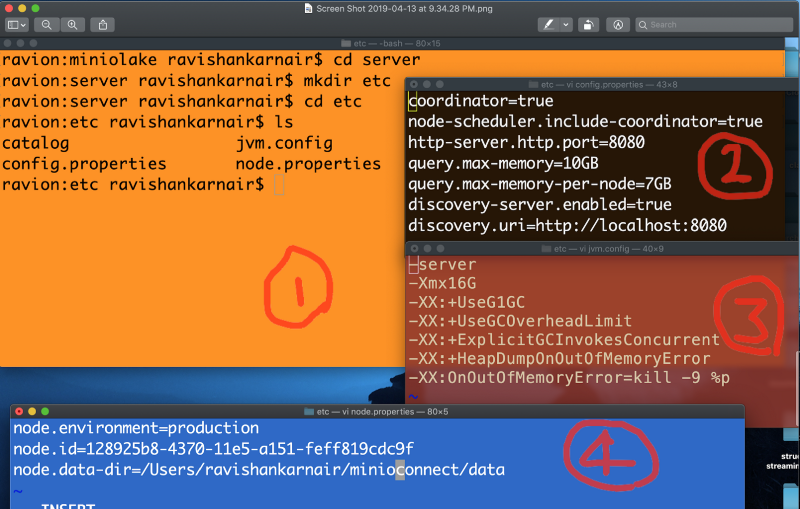
3. Configuring Presto to Use File Metastore and S3Select
Now comes the good part. We have left our catalog directory empty for now. That’s the place where Presto will need all your connectors. You can configure a Hive connector and connect to MinIO — something I covered in my part 2 article. To use the Hive metastore, Hive needs to be running and the metastore service to be started. We never had an opportunity to enable S3Select to enable push down predicate to underlying MinIO. Now that approach is legacy:). We are going to revamp the architecture to adapt to the latest and best. Let’s start by writing a MinIO.properties file within our catalog directory to incorporate a file metastore and S3Select. Here you go:
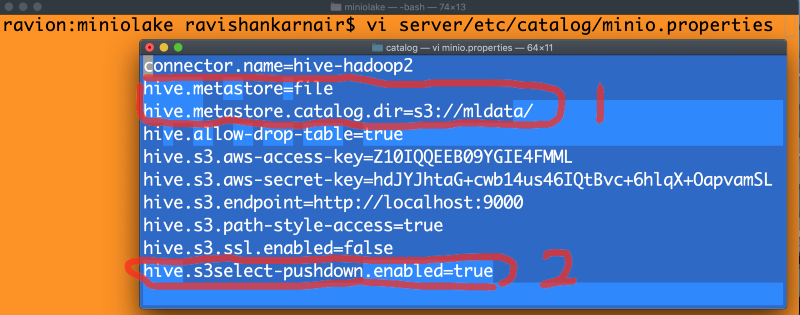
Above configuration is the most important part of this article. Preferably note the two lines marked as 1 and last line marked as 2. Other lines are trivial.
In line 1, we used the hive-hadoop2 connector in Presto, but we say that instead of the traditional thrift based Hive metastore, use the MinIO S3 bucket (created in Step 1) as the metastore. By doing this you don’t need to have any traces of Hadoop or Hive to be installed in your ML or data ecosystem.
In the second part we enable S3Select in Presto. With just a single line of code MinIO can take care of a push down predicate request. If you do not have this enabled, then all the data will come to Presto, including filtering, negatively impacting the performance of your query, particularly when it has conditions and joins from multiple tables stored from the bucket.
Close the file. Now you can start the Presto server. I assume that your MinIO server is running. Start Presto by issuing the below command from your server directory.
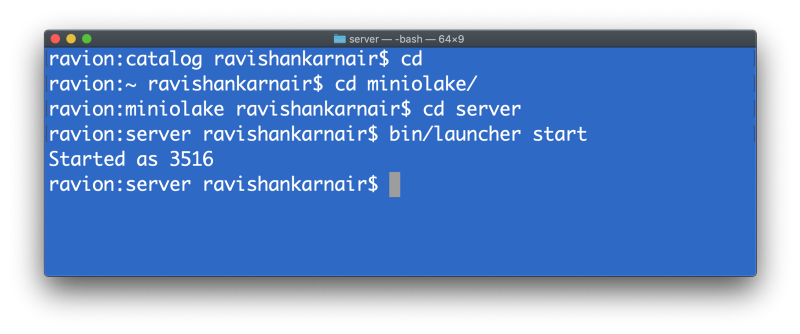
We have now created a best-in-class datalake.
Next, we will create a table, pointing to our file “input.csv”, that’s existing within the “mldata” bucket created in Step 1. We will use Presto CLI (Command line interface, we have already downloaded this jar in our “MinIOlake” directory). Enter the below command to create a table. Here I am assuming that we have the table in MYSQL within a schema called “games”.
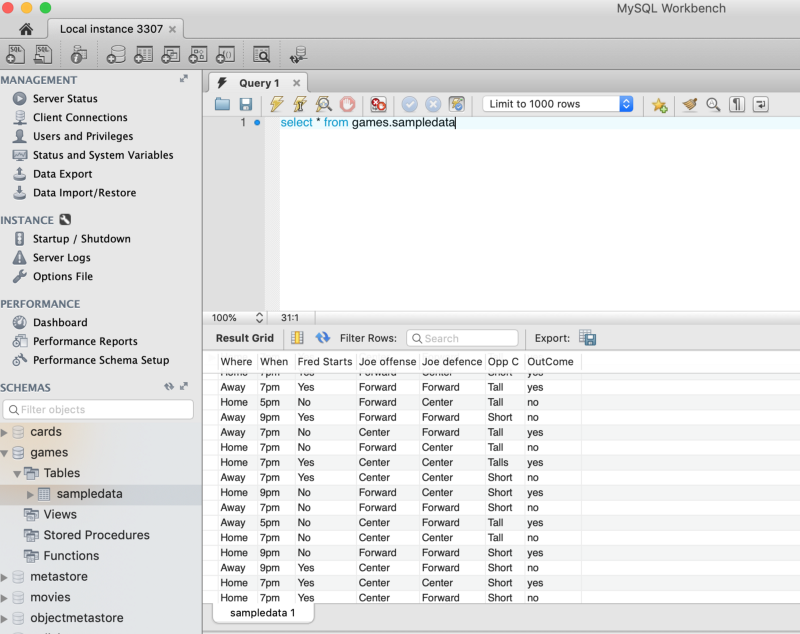
(Use standard SQLs to create the table from our data about basketball game statistics discussed earlier), and we will use Presto’s CTAS (Create Table As …) command to create an equivalent table in MinIO. This underscores the power of Presto to take data from existing databases and migrate that data to MinIO. This is done as:
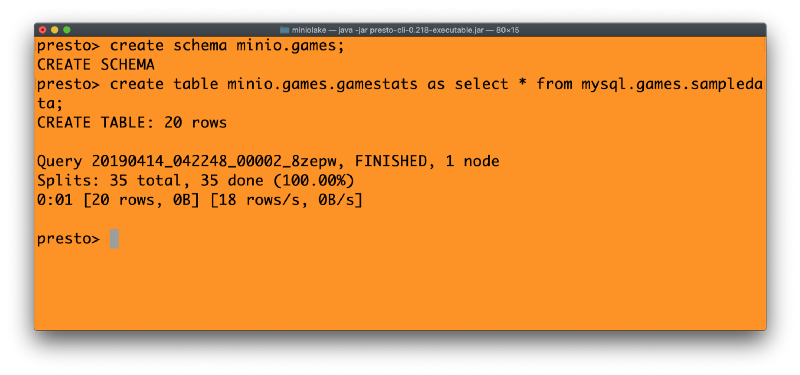
With the table that we have now in S3://mldata, we are ready for the next steps. Note the table name above- MinIO.games.gamestats which means, we have the connector MinIO (pointing to S3://, the MinIO storage), a schema named “games” and we have a table within that schema named “gamestats”. The metastore obviously is within the MinIO bucket “mldata”.
Absolutely no Hive metastore, no Hadoop, and thus no metastore service to be started externally.
Finally, run the below command in Presto, and see the output
explain select * from MinIO.games.gamestats where outcome = ‘yes’
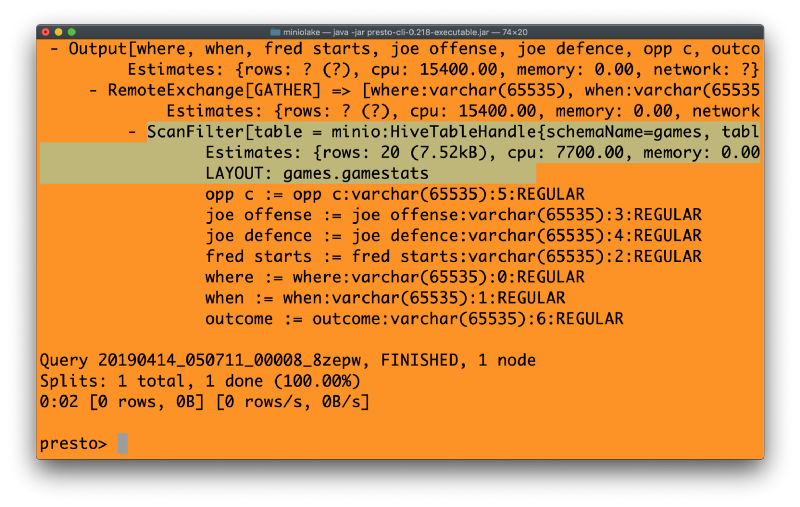
Note the highlighted section of code above. What we see there is the use of “scanfilter” versus “tablescan.” Because Presto only operates on the relevant information, there are massive efficiencies in the analytical workflow. This is the power of pushdown predicate logic and what makes S3 Select so impactful.
This example used three DL-380 machines, 6 CPUs, each with 1 TB and 32 GB Ram for a performance test with MinIO, on filtered queries with various data sizes. The X axis represents the size (in GBs) of the queries, and the Y axis represents the time. To deliver the best performance across the network, I have used dedicated RDMA between the nodes and NVMe disks. Network bandwidth was close to 65 GB/s. Here is the result:
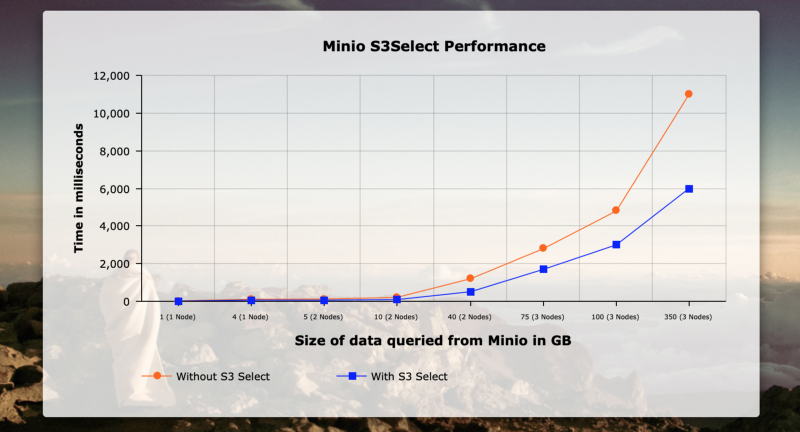
As one can see, the performance improvements really start to take hold as data size starts growing, ultimately delivering 40% to 50% improvement at only 350 GBs.
4. Integrating Weka with Presto JDBC
Let’s take this to the next level. We are now going to code a bit in Java, to integrate Weka with Presto, which in turn has the connector to MinIO ready with S3Select enabled. We will need to do some tweaking in the Weka code to seamlessly integrate the Presto JDBC. The steps to achieve this are illustrated below:
Step 1: Make sure you have Java 8 SDK installed. Download the Weka snapshot from here. Extract the downloaded file to get below files:

Step 2: Go inside the weka directory. Extract the weka-src.jar file as follows:
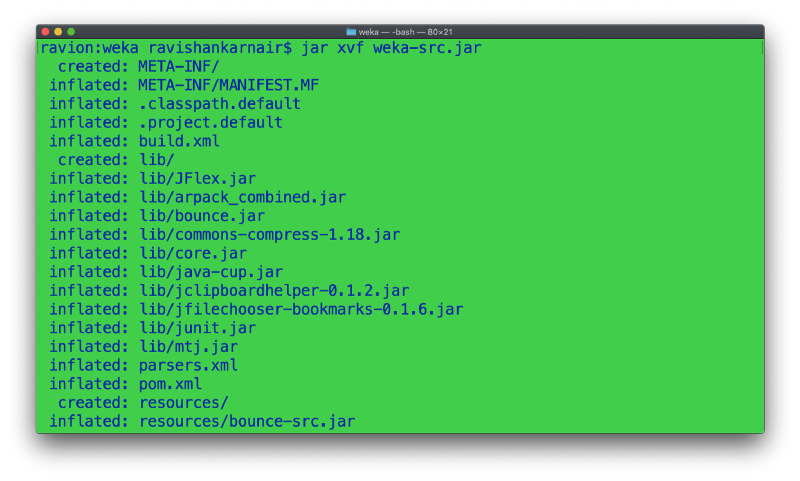
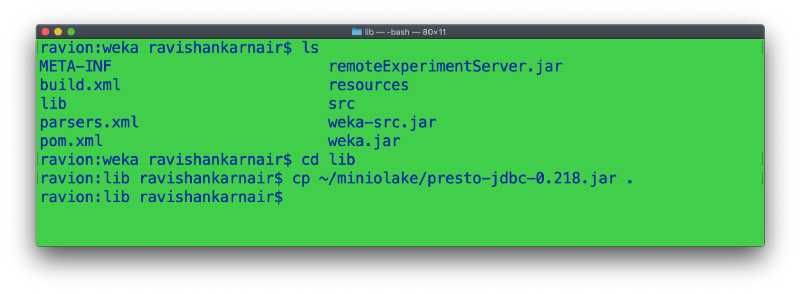
Step 3: Copy presto-jdbc jar file from your MinIOlake directory to lib folder within the extracted source.
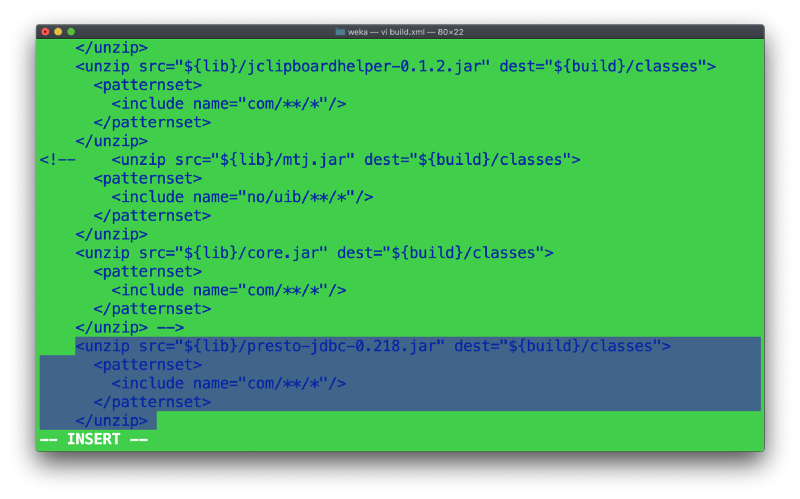
Step 4: Go to Step 2, weka folder. Open the build.xml. Find out the ant target (Apache ANT is a build tool used by Weka to build a release jar) named “compile”. Add in the following lines to explode the JDBC jar file into classes, so that the final jar contains our JDBC as well. Add the highlighted part. You may omit this if you know how to manipulate classpath in Java.
Step 5: Create a copy of the below file

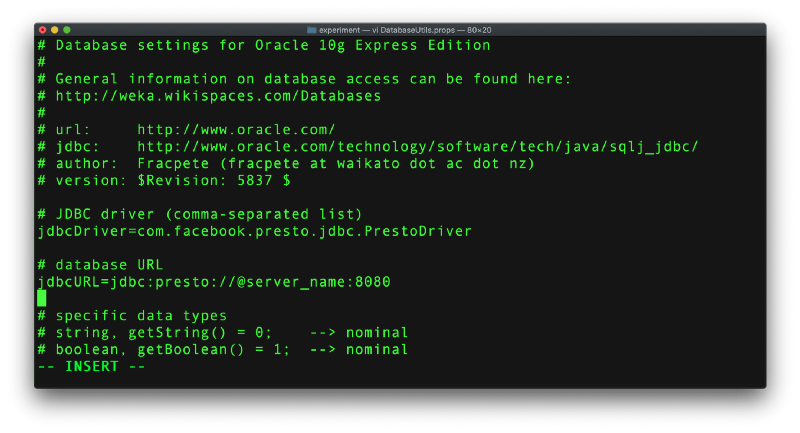
A bit of explanation is necessary here. Weka does not understand all the datatypes of all the databases in the universe. We need to provide a mapping file which specifies how the source database type must be interpreted. Also, the driver names and parts are specified in this file. Since our datatypes are very similar to Oracle, we created a copy. Advanced users may create their own.
Step 6: Edit the above file to add in the driver names and server/port details as below and save the file as DatabaseUtils.props. Please check the datatypes as well, shown in the next screenshot. Weka will have this file, but feel free to overwrite:

Step 7: Build a fresh new jar file. Go to Step 2, weka folder and type “ant exejar”. Assumption: You have ANT installed. If you don’t please follow the instructions here.
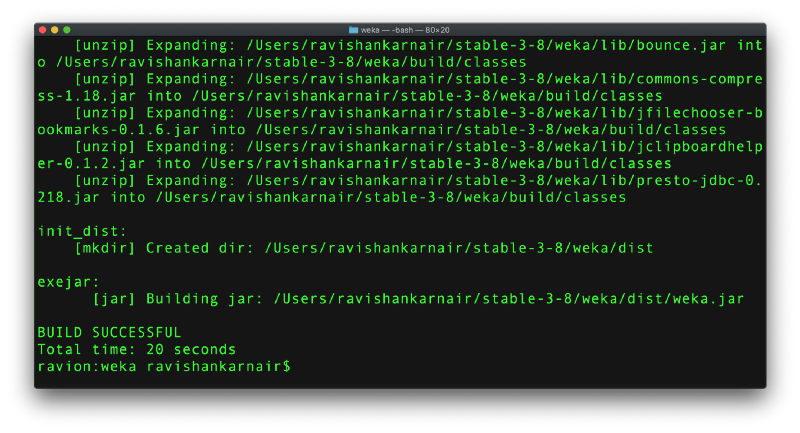
As you can see, ANT has created a new folder called dist and it has provided a jar file named weka.jar. This jar is the one we will use for next steps
5. Machine Learning: Decision Tree with Weka on Data from MinIO
We have a powerful, modern datalake and analytics platform built at this point. Let’s apply one of the major classification algorithms, decision trees, on our sample data with Weka. Since we have created a connector to Presto, Weka is going to connect to Presto, pull the data from MinIO. Before we go to the next steps, just a quick check: you must have both MinIO and Presto running:
Step 1: Start Weka from your dist directory where we created our distribution jar:
java -jar weka.jar
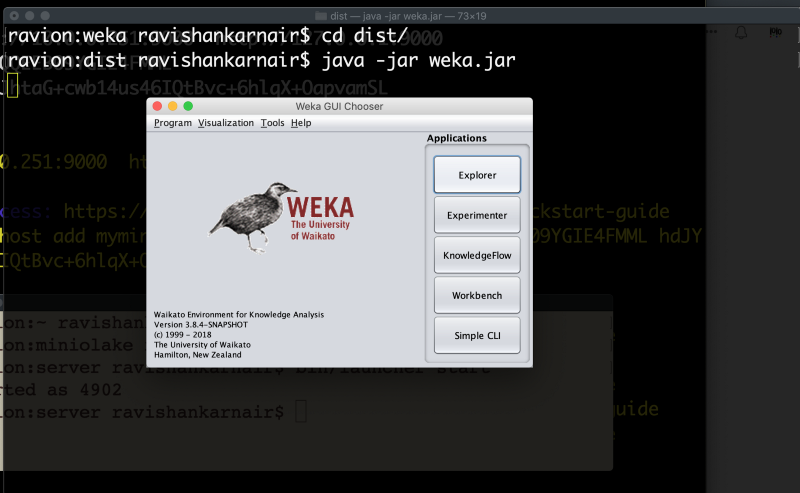
Click on “Explorer”
Proceed to below the window:
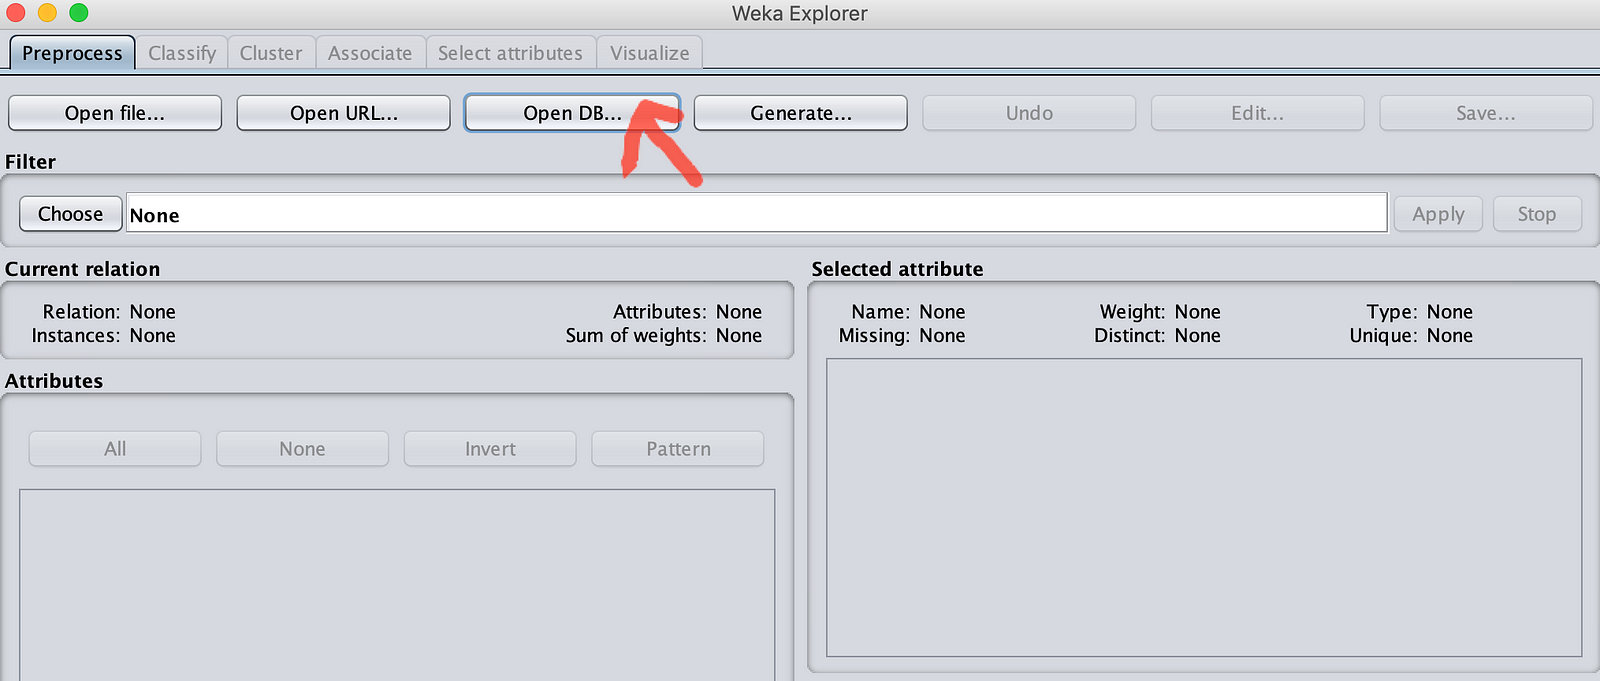
You will see an SQL-Viewer window. The URL will show jdbc:presto://@servername:8080. Change @servername to localhost as our Presto is running locally. You can clock on the first button on right to set username and password. Give any username (in my case MinIO) and leave the password empty. If you enable authentication in Presto and configure https, then you will need to give both userid and password which are valid.
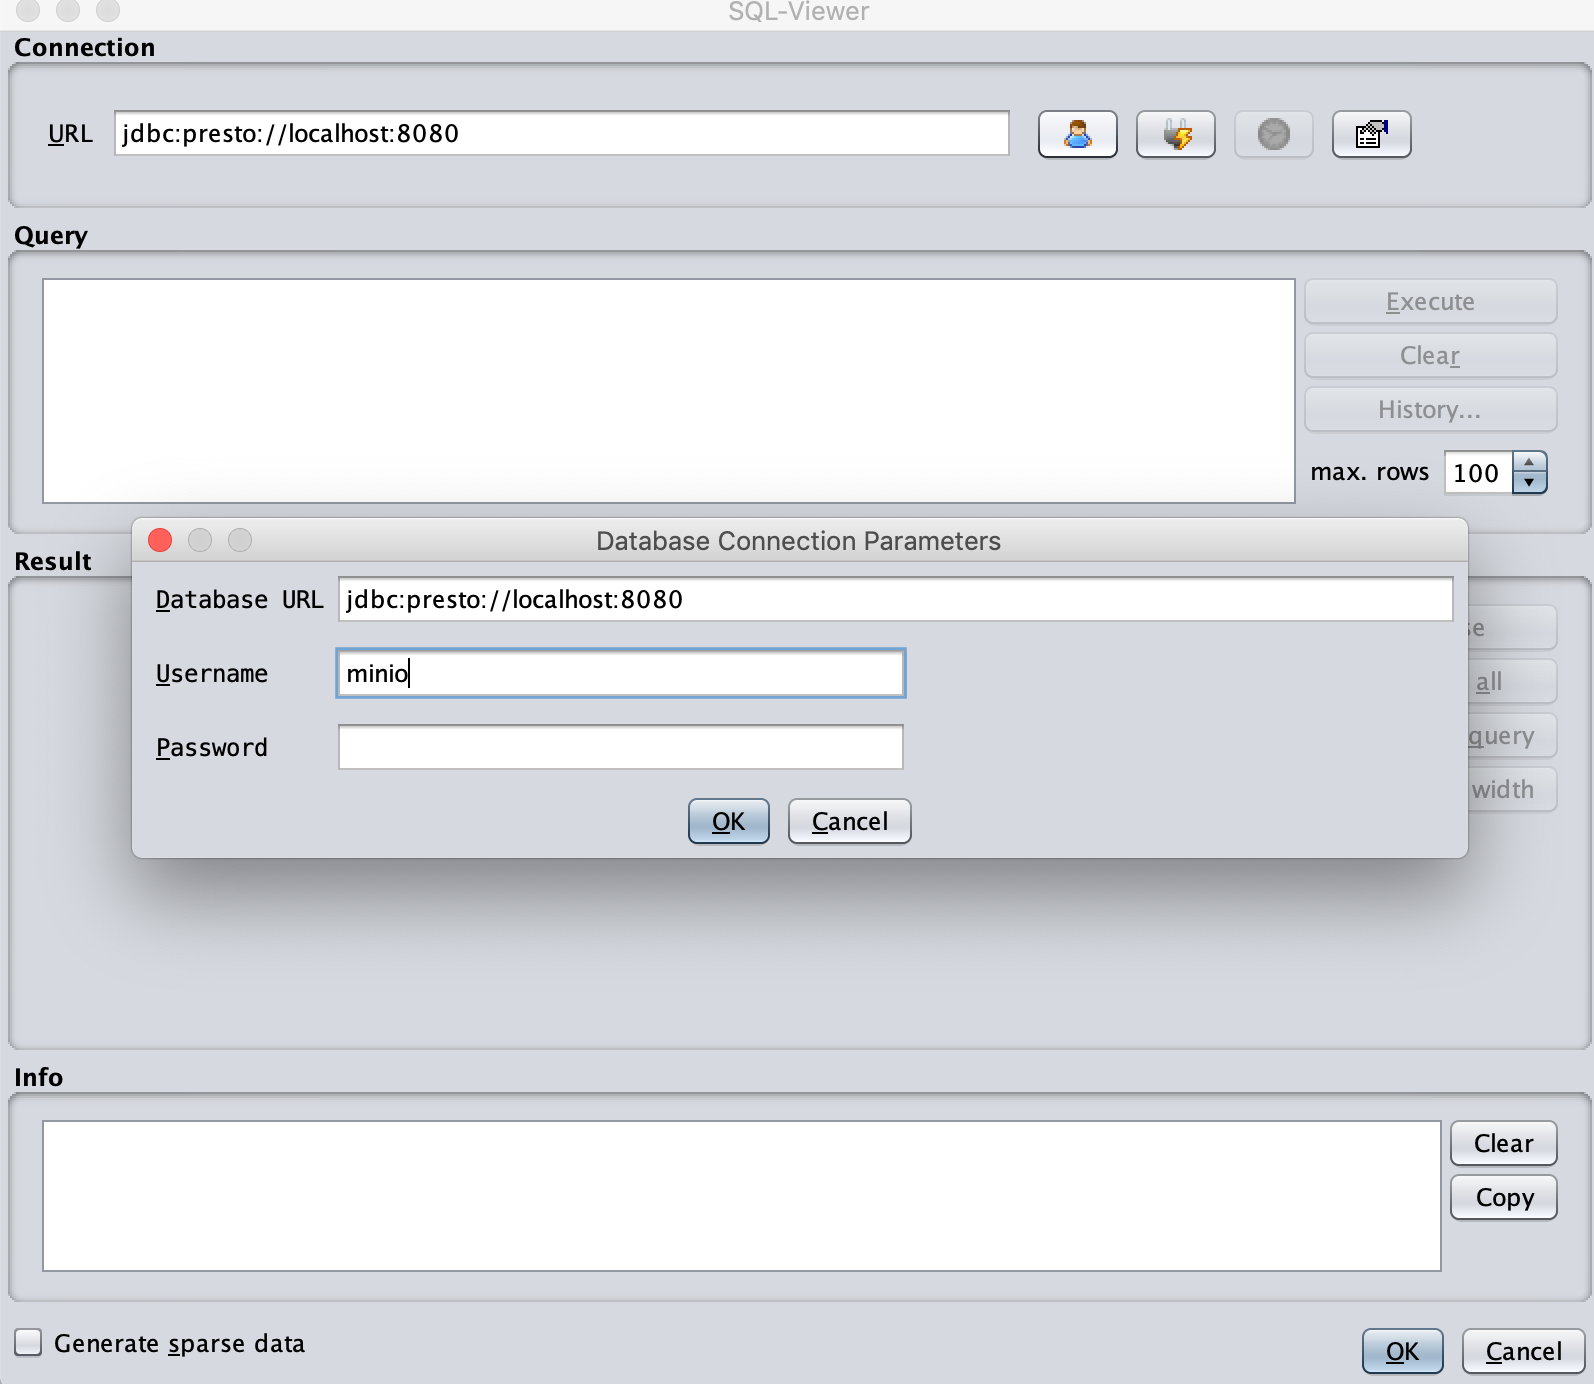
Step 2: Once you click OK followed by the second button on right, you are going to see that the Info pane shows the status. Now write our query.
select * from minio.games.gamestats //Do not put semicolon at end
Click on execute button. Voila! Our first MinIO browser in action.
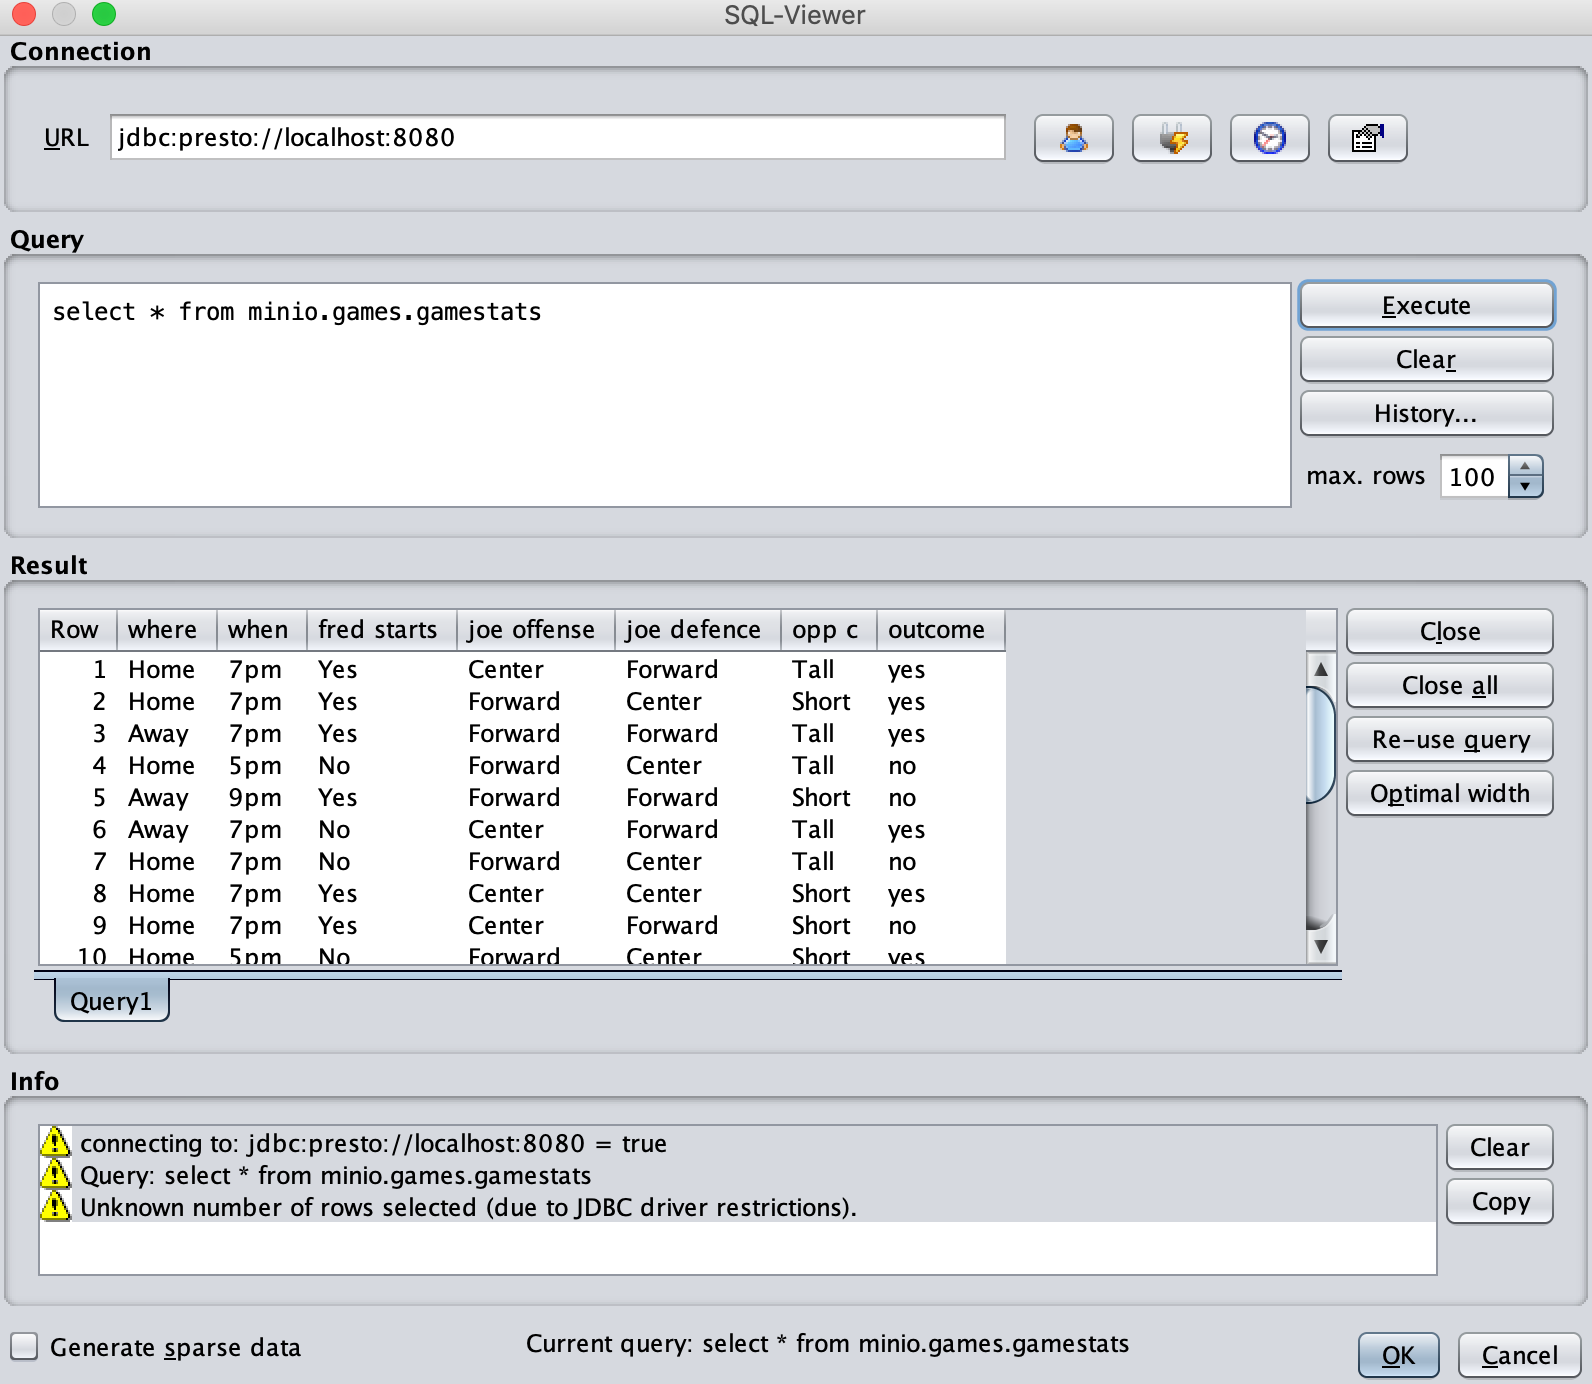
Click the “OK” button now. You should not get any datatype related errors. If you see something wrong, review back DatabaseUtils.props that we have changed earlier, and double check again.
Now you get the powerful Weka “Preprocess” screen where you will see:
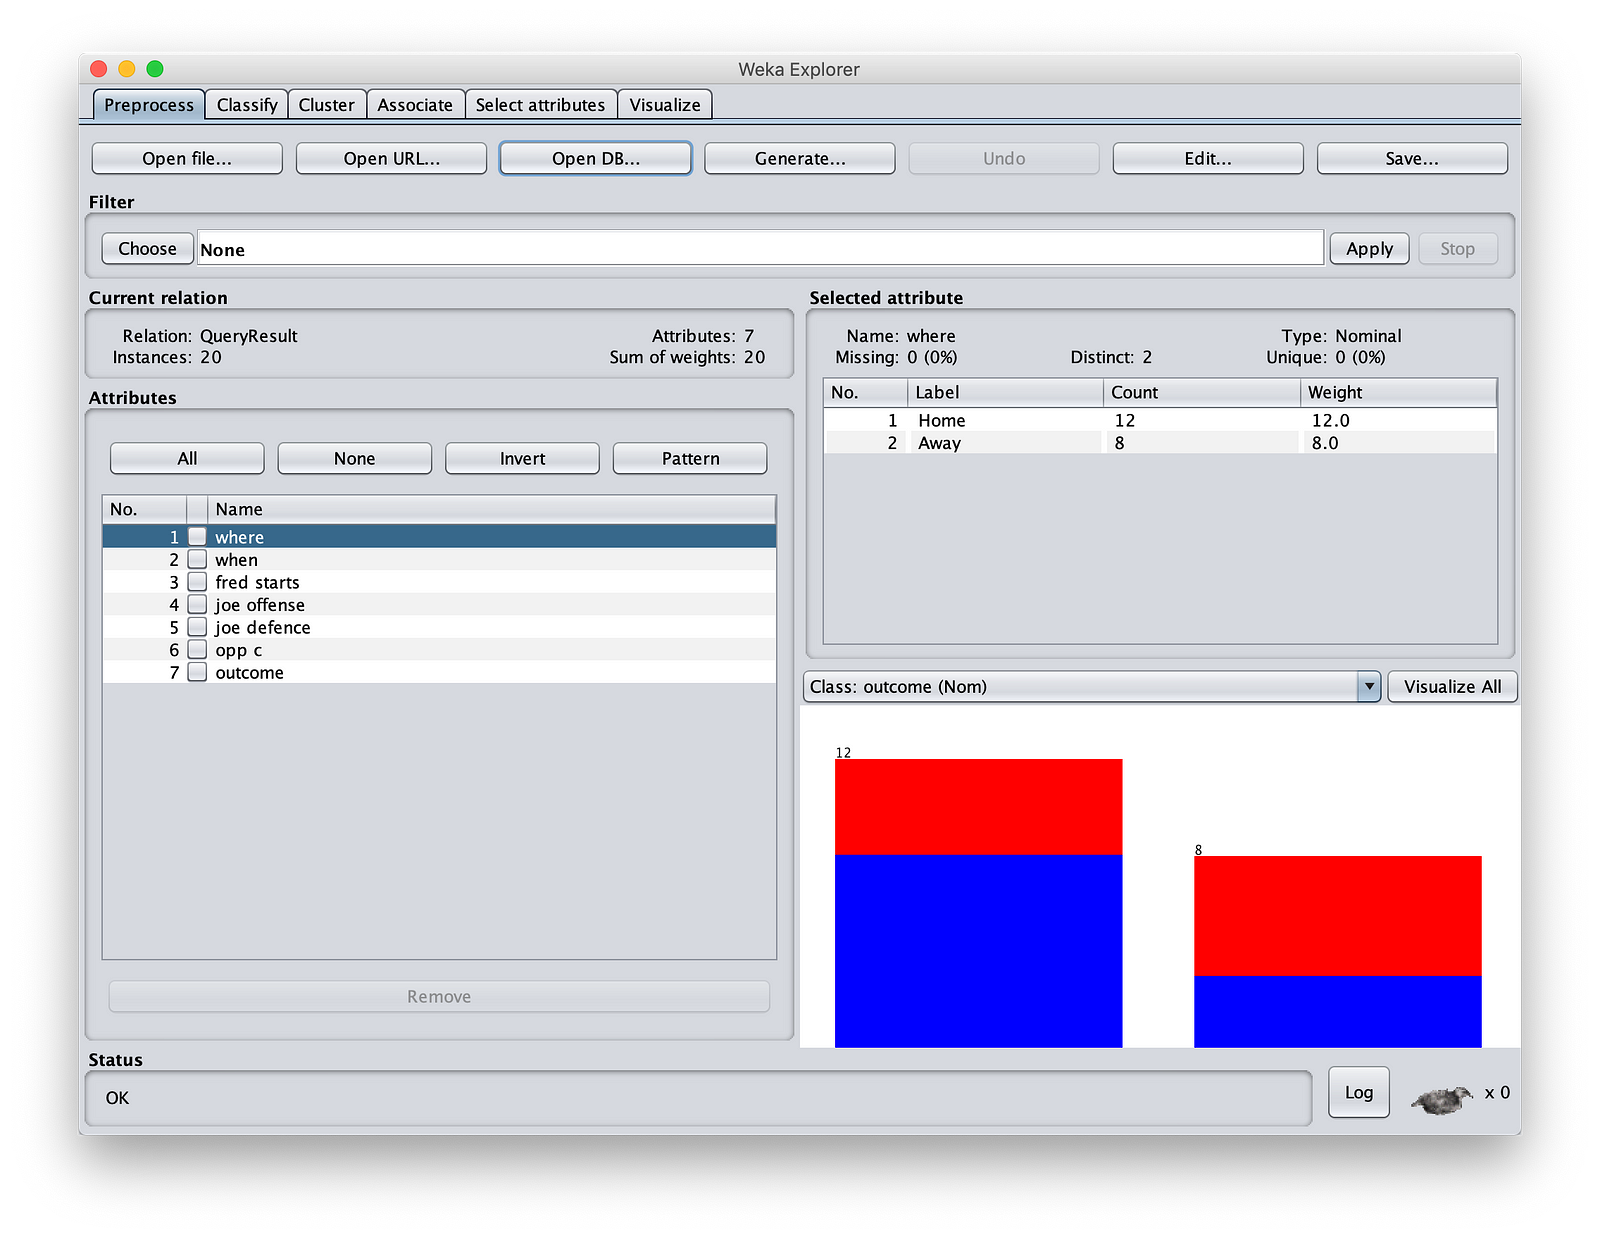
Step 3: Let’s start our ML actions. Often, when you are bringing the data like above, there may be a mix up of columns with different data types. Some of the columns may be categorical (where you list down the possible values, normally strings) or continuous (discrete numbers). You may need to do a data cleansing and conversion. Weka supports it through an amazing array of filters for this purpose. You can see it by clicking “Filter”. Even we can use the options to substitute some values for nulls if your data is sparse or you can remove irrelevant values which might not add any value to your ML logic. For example, an employee-id might not play any role in a loan application outcome prediction. You use StringIndexer in Spark to convert data types.
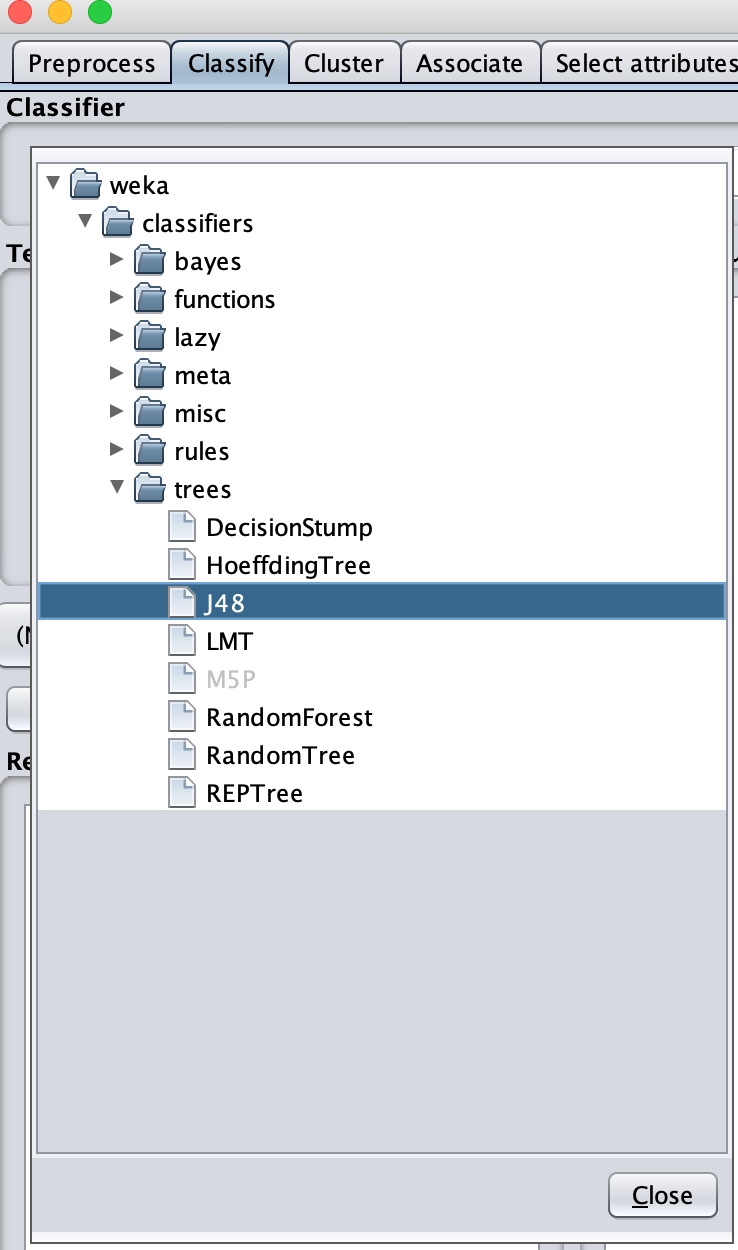
For the decision tree, click on the “classify” button. You will see a window on left with all kinds of algorithms supported by Weka. Select “trees” and select J48.
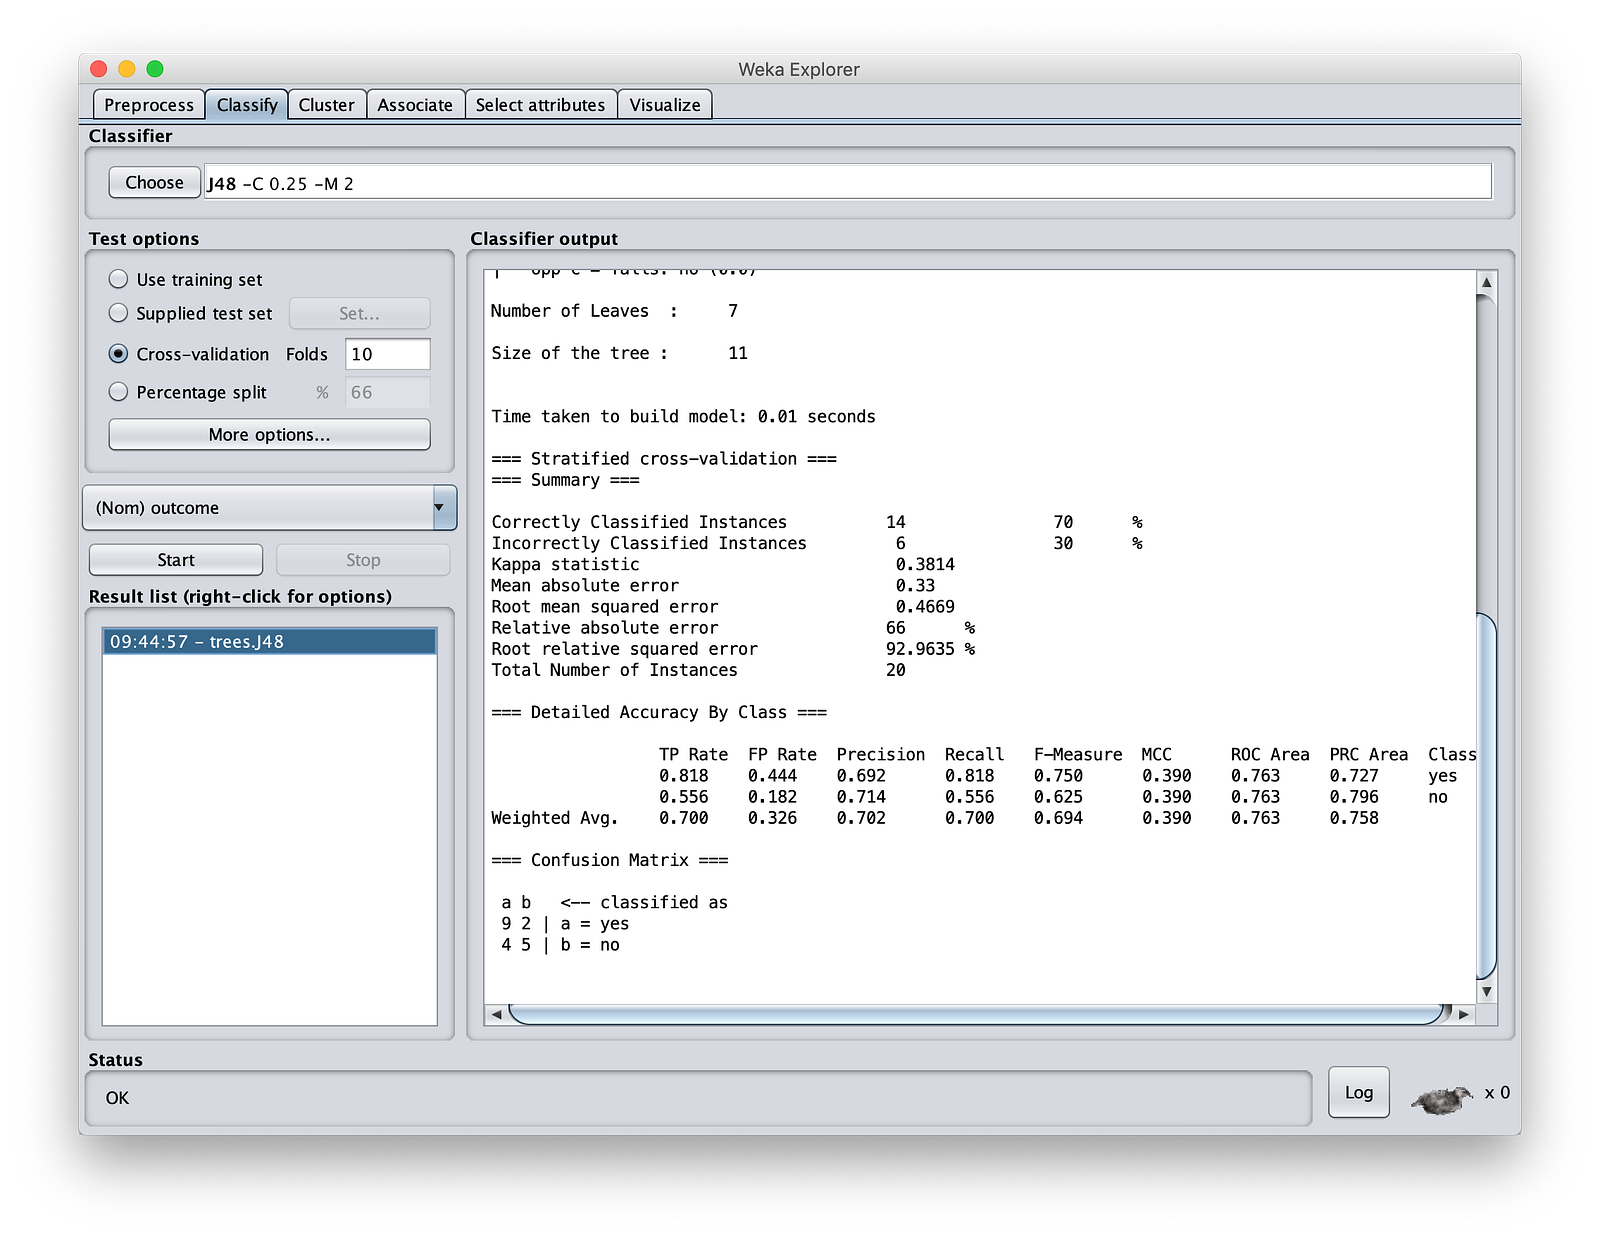
Click on “Start”. Let remaining options be the default. You, as a machine learning expert know what these are. See that we had created a model with 70% accuracy. For a small set of experimental data like ours, that’s fine as I am not intending to tune it further.
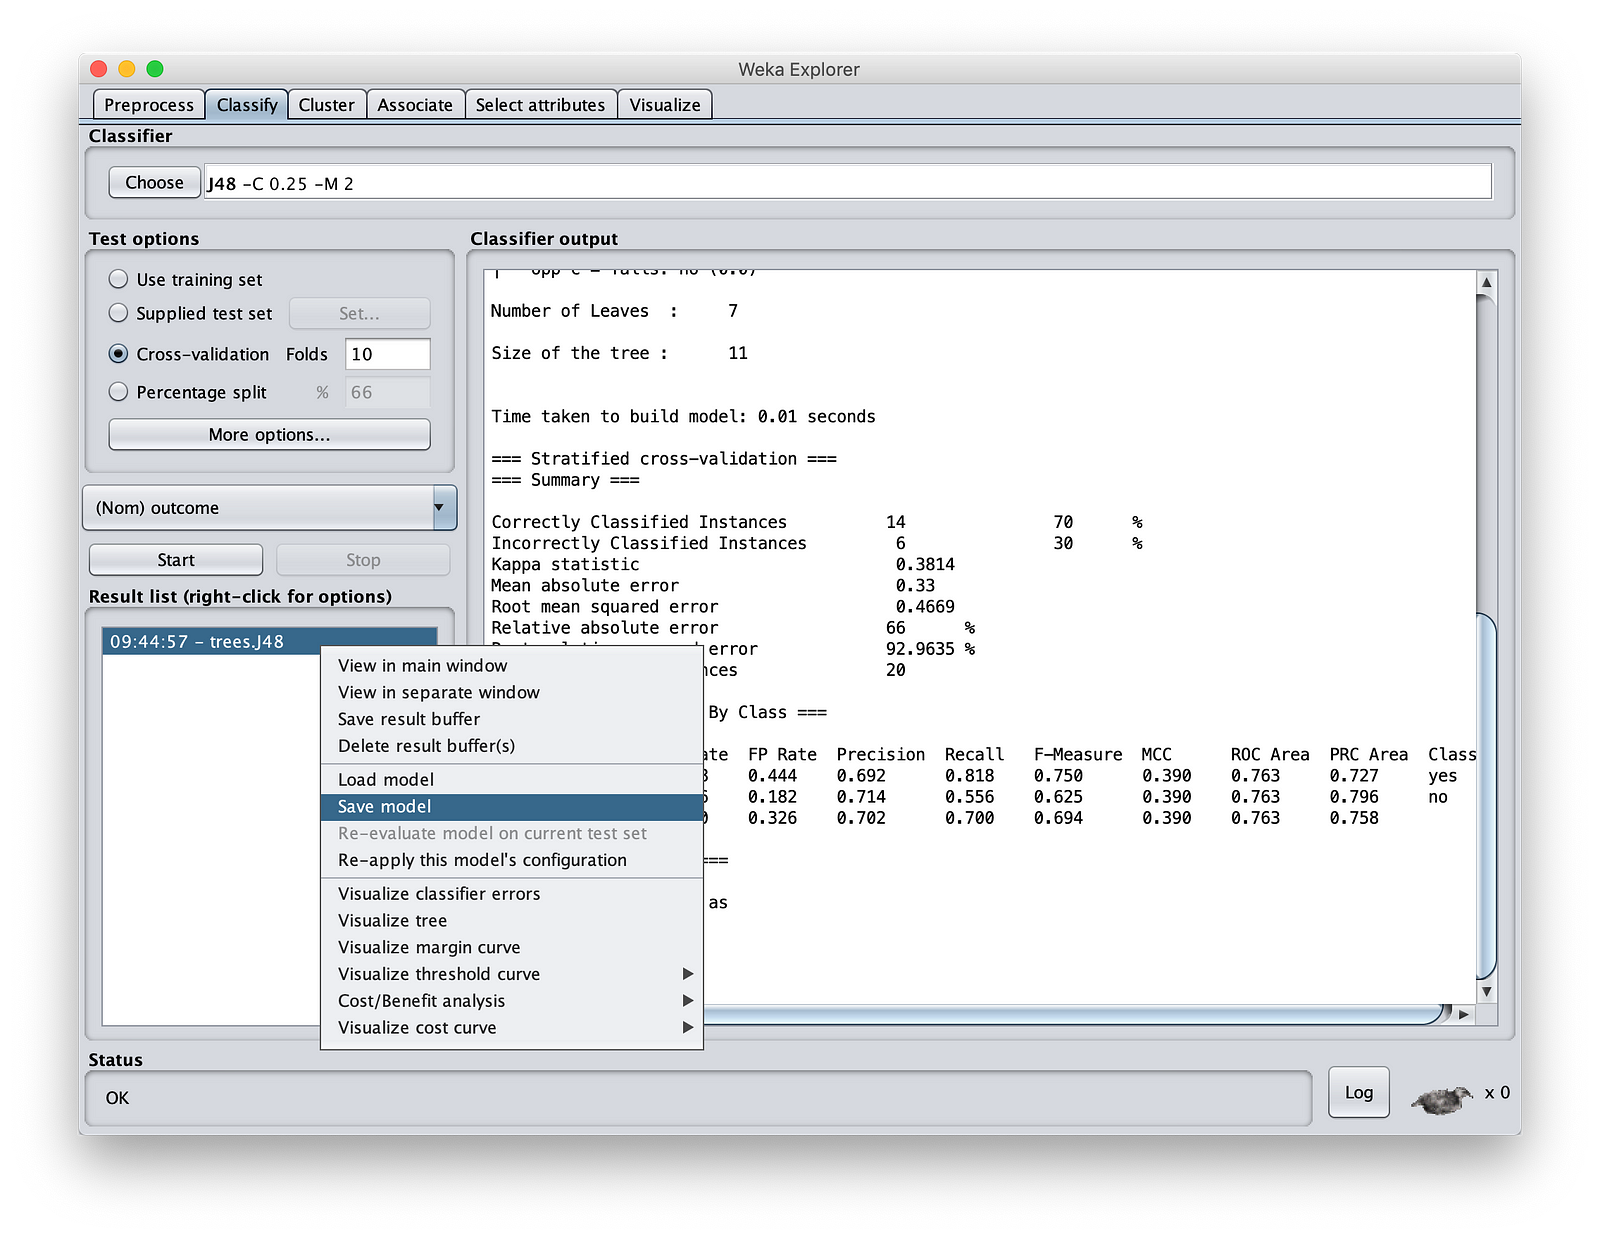
Save the model in your MinIOlake folder (not in MinIO storage as Weka cannot read S3:// protocol). Call it as “MinIOdtree.nodel”.
6. Testing our Decision Tree Model
Now let’s test our model. To do so we will create a file with two rows, where we do not know our prediction. Name that file as Test.csv. It’s given below.

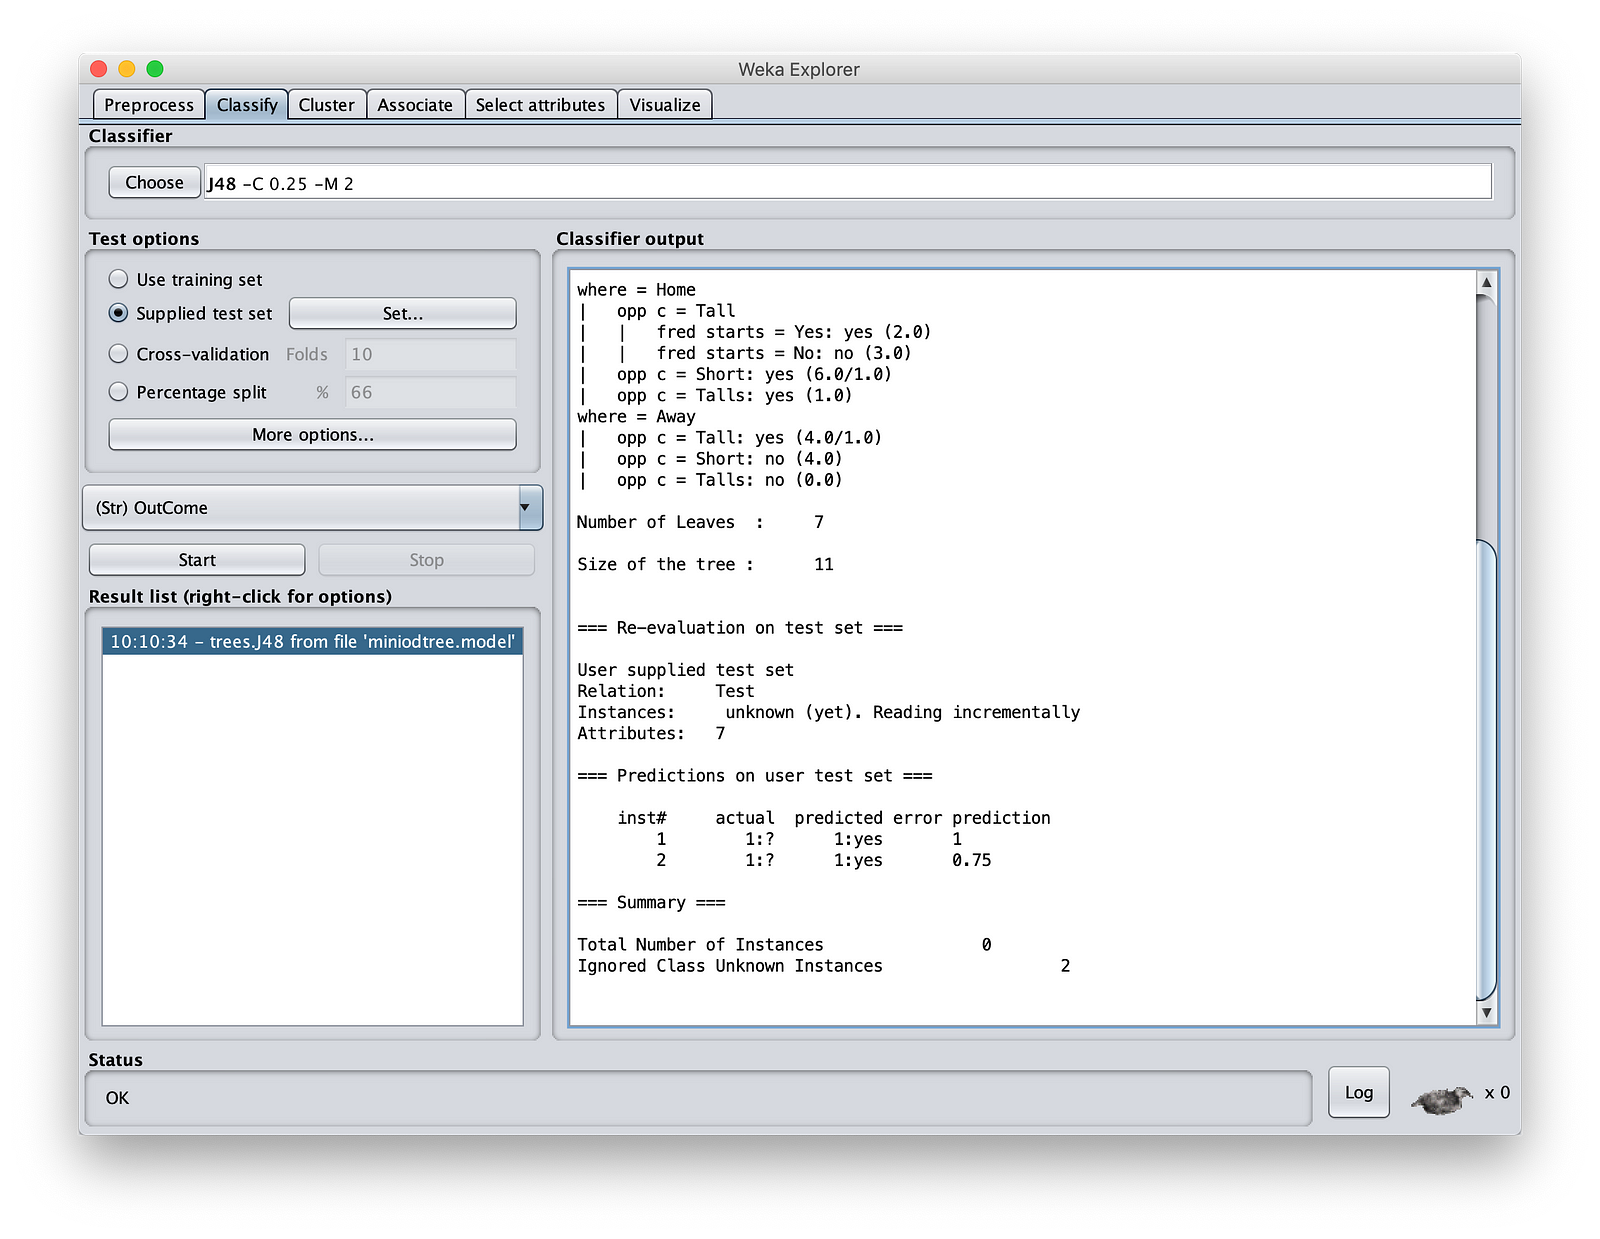
Observe the “?” marks. We do not know what the outcome will be and we want Weka to tell us using the model that we created.
Step 1: Start Weka. Just click on “File button”, and give any file. We are not going to use this file. If you are reading a CSV file, please change the filetype. In Weka, unless you give some input file, you cannot open “Classify” section. In Classify, come to the “Result List” Window, right click and load the model you saved in the last section. This is shown below:
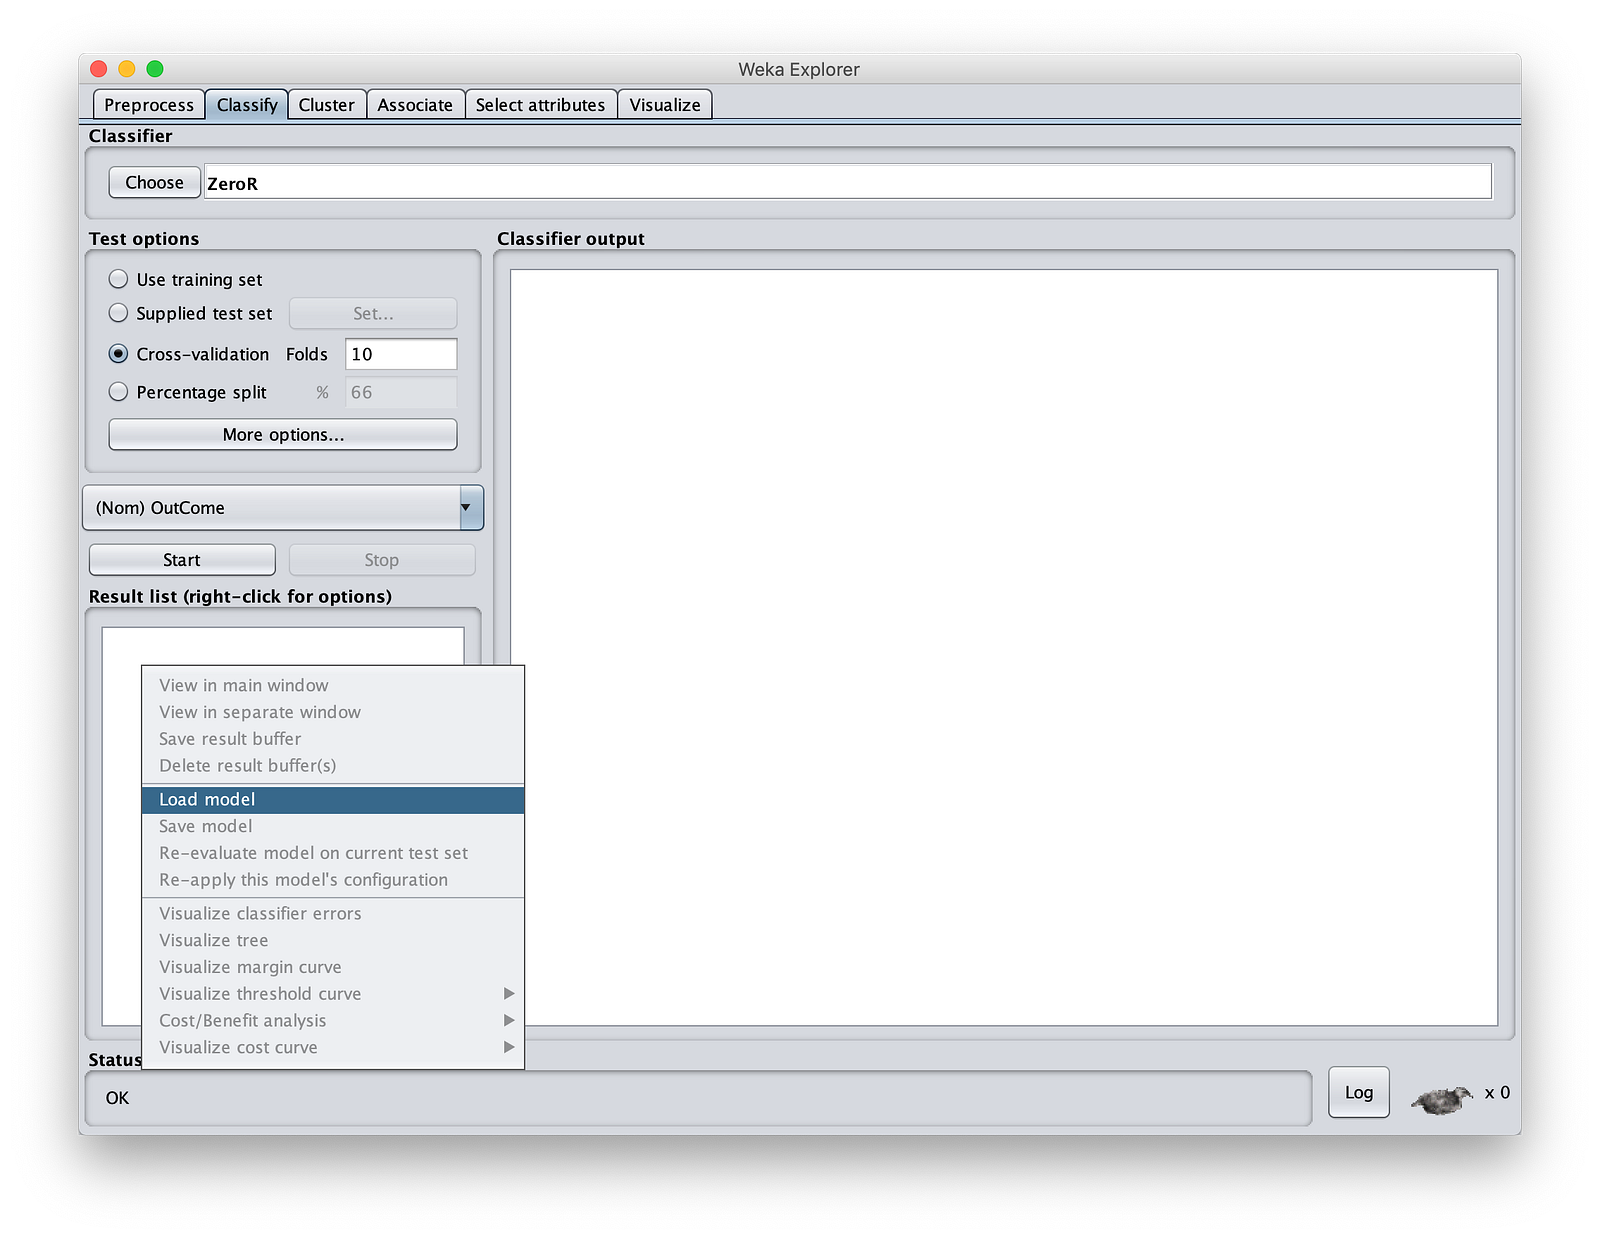
Select the “MinIOdtree.model”. Then click on “Supplied test set” on “Test Options”. Traverse to MinIOlake folder and give “Test.csv” as input.
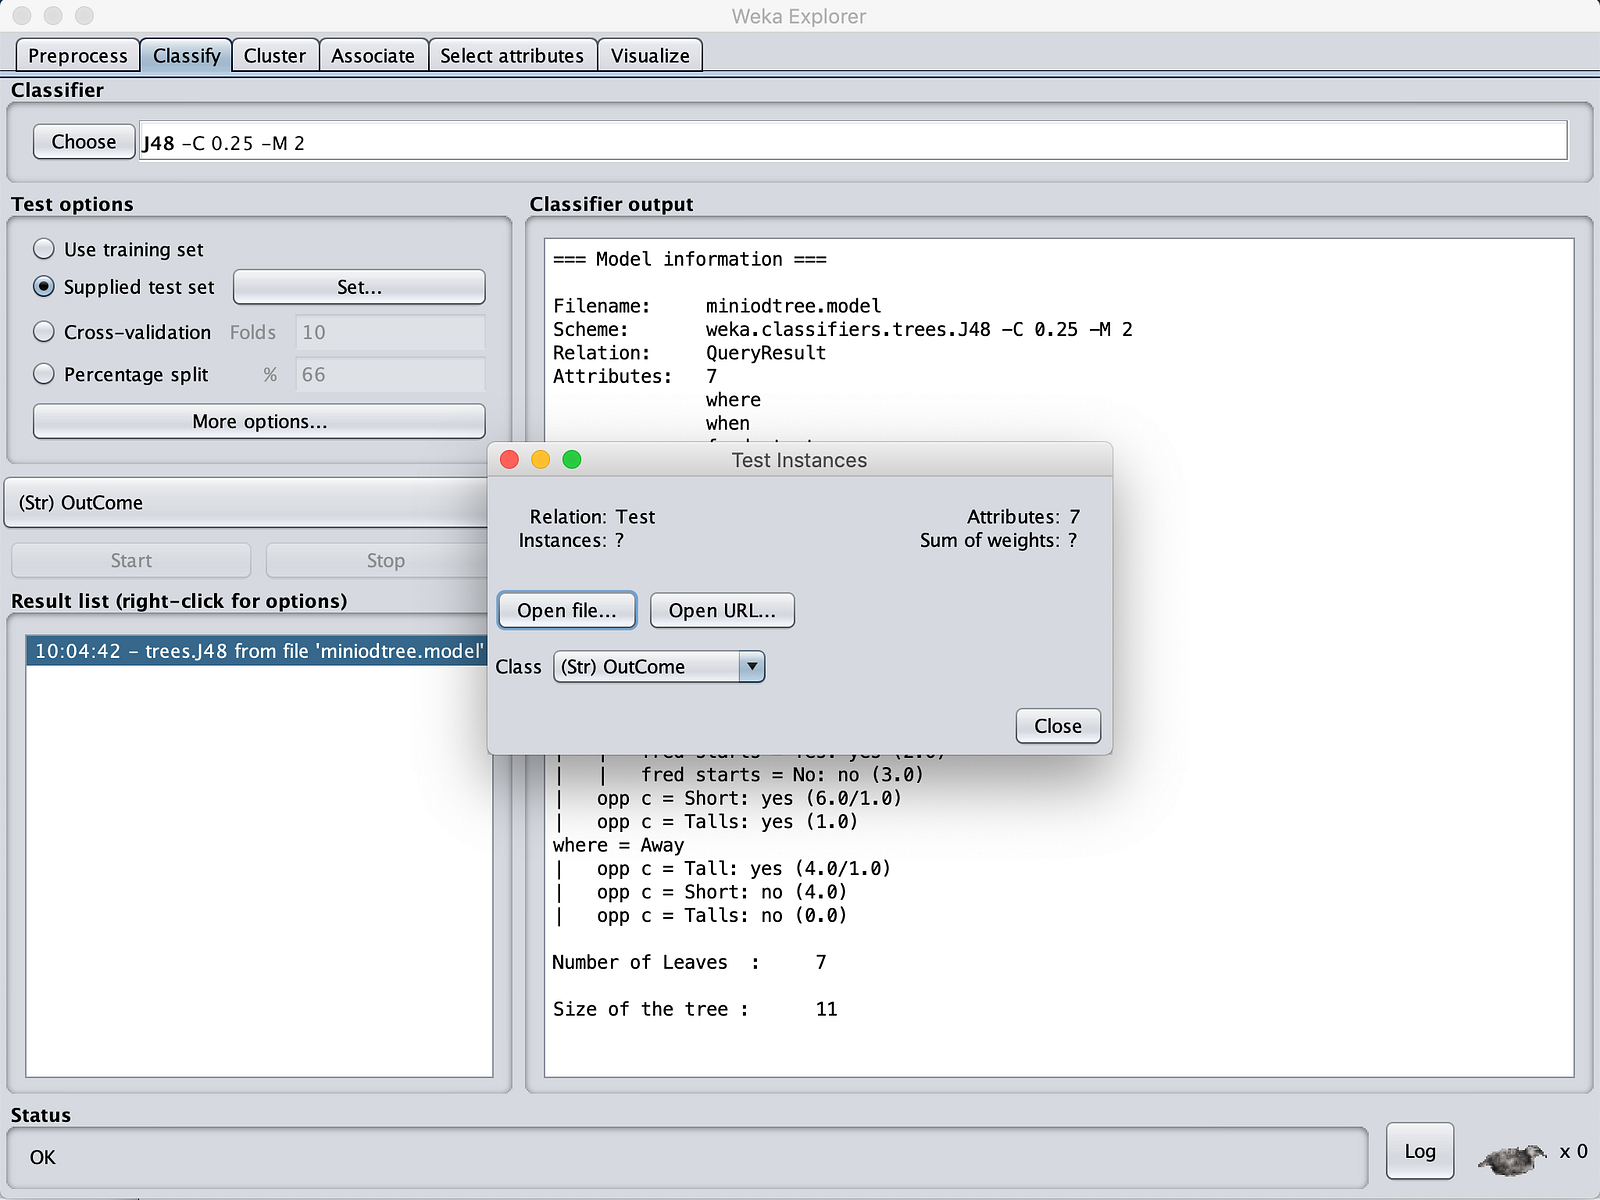
Now Click on “More Options”. Make sure that output type is “Plain Text”.
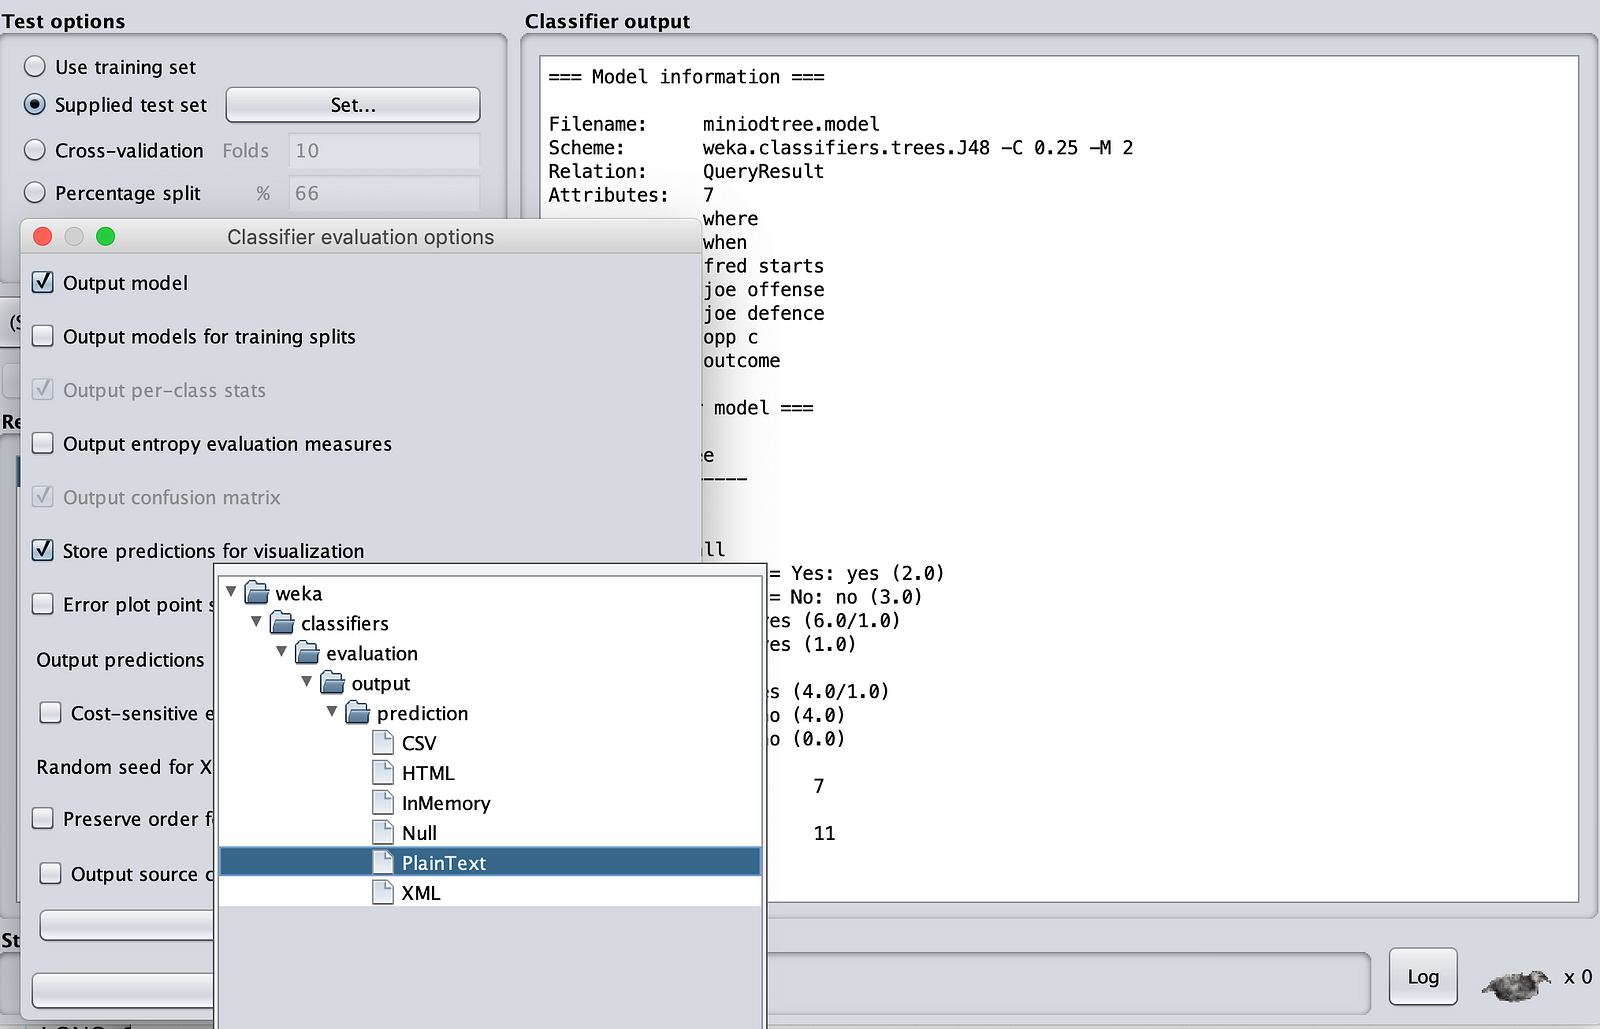
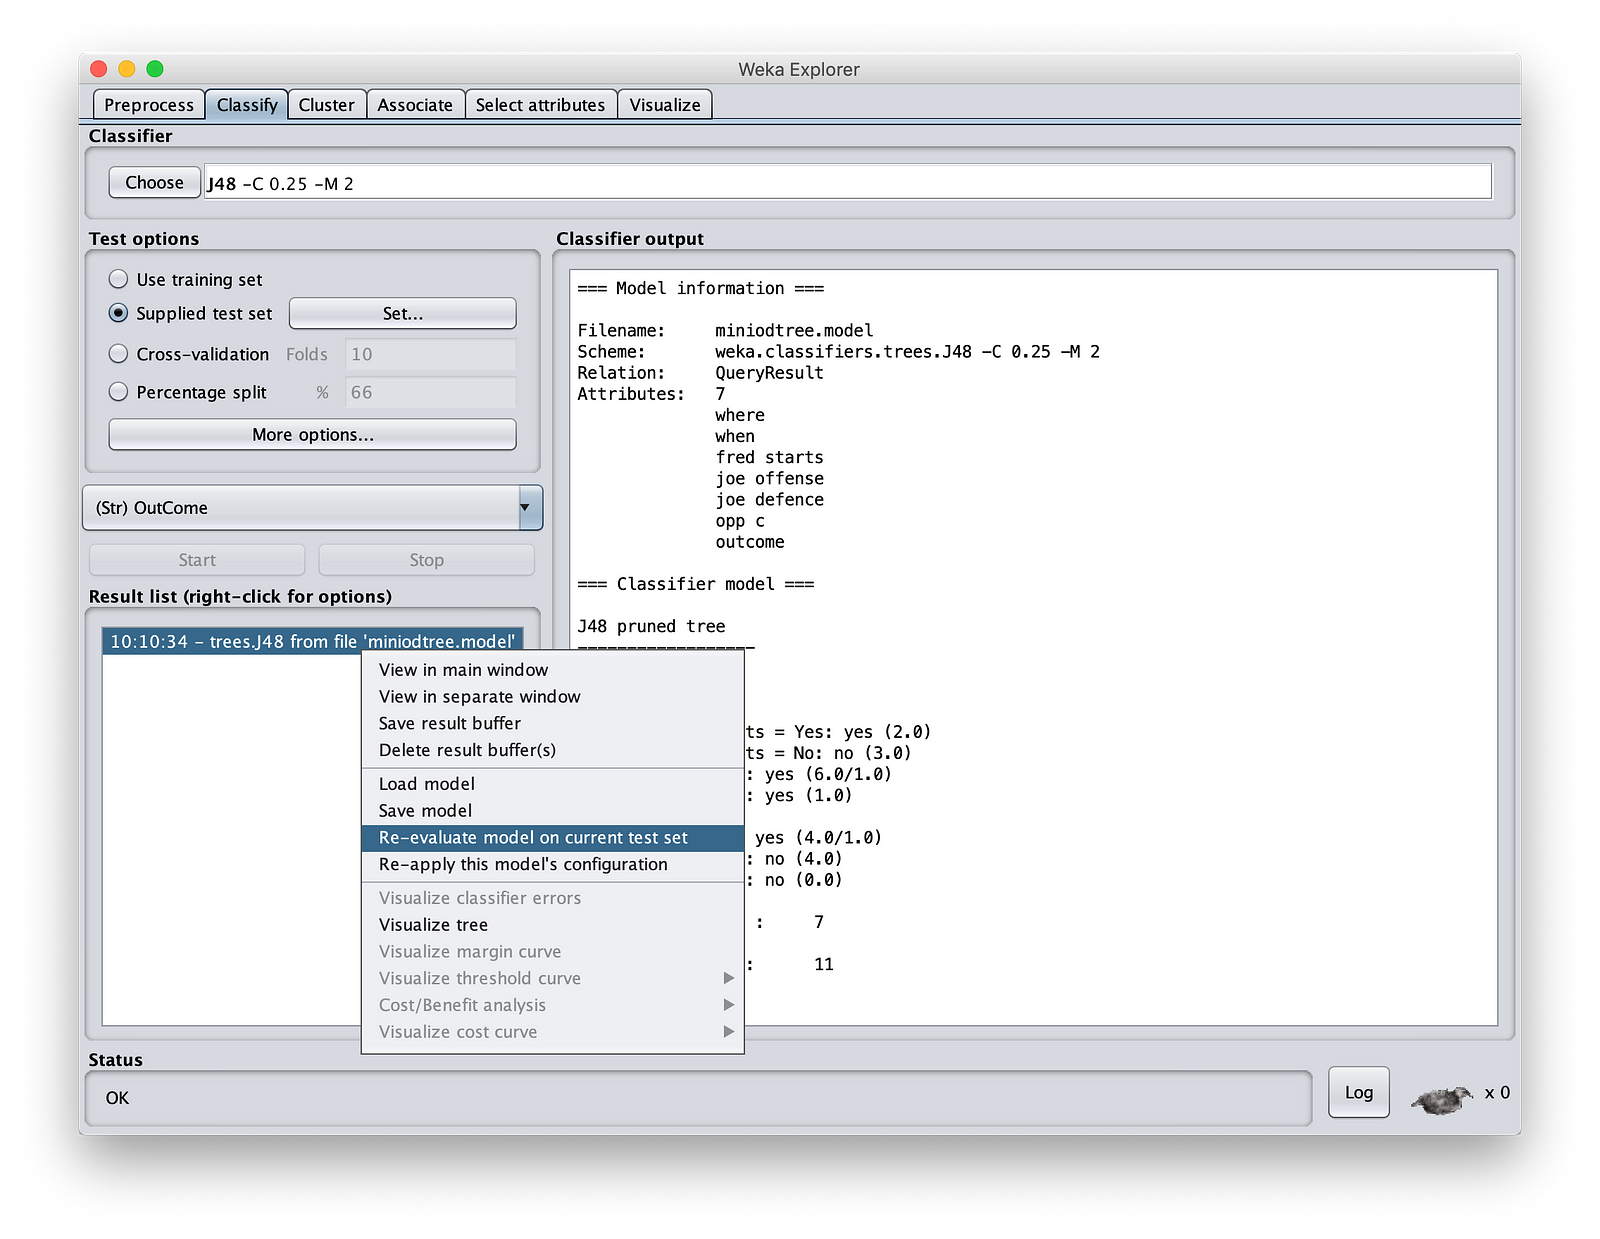
Once you have done this, right-click the “Result List” pane. Click on “Re-evaluate model on current test set”.
And there you go. You have predicted the results using our model:
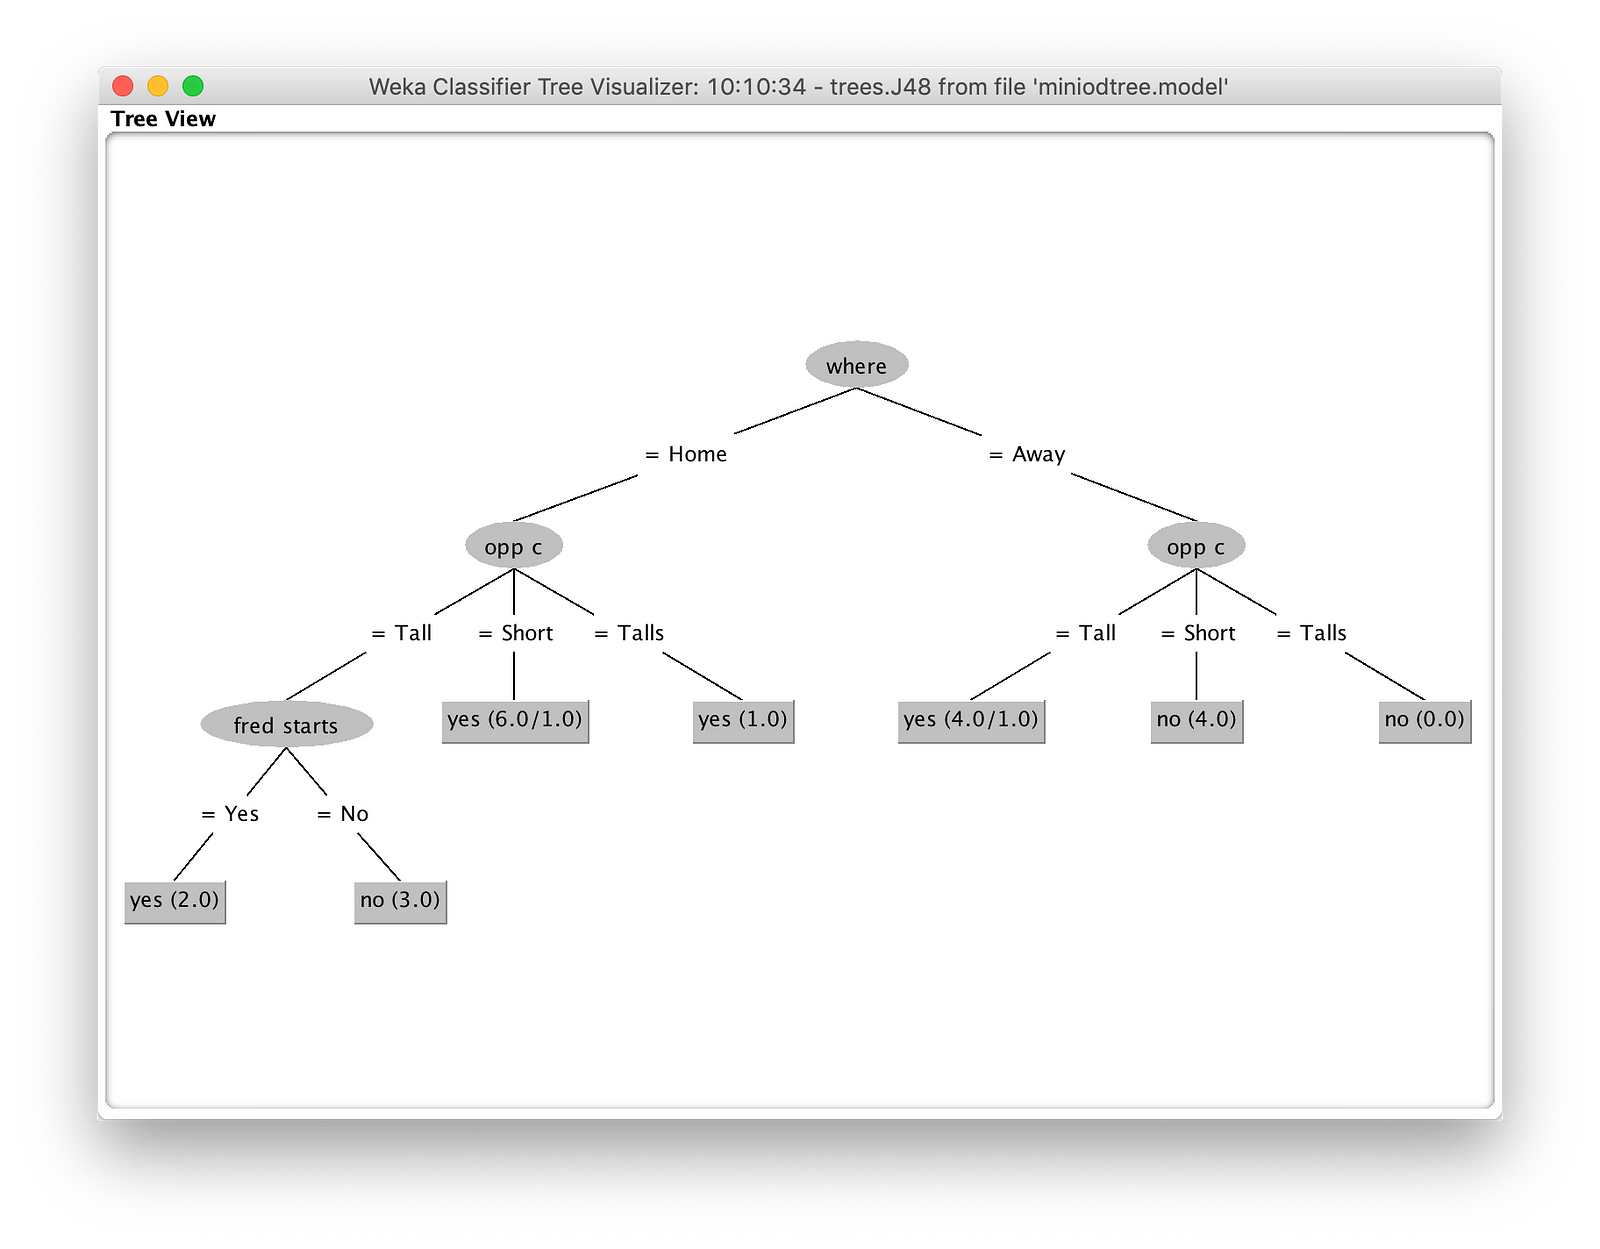
Finally, you can visualize the tree in Wek. Right click “Result List” pane, and select “Visualize Tree” to see how your model will be evaluated.
Bonus: Connect MinIO from R
Some of you may be hardcore R programmers and the introduction of Weka might not be of much interest to those. For those R geeks, here is the idea:
- Download RPresto package and install onto your R environment.
- Please make sure that Presto and MinIO are running. Again, NO Hive.
- Following is the code:
install.packages(“RPresto”)
install.packages(“dplyr”)
install.packages(“dbplyr”)
my_db <- src_presto(catalog = “MinIO”, schema = “games”, user = “ravi”, host = “localhost”, port = 8080, session.timezone=’US/Eastern’)
my_tbl <- dplyr.tbl(my_db, “gamestats”)
my_tbl
4. Following output is generated:
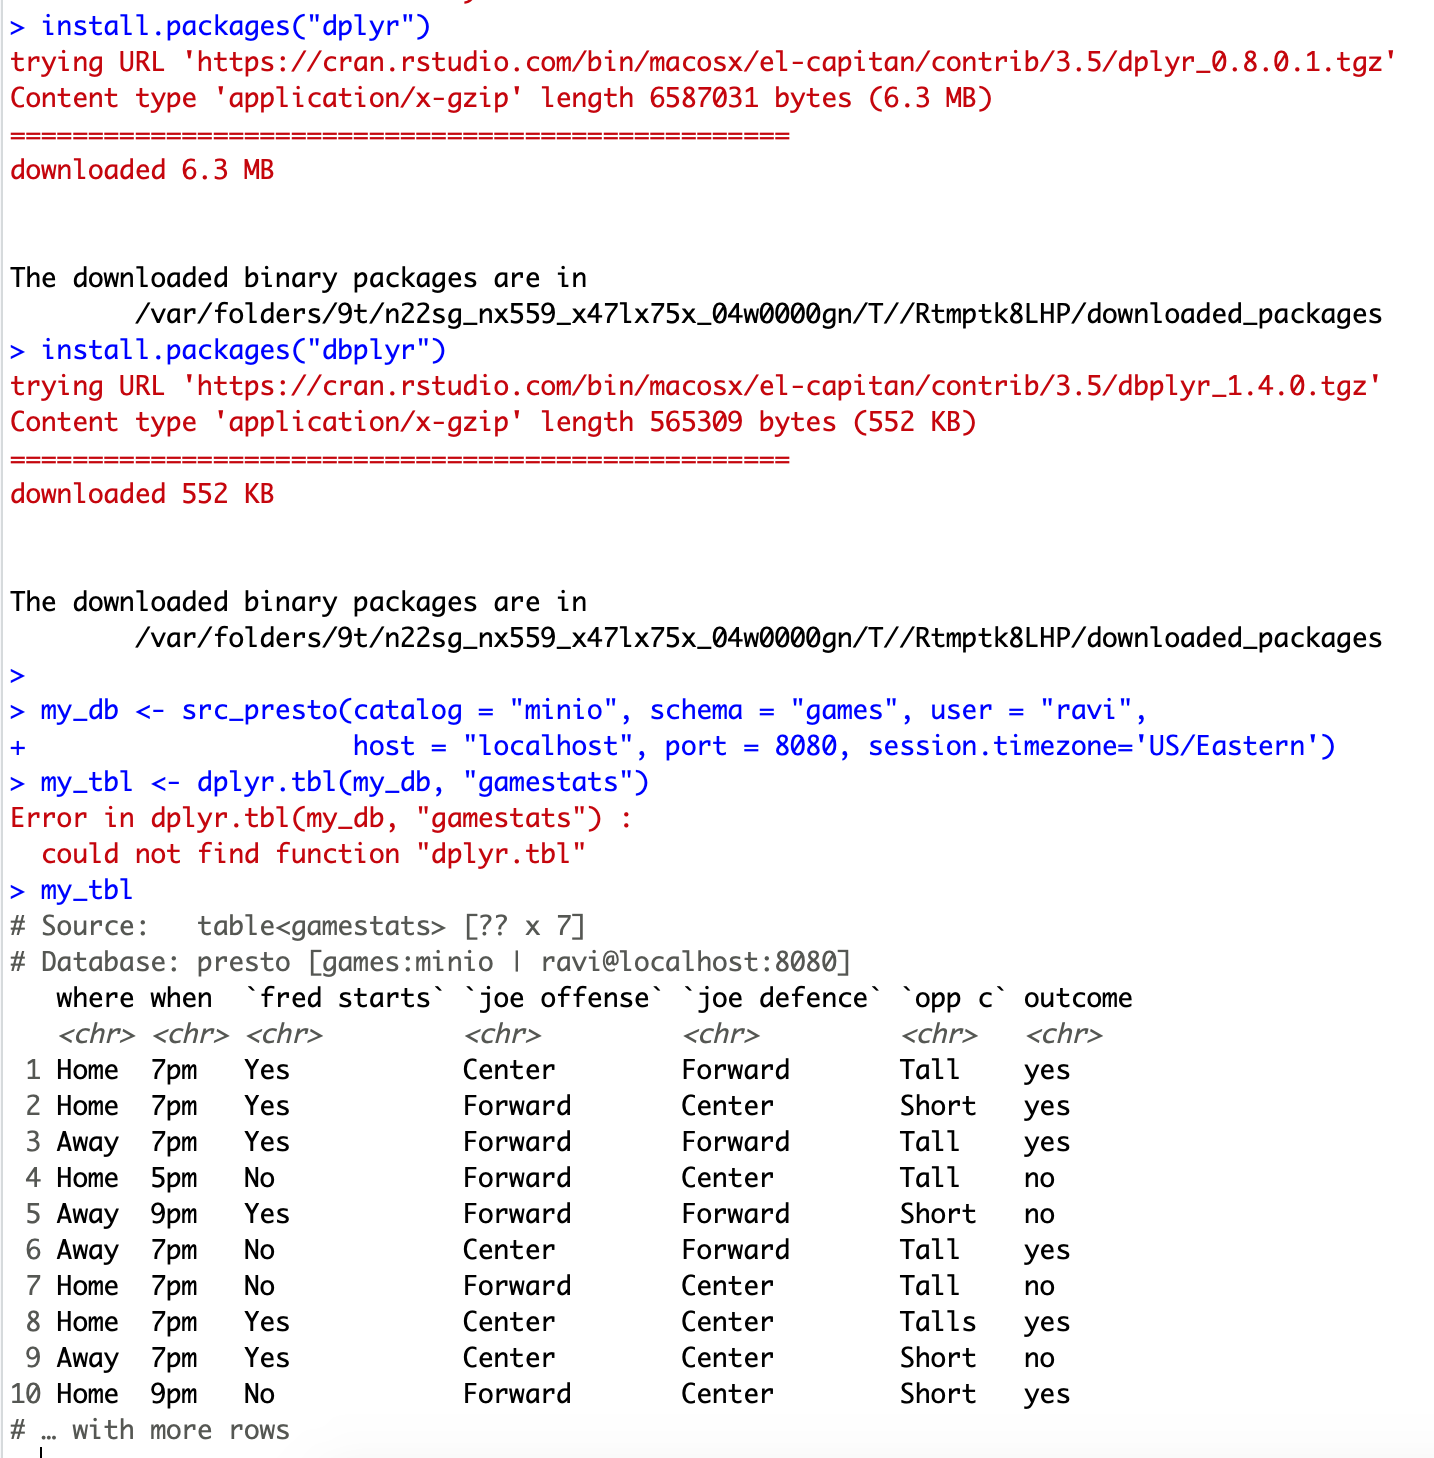
With the variable my_tble, now you can write all your favourite stuff in R.
To summarise, let’s have an architecture diagram of what we did.
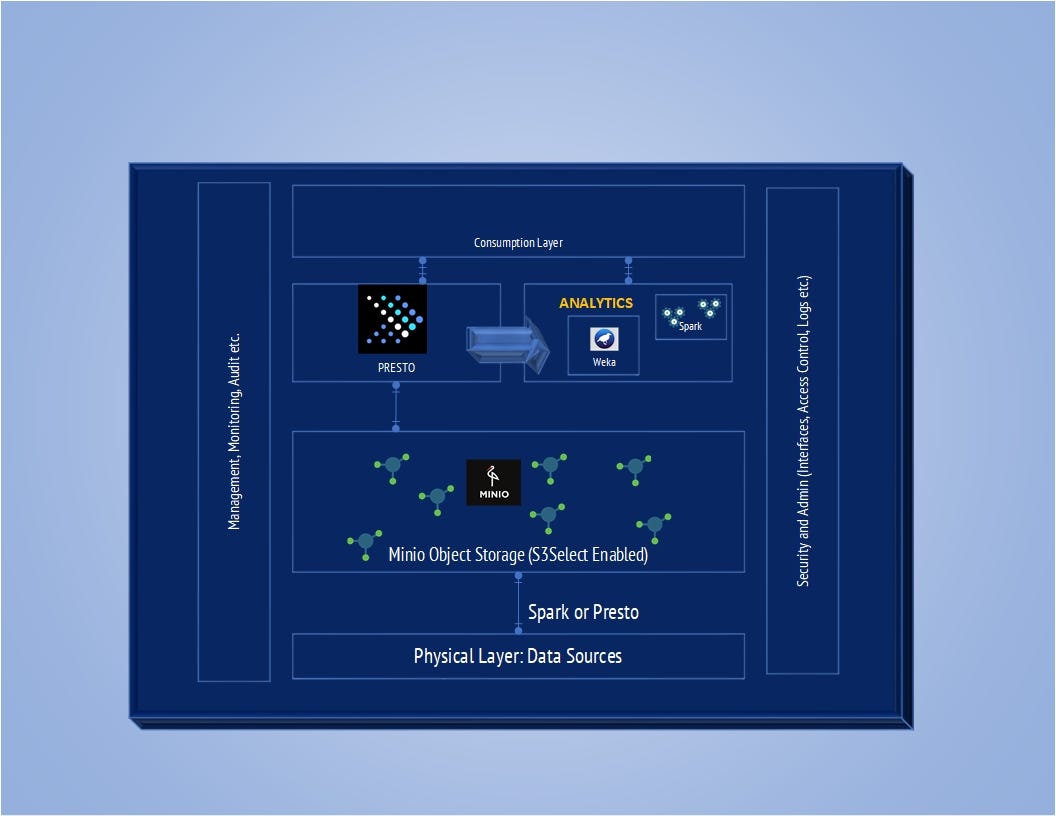
I have used a 64 GB server, and could do models on about 1.2 billion rows of 8 attributes. You can cluster MinIO, cluster Presto for more improvements. You can use NVMe discs with RDMA connectors for faster throughput.
Hopefully this post has demonstrated how easy and powerful an advanced analytics framework featuring MinIO object storage can be. If you want more support or to continue the conversation, connect with me at LinkedIn.


