Deploying MinIO with GitOps on Self-Hosted Infrastructure

Building on the insights from the MinIO Weaviate Python GitOps exploration, this article ventures into enhancing automation for software deployment processes.
The synergy created by integrating GitHub Actions with Docker Swarm, underpinned by the robustness of self-hosted infrastructure, signifies a pivotal advancement in CI/CD practices. This approach not only leverages containerization benefits for software applications but also underlines the essential role of MinIO S3 in facilitating GitOps-driven workflows. Utilizing self-hosted environments grants organizations unmatched control and improved security, paving the way for custom-tailored CI/CD pipelines.
The Self-Hosted Imperative
The objective focuses on implementing MinIO using a customized GitHub Actions runner managed internally. This approach transcends mere adoption of automation forefronts; it’s about leveraging the comprehensive capabilities of a premier storage solution within a tailored setting. This environment emphasizes absolute control and adaptability, pushing the boundaries of operational superiority. Choosing self-hosted runners over GitHub’s hosted alternatives empowers with complete environmental command and the flexibility to run workflows on specialized hardware, optimizing the deployment process to its fullest extent.
Furthermore, self-hosted runners can minimize potential attack vectors by limiting the exposure of internal networks to external threats. With the runner operating internally, organizations can implement stringent security measures, such as network segmentation and access control, to address vulnerabilities effectively.
The primary objective of this configuration is to boost the automation, effectiveness, and scalability of CI/CD pipelines, especially for Docker-centric applications and services. Through the integrated use of GitHub Actions, self-hosted runners, and MinIO, teams can streamline development workflows, achieve more dependable deployments, and optimize resource allocation, all while ensuring their deployment environments remain secure and highly controllable.
Ensuring the Foundation is Ready
Before delving into the deployment and configuration, it's critical to ensure that the foundational elements are in place locally. This involves setting up a server to function as the Docker Swarm leader and preparing a GitHub account with a specific repository for the runner.
- Server Requirements: A Linux-based server with Docker Swarm enabled serves as the cornerstone of this setup. The server will act as the leader in the Docker Swarm configuration, orchestrating container deployments across multiple nodes.
- GitHub Account Preparation: A GitHub account is necessary, with a repository where the GitHub Actions self-hosted runner will be configured. This repository will hold the codebase and workflows that the runner will execute.
Installation Commands
To prepare the server environment, the following packages must be installed:
sudo apt update -y && sudo apt install docker.io docker-compose python3Command-line prerequisites commands
These commands ensure that Docker, Docker Compose, and Python are installed and ready to use, setting the stage for a smooth deployment process.
Laying the Groundwork with Docker Swarm
Docker Swarm transforms a group of Docker hosts into a single, virtual Docker host, facilitating high availability and load balancing for deployed applications. Configuring the Swarm involves initializing it on the leader and then connecting additional nodes.
Initialize Docker Swarm on the Leader Node
Before adding any workers to the swarm, the leader node needs to be initialized. This is done with the following command:
docker swarm initInitialize docker swarm
This command will output a docker swarm join command with a token. Copy this command for use in the next step.
Add Worker Nodes to the Swarm
On each worker node (in this case, Raspberry Pis), execute the command copied from the leader node initialization output. It looks something like this:
docker swarm join --token <SWARM_JOIN_TOKEN> <LEADER_IP_ADDRESS>:2377Joining additional workers to the docker swarm
Replace <SWARM_JOIN_TOKEN> and <LEADER_IP_ADDRESS> with the actual token and IP address provided during the initialization.

These steps create a cohesive and coordinated cluster of nodes, capable of hosting and managing containerized applications.
Configuring the GitHub Self-Hosted Runner
A GitHub Self-Hosted Runner is a machine or container that you manage and maintain, allowing you to have full control over the environment and customization options. Unlike GitHub-hosted runners, which are ephemeral virtual machines provided by GitHub, self-hosted runners offer flexibility in terms of operating system, software, and configurations.
In this case, the runner will be hosted on a Docker Swarm leader node, which is running on-premises, to ensure seamless integration with the existing infrastructure and maintain control over the deployment process.
Integrating GitHub Actions with Docker Swarm
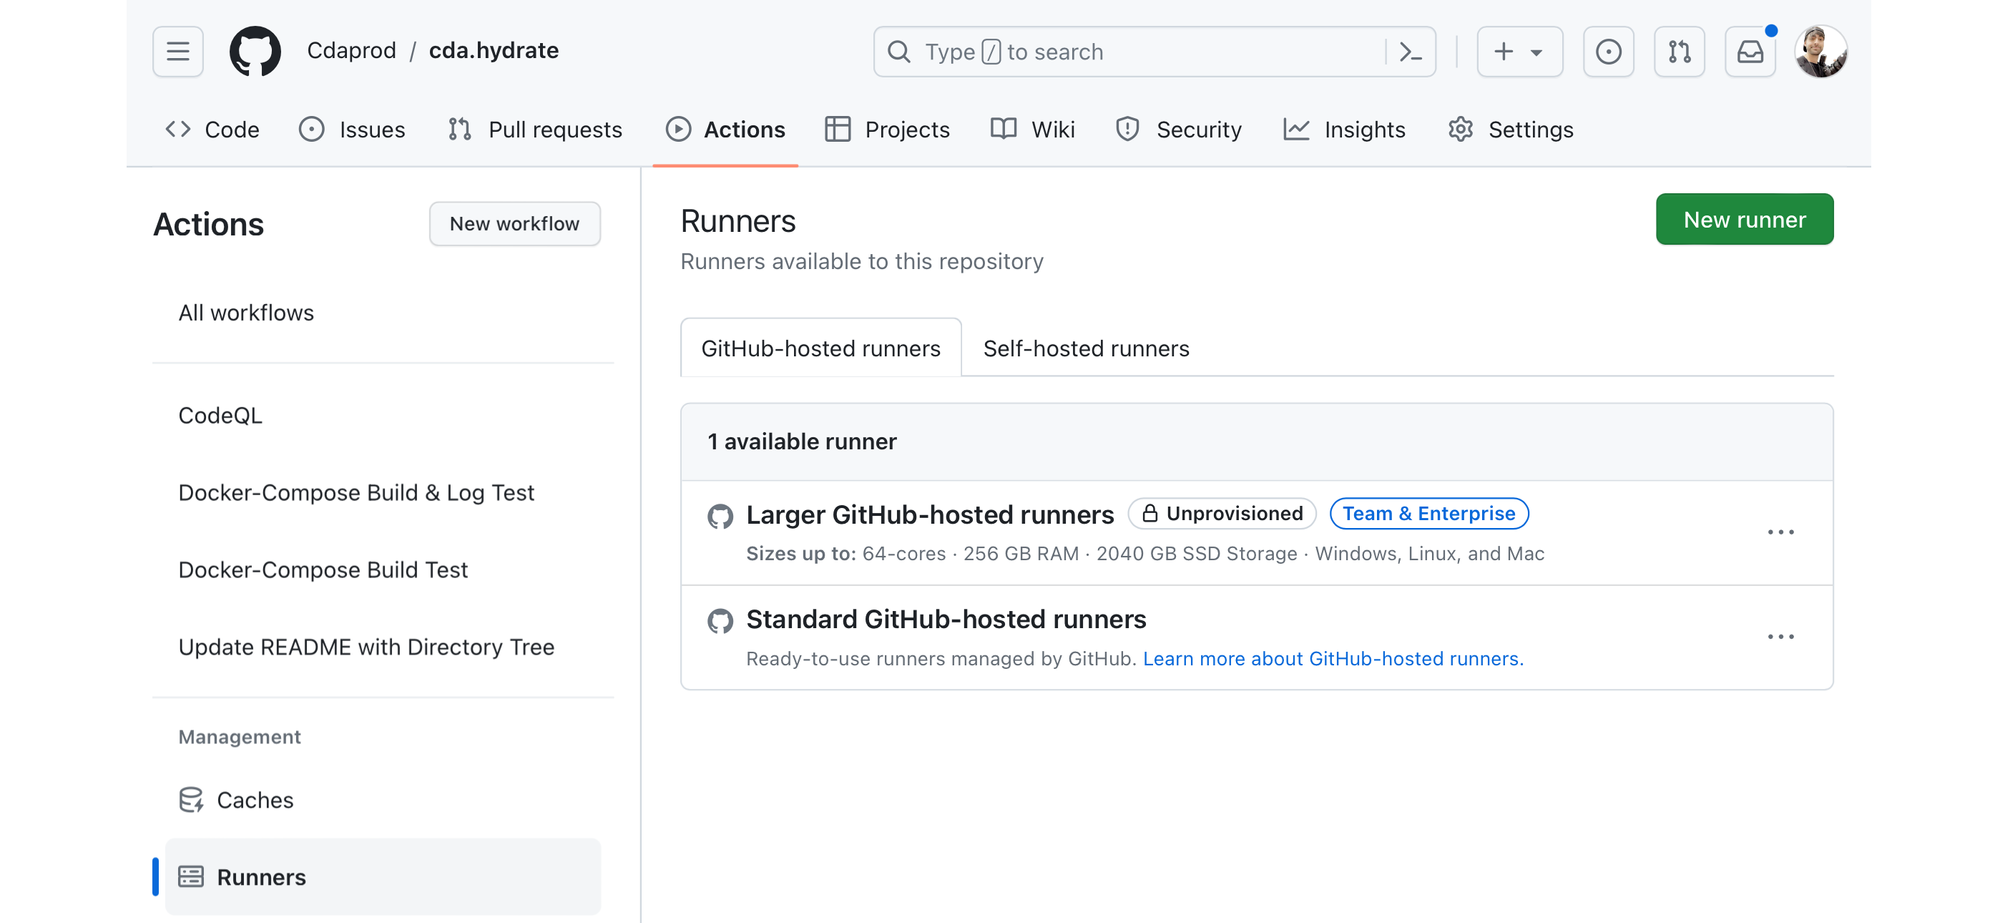
The integration of a GitHub Actions self-hosted runner into Docker Swarm involves a few key steps, from setting up the runner environment to downloading and configuring the runner software.
Setting up the Runner Environment:
Through the GitHub UI, navigate to the repository settings to add a new self-hosted runner. Select the appropriate operating system and architecture, matching the Swarm leader's environment.
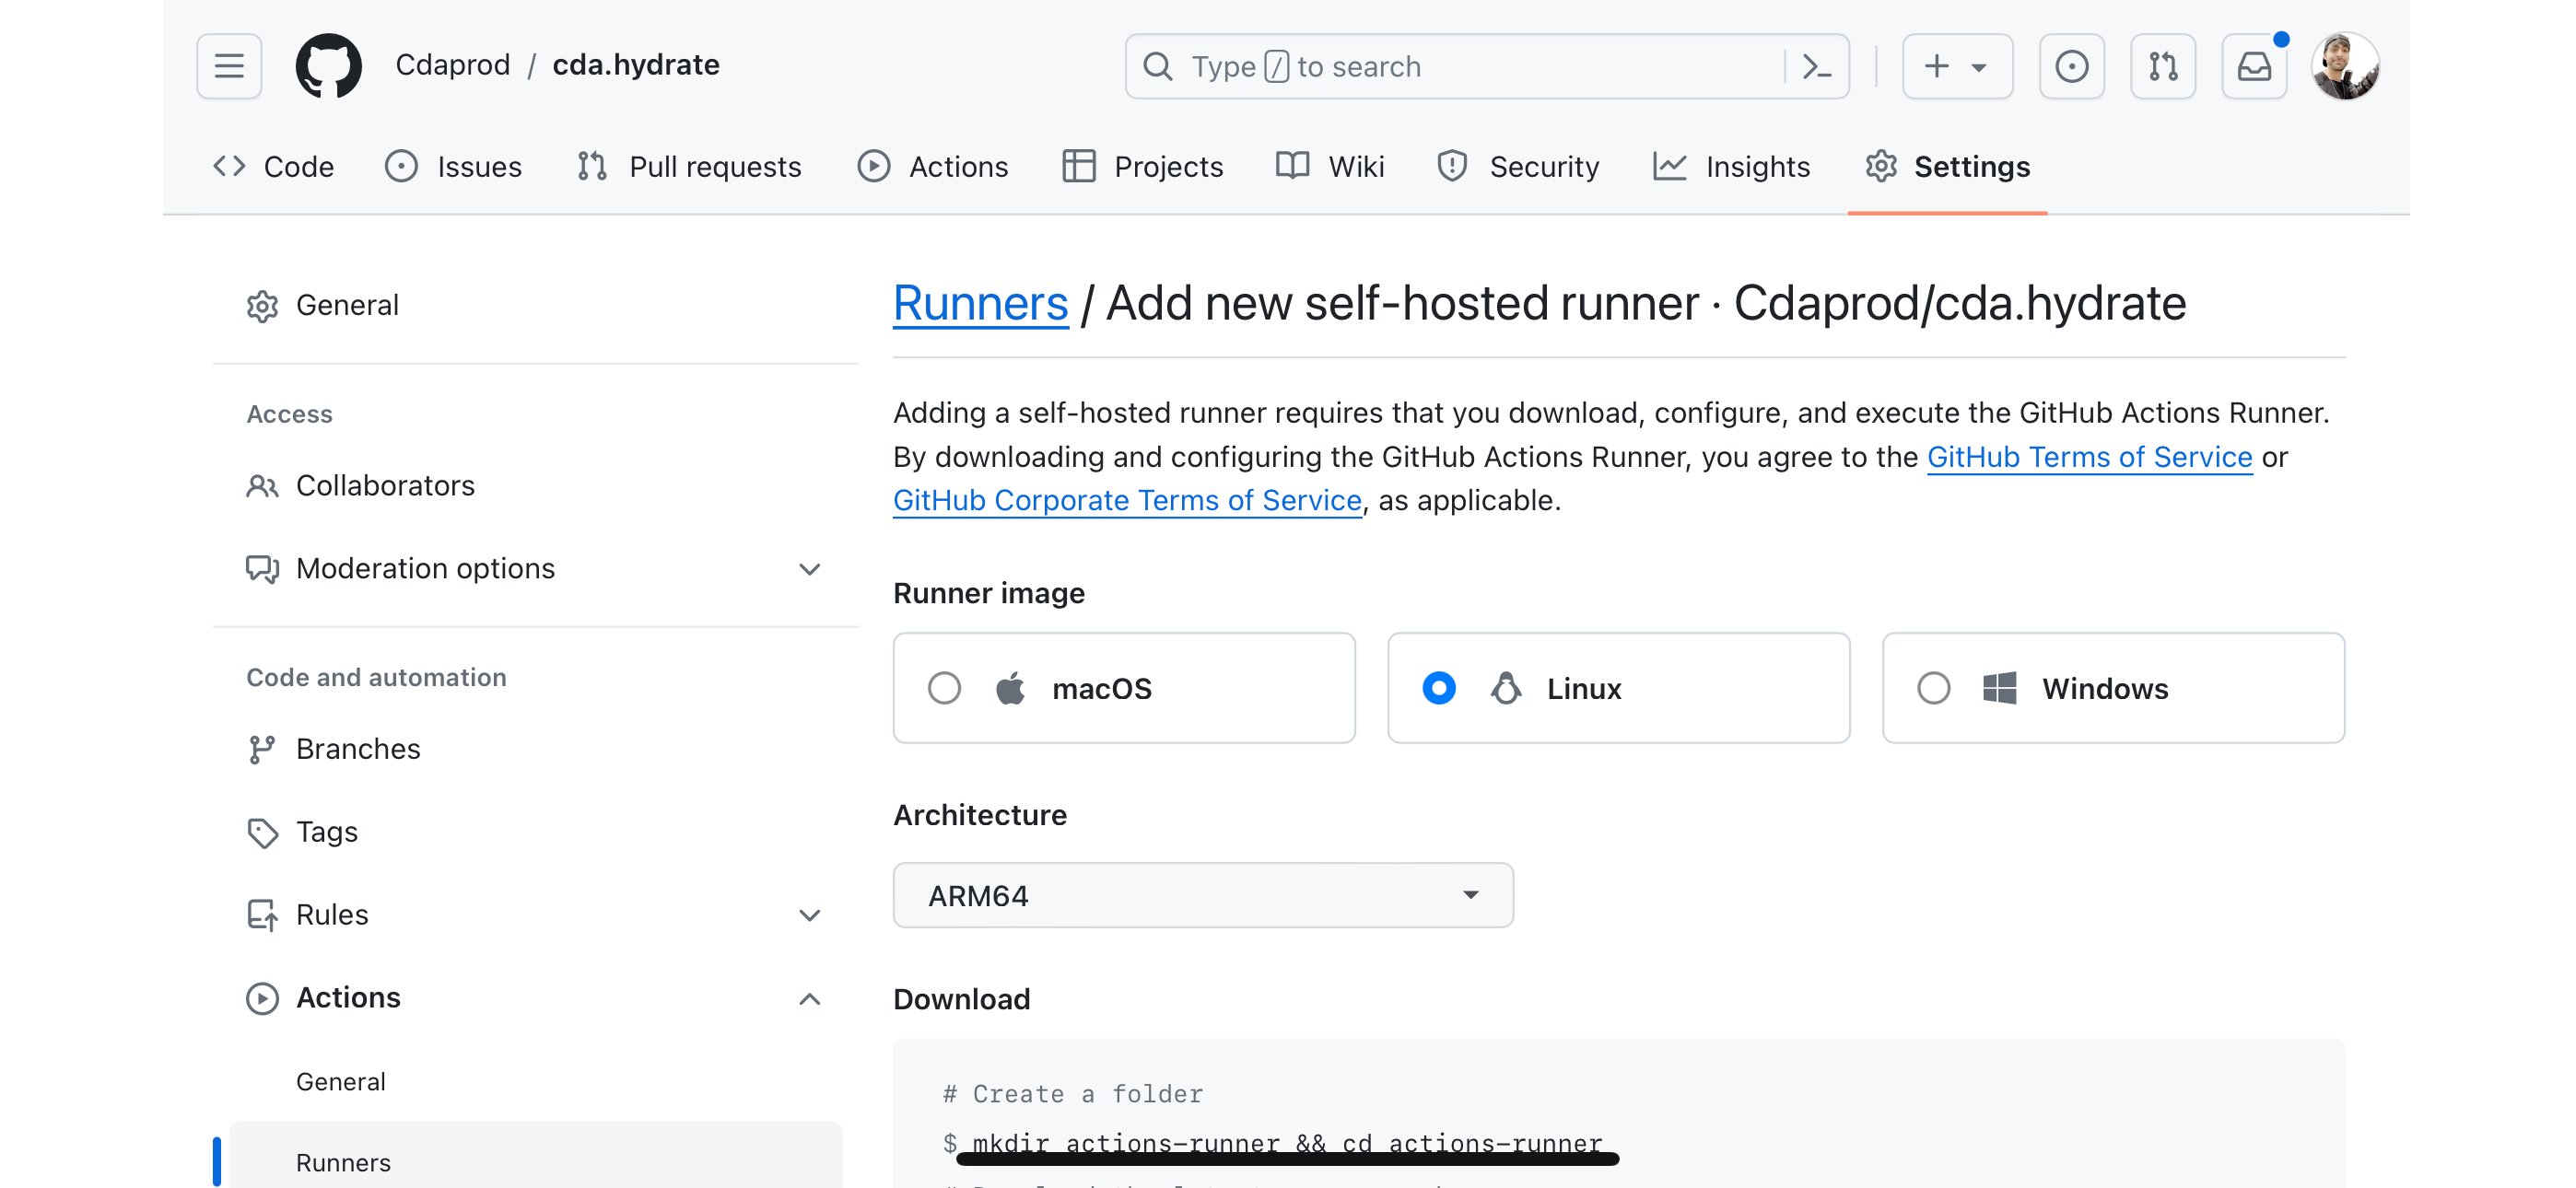
Downloading and Configuring the Runner:
GitHub provides a set of commands to download, configure, and start the self-hosted runner on the Swarm leader. These steps register the runner with GitHub, making it available to execute workflows.
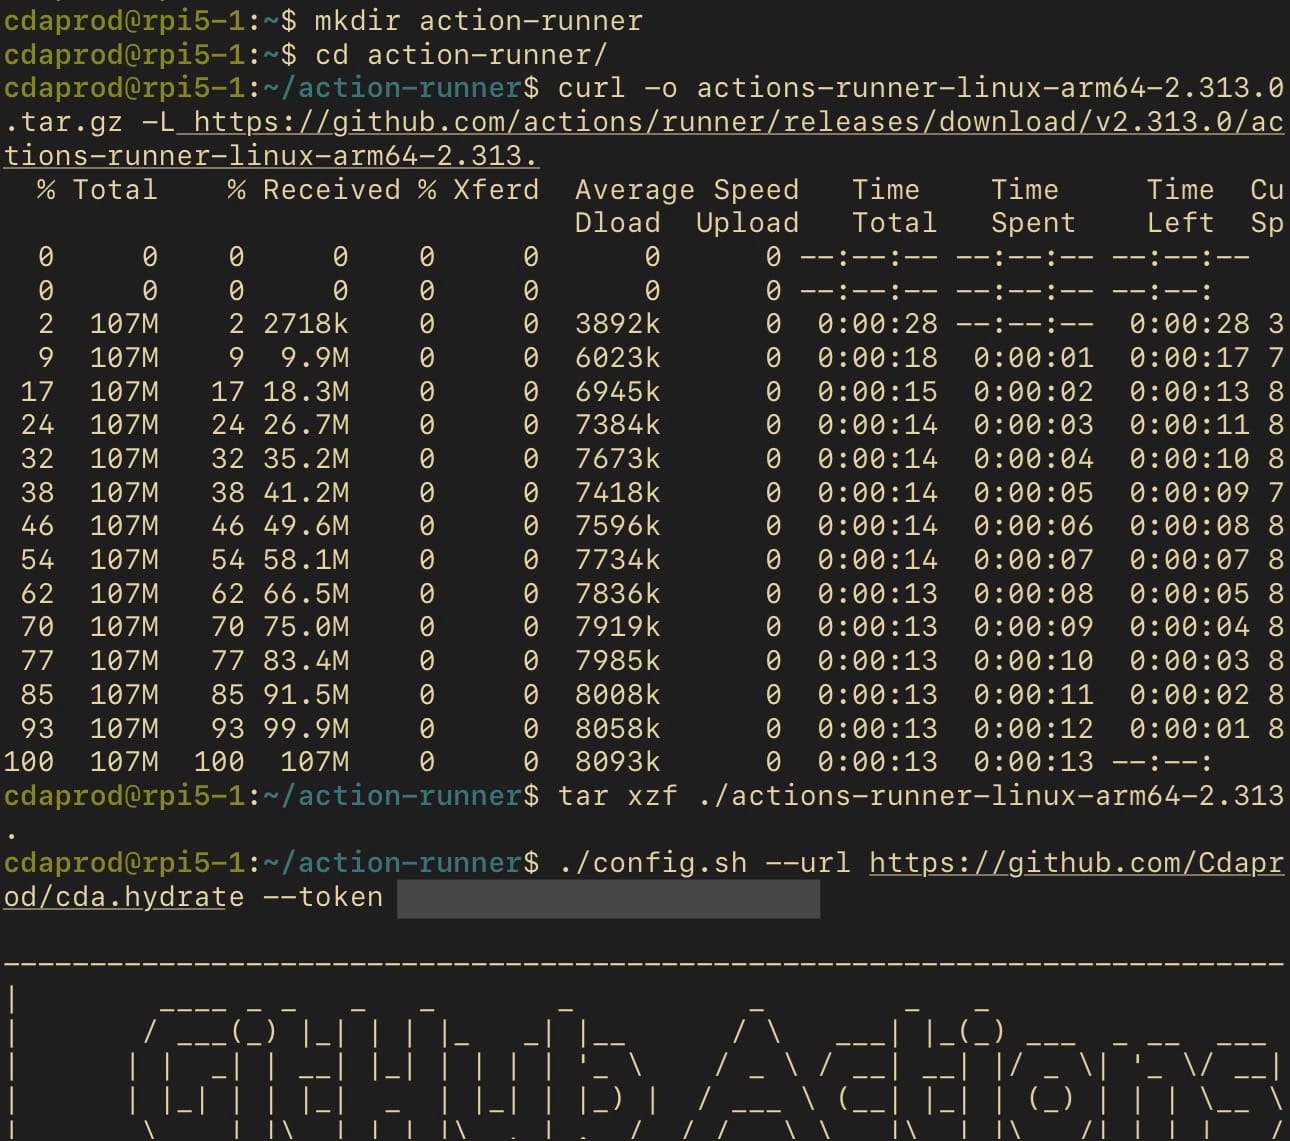
First, you need to navigate to your GitHub repository's settings, access the Actions tab, and add a new runner. Follow the instructions provided by GitHub, which include downloading the runner and configuring it.
Each runner must be implemented per repository, and be running independently; the ability to have GitHub runners that can span multiple repositories is a GitHub Enterprise feature. The instructions will look similar to the commands below but use the exact commands provided by GitHub as they include a unique token:
# Create a directory for the runner
mkdir action-runner && cd action-runner

# Download the runner package
curl -o actions-runner-linux-arm64-<RUNNER_VERSION>.tar.gz -L <https://github.com/actions/runner/releases/download/v><RUNNER_VERSION>/actions-runner-linux-arm64-<RUNNER_VERSION>.tar.gz

# Extract the runner package
tar xzf ./actions-runner-linux-arm64-<RUNNER_VERSION>.tar.gz

# Configure the runner
./config.sh --url <https://github.com/><GITHUB_USERNAME>/<GITHUB_REPO> --token <GITHUB_TOKEN>
Example of code provided by GitHub
Make sure to ensure <RUNNER_VERSION>, <YOUR_USERNAME>, <YOUR_REPO>, and <YOUR_TOKEN> with the actual version number, your GitHub username, your repository name, and the token provided by the GitHub UI, respectively.
Interactive Test Run
Initially, start the runner using the provided script to confirm its successful setup and readiness to process jobs.
# Start the runner interactively

./run.sh
Execute run script
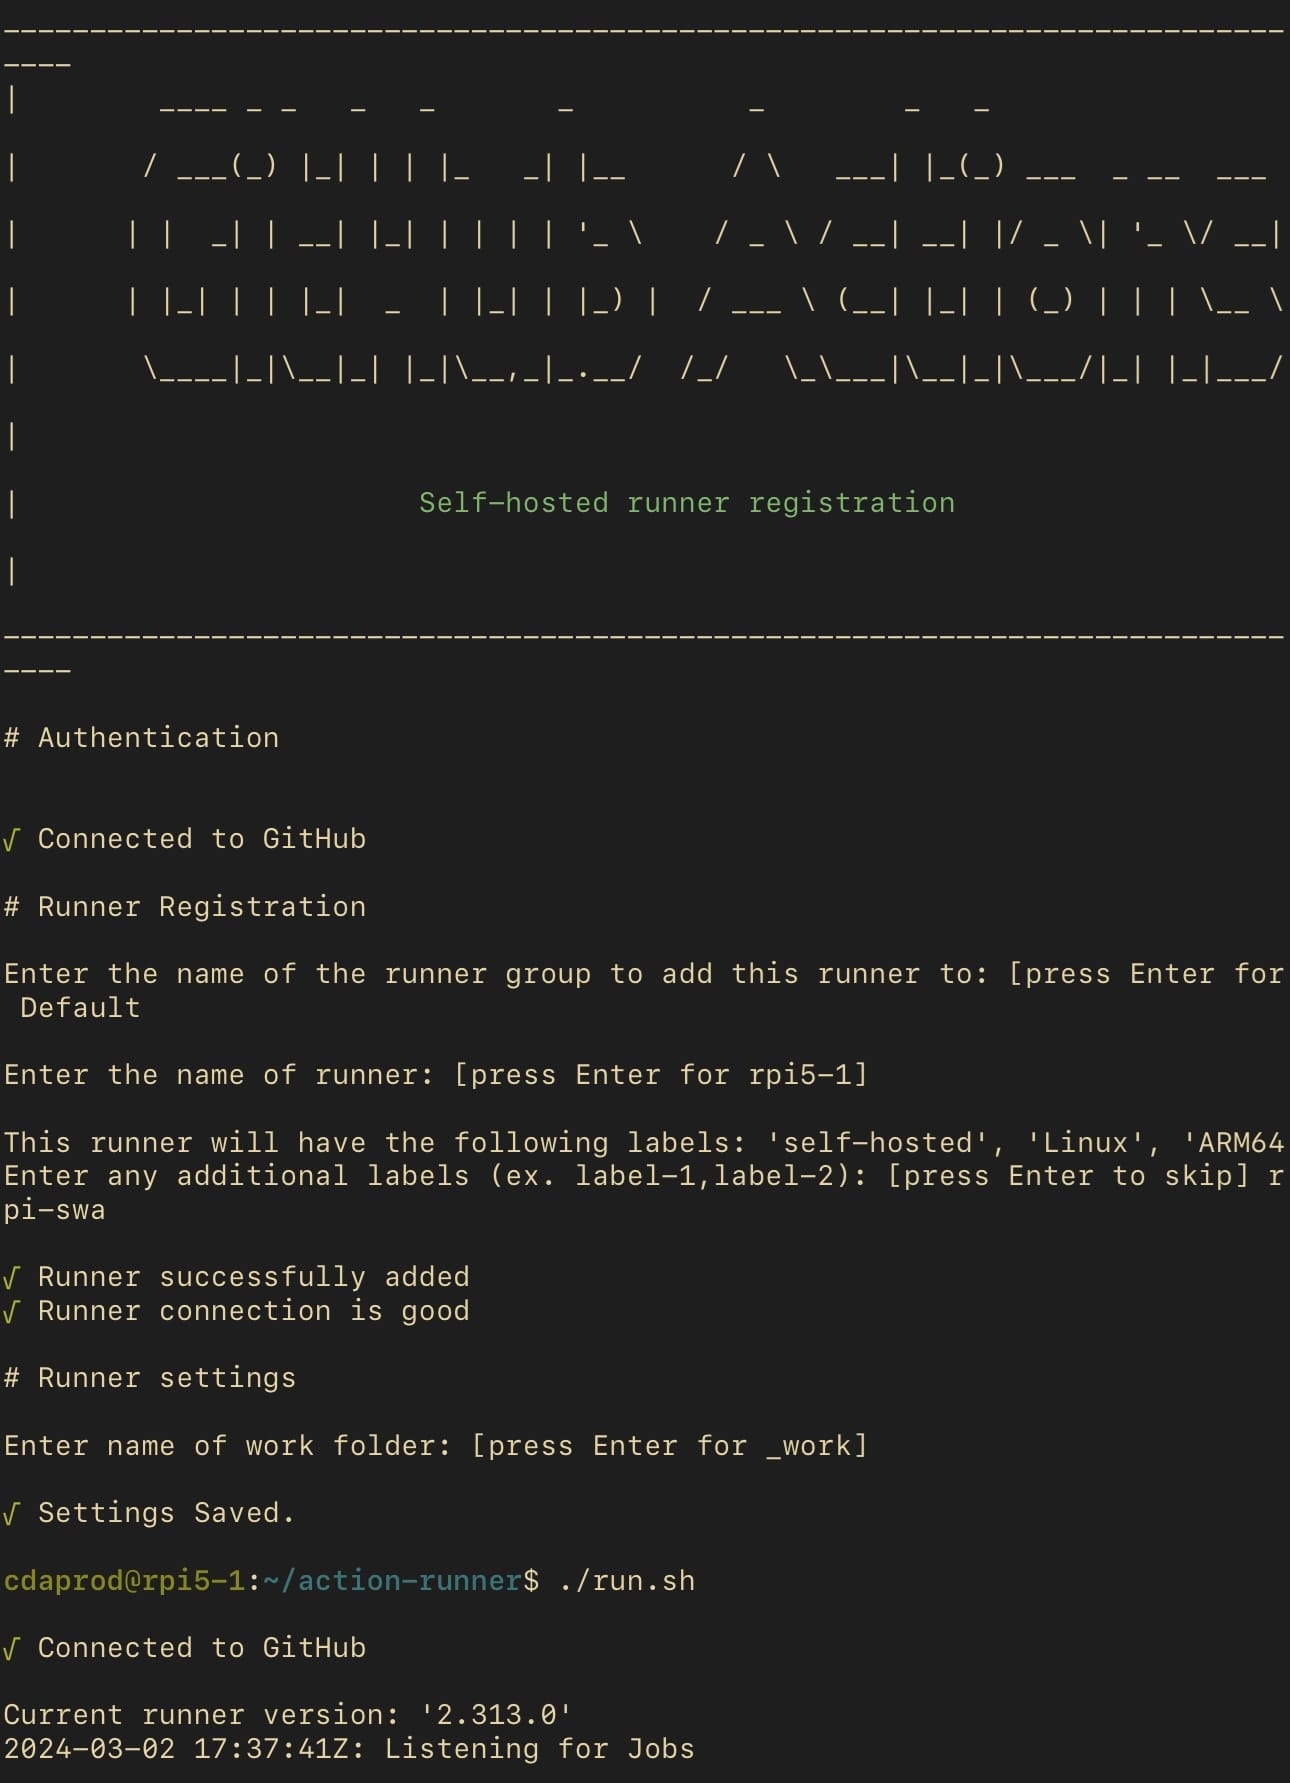
These commands establish the connection between the self-hosted runner and the GitHub repository, setting the stage for executing CI/CD workflows directly from the Docker Swarm leader.
Creating a Systemd Service for the Runner
With the runner configured, the next step is to operationalize it, ensuring it can handle workflow executions seamlessly. Starting the runner interactively tests its functionality, while creating a Systemd service ensures its persistence and resilience.
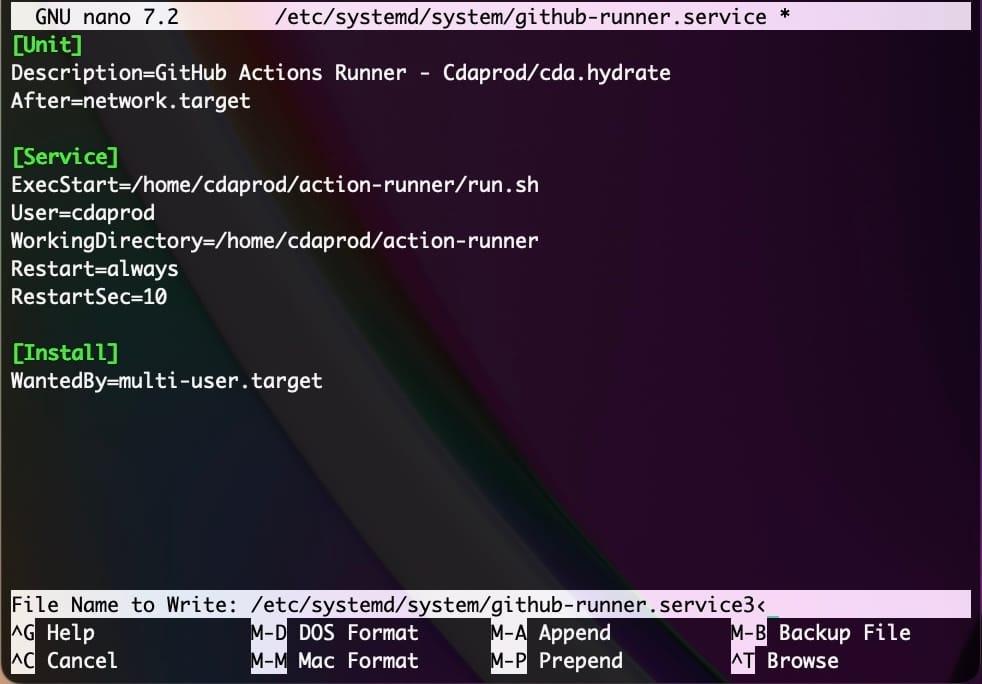
1. Create the Systemd Service File
This step involves creating a systemd service file to manage the GitHub Actions runner as a service, ensuring it starts automatically and remains running.
Create a new service file using your preferred text editor, like nano or vim:
sudo nano /etc/systemd/system/github-runner.serviceCreating service file
Insert the following content, adjusting paths as necessary:
[Unit]
Description=GitHub Actions Runner
After=network.target

[Service]
ExecStart=/home/<USER>/action-runner/run.sh
User=<USER>
WorkingDirectory=/home/<USER>/action-runner
Restart=always
RestartSec=10

[Install]
WantedBy=multi-user.target
Example service file contents
Replace <USER> with the username of the account under which you've installed the runner.
2. Enable and Start the Service
After saving and closing the service file, reload systemd to recognize the new service, enable it to start at boot, and then start the service immediately:
sudo systemctl daemon-reload
sudo systemctl enable github-runner.service
sudo systemctl start github-runner.service
3. Verify the Service Status
To ensure the GitHub Actions runner service is active and running, execute the following command:
sudo systemctl status github-runner.service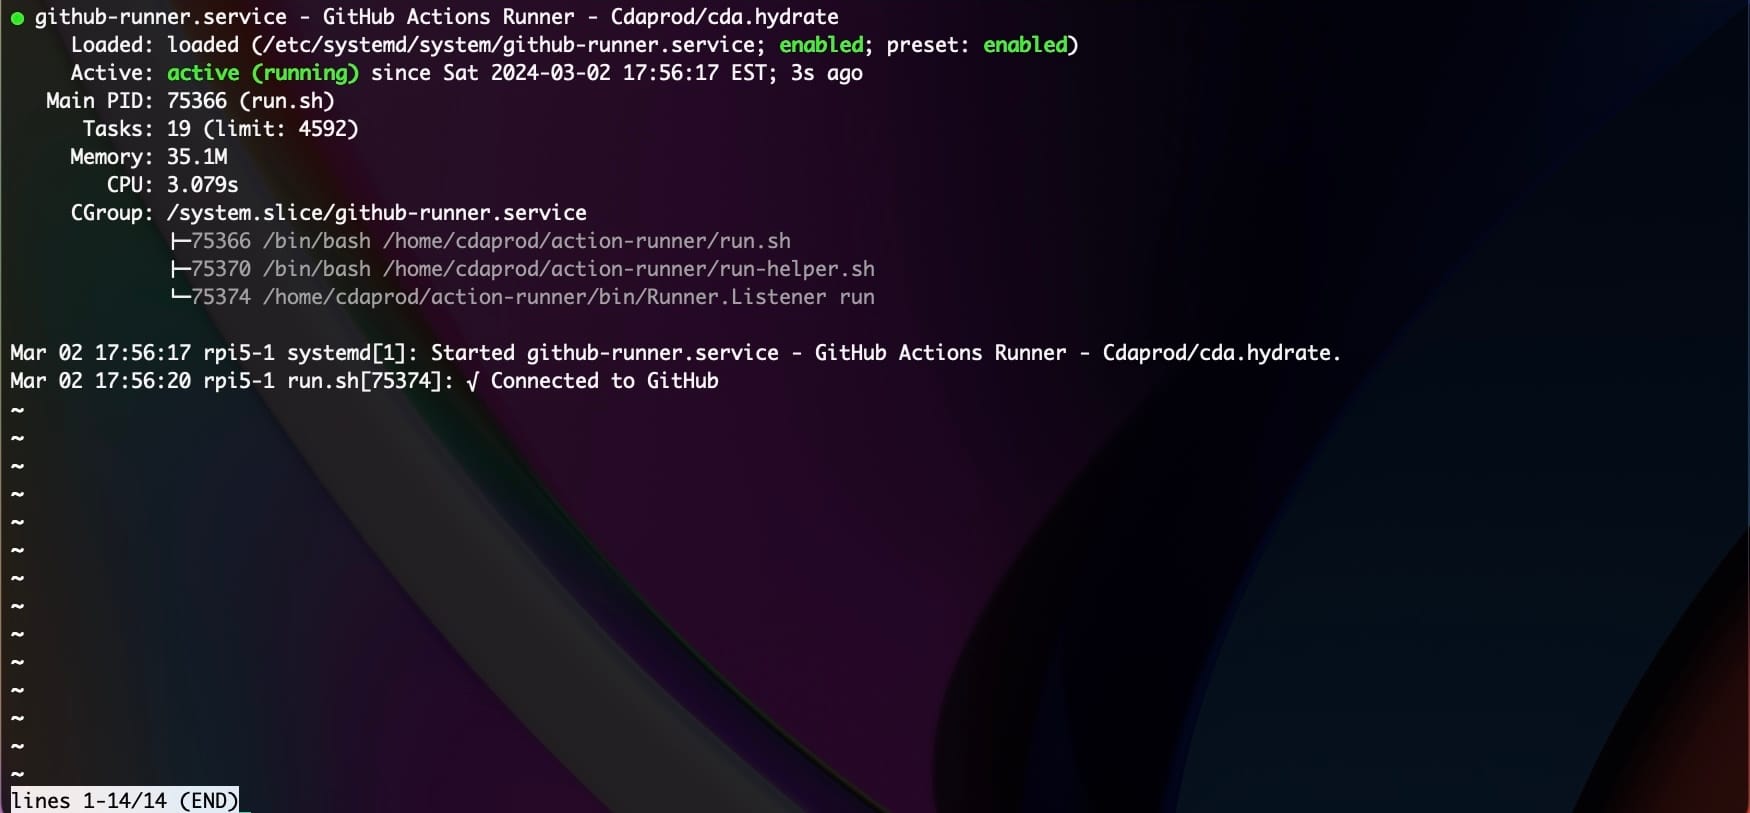
You should see output indicating that the service is active. If there are any issues, the output will also include error messages that can help in troubleshooting.
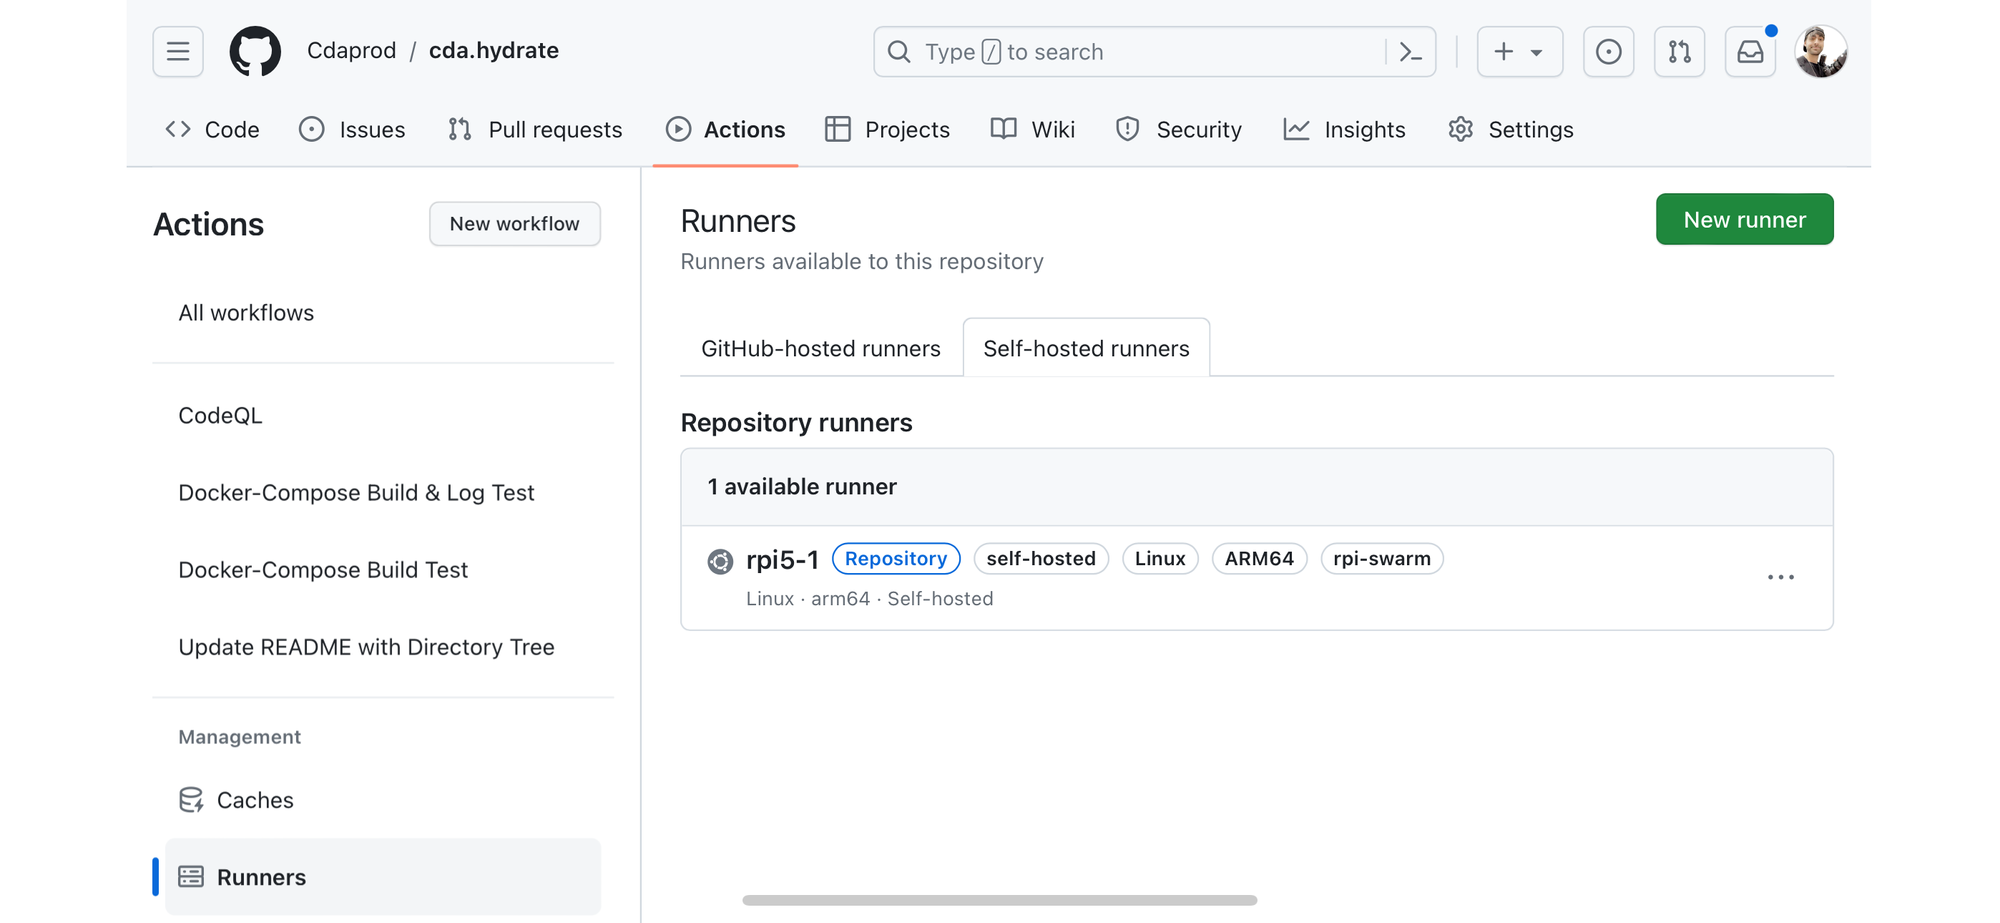
From the GitHub Actions tab, select the Runners tab, this will bring up two “tabs”. Select Self-hosted runners to view your configured Repository runner.
Deploying MinIO on Docker Swarm with Self-Hosted Runner
When adapting GitHub Actions workflows for execution on a self-hosted runner, particularly one tailored for a Docker Swarm infrastructure like "rpi-swarm", it is essential to design the workflow to leverage the unique environment fully. This means not just running tests, but also deploying real applications like MinIO, a high-performance distributed object storage server. Below is an example of how to configure a GitHub Actions workflow to deploy MinIO on your "rpi-swarm" runner, demonstrating the runner's capability to handle more complex CI/CD tasks like deploying services with the use of Docker and Docker Compose.
Create a file in your repository under .github/workflows directory, for example, .github/workflows/deploy-minio-on-rpi-swarm.yml, and insert the following workflow configuration:
name: Deploy MinIO on RPI Swarm

on:
  push:
    branches:
      - main
  pull_request:

jobs:
  deploy-minio:
    name: Deploy MinIO to RPI Swarm
    runs-on: [self-hosted, rpi-swarm]

    steps:
    - name: Check out repository code
      uses: actions/checkout@v2

    - name: Load Docker Compose File
      run: |
        echo "Loading Docker Compose for MinIO Deployment..."
        docker-compose -f docker-compose.yml config

    - name: Deploy MinIO Stack
      run: |
        echo "Deploying MinIO on RPI Swarm..."
        docker stack deploy -c docker-compose.yml minio_stack

    - name: Verify Deployment
      run: |
        echo "Verifying MinIO Deployment..."
        docker service ls | grep minio_stack
This workflow exemplifies how to utilize a GitHub Actions self-hosted runner for deploying applications like MinIO to a Docker Swarm setup, demonstrating the runner's ability to facilitate complex CI/CD tasks beyond simple tests.
- name: Identifies the workflow, here named "Deploy MinIO on RPI Swarm".
- on: Defines the trigger events for the workflow, set to activate on pushes to the main branch and on pull requests.
- jobs: Contains the jobs to be executed by the workflow, with a single job named "deploy-minio" in this example.
- runs-on: Directs the job to execute on your self-hosted runner tagged with "rpi-swarm", ensuring the workflow leverages the specific environment of your Docker Swarm.
- steps: Lists the sequence of operations the job will perform:
- Check out repository code: Fetches the codebase onto the runner using actions/checkout@v2.
- Load Docker Compose File: Prepares the Docker Compose file for deployment, useful for verifying the file's syntax and outputting the effective configuration.
- Deploy MinIO Stack: Utilizes Docker Compose to deploy MinIO as a stack to the Docker Swarm, showcasing the self-hosted runner's capability to handle Docker Swarm deployments.
- Verify Deployment: Confirms the MinIO stack deployment by listing Docker services and filtering for the MinIO stack, ensuring that the deployment was successful.
Elevating Deployment Practices with MinIO and GitOps
Underscoring MinIO’s dedication to refining storage solutions for contemporary applications, merging seamlessly with the evolution brought about by GitHub self-hosted runners in the CI/CD arena. Embracing GitOps principles places MinIO at the vanguard of a strategic pivot towards more self-reliant, secure, and efficient deployment workflows, significantly enhancing the developer experience.
The flexibility that GitOps introduces into application development is another sphere where MinIO’s capabilities shine brightly. Developers find themselves well-equipped to refine application layers and deploy microservices with assurance, utilizing MinIO for streamlined data storage and management. This structured and automated method accelerates development, fortifying the resilience and scalability of applications. The incorporation of GitHub Actions and self-hosted runners smoothens the deployment across various settings, fully leveraging MinIO’s object storage strengths.
We encourage our fellow developers and engineers to dive into this journey with us, explore the potentials, and share their insights and queries. For deeper conversations, collaborations, or queries, feel free to reach out to us on the MinIO Slack channel. Together, let’s shape the future of deployment practices, leveraging our collective expertise and the powerful capabilities of MinIO and GitOps.


