Publish Minio events via RabbitMQ

Introduction
Minio server supports Amazon S3 compatible bucket event notification for following targets AMQP, Elasticsearch , Redis, nats.io, PostgreSQL and Apache Kafka. Part 1 of this blog series covers sending bucket notifications via AMQP using RabbitMQ server. You may compare this setup to AWS S3 & SQSservices.
Steps to Configure RabbitMQ
I used Ubuntu Linux 16.04, latest Minio server binary and RabbitMQ 3.5.7–1 on my laptop for this setup.
Install RabbitMQ server and enable the management plugin.
$ sudo apt-get install rabbitmq-server
$ sudo rabbitmq-plugins enable rabbitmq_management
Create a user named “myuser” with password “mypassword”. For your production environment you may want to choose your access credentials with security in mind.
$ sudo rabbitmqctl add_user myuser mypassword
$ sudo rabbitmqctl set_user_tags myuser administrator
$ sudo rabbitmqctl set_permissions -p / myuser ".*" ".*" ".*"
Steps to Configure Minio
Latest Minio server binary can be downloaded from https://minio.io/downloads/
$ wget https://dl.minio.io/server/minio/release/linux-amd64/minio
$ chmod +x minio
In this case “myphotos” is used as my data directory for Minio server.
$ ./minio server myphotos
Endpoint: http://10.1.10.150:9000 http://127.0.0.1:9000
AccessKey: 7I6R5G576YI641GS9J9F
SecretKey: SuycBIe+O/s5zXxU9w+N4wkXHpBCKa2H6Ptlrc8c
Region: us-east-1
...
...
The default location of Minio server configuration file is ~/.minio/config.json. Update the AMQP configuration block in ‘config.json’ as follows.
"amqp": {
			"1": {
				"enable": true,
				"url": "amqp://myuser:mypassword@localhost:5672",
				"exchange": "bucketevents",
				"routingKey": "bucketlogs",
				"exchangeType": "fanout",
				"mandatory": false,
				"immediate": false,
				"durable": false,
				"internal": false,
				"noWait": false,
				"autoDeleted": false
			}
        }
Restart the Minio server to reflect config changes made above. Minio supports all the exchange available in RabbitMQ. For this setup we are using fanoutexchange.
Enable bucket notification using Minio client
Step 1: Download and install Minio client
$ wget https://dl.minio.io/client/mc/release/linux-amd64/mc
$ chmod 755 mc
Step 2: Add Minio server host alias information
Configure Minio client with access and secret keys pointing to the Minio server.
$ ./mc config host add myminio http://localhost:9000 7I6R5G576YI641GS9J9F SuycBIe+O/s5zXxU9w+N4wkXHpBCKa2H6Ptlrc8c
Step 3: Enable bucket notification
In this example we will enable bucket events only when JPEG images are uploaded or deleted from ‘images’ bucket on ‘myminio’ server. Here ARN value is arn:minio:sqs:us-east-1:1:amqp. To understand more about ARN please follow AWS ARN documentation.
$ ./mc mb myminio/images
$ ./mc events add  myminio/images arn:minio:sqs:us-east-1:1:amqp    --suffix .jpg
$ ./mc events list myminio/images
arn:minio:sqs:us-east-1:1:amqp s3:ObjectCreated:*,s3:ObjectRemoved:* Filter: suffix=”.jpg”
Step 4: Watch for events on exchange
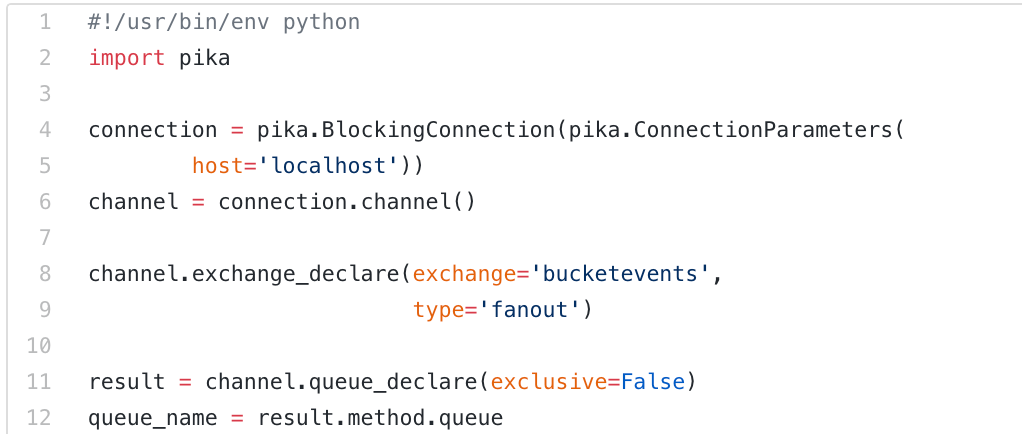
Below python script waits on queue exchange ‘bucketevents’ and prints event notification on console. It uses pika python client library for RabbitMQ.
#!/usr/bin/env python
import pika

connection = pika.BlockingConnection(pika.ConnectionParameters(
        host='localhost'))
channel = connection.channel()

channel.exchange_declare(exchange='bucketevents',
                         type='fanout')

result = channel.queue_declare(exclusive=False)
queue_name = result.method.queue

channel.queue_bind(exchange='bucketevents',
                   queue=queue_name)

print(' [*] Waiting for logs. To exit press CTRL+C')

def callback(ch, method, properties, body):
    print(" [x] %r" % body)

channel.basic_consume(callback,
                      queue=queue_name,
                      no_ack=False)

channel.start_consuming()
Execute this example python script to watch for RabbitMQ events on the console.
$ python rabbit.py
Open another terminal and upload a JPEG image into “images” bucket.
$ ./mc cp myphoto.jpg myminio/images
You should receive the following event notification via RabbitMQ once the upload completes.
$ python rabbit.py
‘{“Records”:[{“eventVersion”:”2.0",”eventSource”:”aws:s3",”awsRegion”:”us-east-1",”eventTime”:”2016–09–08T22:34:38.226Z”,”eventName”:”s3:ObjectCreated:Put”,”userIdentity”:{“principalId”:”minio”},”requestParameters”:{“sourceIPAddress”:”10.1.10.150:44576"},”responseElements”:{},”s3":{“s3SchemaVersion”:”1.0",”configurationId”:”Config”,”bucket”:{“name”:”images”,”ownerIdentity”:{“principalId”:”minio”},”arn”:”arn:aws:s3:::images”},”object”:{“key”:”myphoto.jpg”,”size”:200436,”sequencer”:”147279EAF9F40933"}}}],”level”:”info”,”msg”:””,”time”:”2016–09–08T15:34:38–07:00"}\n’
You can make your own script using different language bindings available on official RabbitMQ documentation.
Step 5: Testing on RabbitMQ
Use rabbitmqctl command-line tool to test the setup.
$ sudo rabbitmqctl list_exchanges
Listing exchanges …
direct
amq.direct direct
amq.fanout fanout
amq.headers headers
amq.match headers
amq.rabbitmq.log topic
amq.rabbitmq.trace topic
amq.topic topic
bucketevents fanout
“bucketevents fanout” states that an RabbitMQ exchange has been successfully created as type: ‘fanout’.
For further questions and comments join our Slack chat at: https://slack.minio.io


