Leveraging Object Storage for Enterprise Legacy Data

MinIO is built with speed and resiliency at the forefront, regardless of the type of environment you choose to run it on. Whether it's multi cloud, bare metal, cloud instances or even on-premise, MinIO is designed to run on AWS, GCP, Azure, colocated bare metal servers and Kubernetes distributions such as Red Hat OpenShift. MinIO runs just as well on developer laptops as it does on commodity servers.
That being said, not all environments are created equal. In earlier blogs we spoke about what is the best drive combination to use to get the best performance and capacity, we also showed overall how to design and architect your hardware to deploy MinIO on, and soon in a future blog post we will go into detail on how to tune your hardware and configure performance settings based on the application you are trying to deploy so you get the right bang for your buck.
Today, we’ll focus on how to leverage MinIO to support enterprise legacy data. In big banks and retailers, where billions over billions of transactions go on every day, not everything is stored on the latest systems using modern protocols. Many times, and for a variety of reasons, they are required to keep using these legacy systems.
Why would anyone want legacy data to also live on modern, cloud-native object storage? Why not just archive the legacy data onto some tapes or HDD, and save only new data to object storage? Because access to data is power – at the same time they have a need to maintain a system for operational transactions and share the valuable information within for AI/ML training with KubeFlow, analytics and reporting such as with Power BI or Dremio, and a cornucopia of twenty first century cloud-native applications.
MinIO makes sharing legacy data easier, providing mechanisms and integrations to connect the legacy system with MinIO and leverage the data for other modern applications? There are several tools and protocols we can use to connect MinIO with legacy systems, albeit each of them come with their own caveats in performance, security or resiliency.
The reason MinIO is built on this ethos is because we believe the future is cloud-native – and that includes on-prem bare metal and Kubernetes. We want to make sure no data is left behind just because they are not up to snuff with the latest and greatest technologies. As we’ll soon find out, they're trapped in a world that requires legacy apps for operations but they want to use cloud-native software with their data. In these cases, MinIO is the perfect companion for Microsoft Windows and office productivity apps and mainframe data. Once that data is on a backend that is designed with industry-leading performance and scalability, it can be exposed to the cloud-native analytics, AI/ML and custom applications the business requires. MinIO’s performance puts every data-intensive workload within reach. MinIO has created a comprehensive blueprint for data infrastructure to support exascale AI and other large scale data lake workloads. It is called the MinIO DataPod. Why? Because exascale data is the reality that is common today in today's enterprise.
Let’s get started transferring data back and forth between MinIO and Microsoft Windows and between MinIO and mainframes, including a look at the tools we use along the way.
Set Up MinIO
Before we can connect to these resources, we need an instance of MinIO. This could be something that is already running or we can quickly set one up using the steps below. More detailed steps can be found in the docs.
To make it as simple as possible we’ll bring up a MinIO node with 4 disks. MinIO runs anywhere - physical, virtual or containers - and in this overview we will use containers created using Docker.
For the 4 disks, create the directories on the host for minio:
Launch the Docker container with the following specifications for the MinIO node:
The above will launch a MinIO service in Docker with the console port listening on 20091 on the host. It will also mount the local directories we created as volumes in the container and this is where MinIO will store data. You can access your MinIO service via http://localhost:20091.
If you see 4 Online that means you’ve successfully set up the MinIO node with 4 drives.
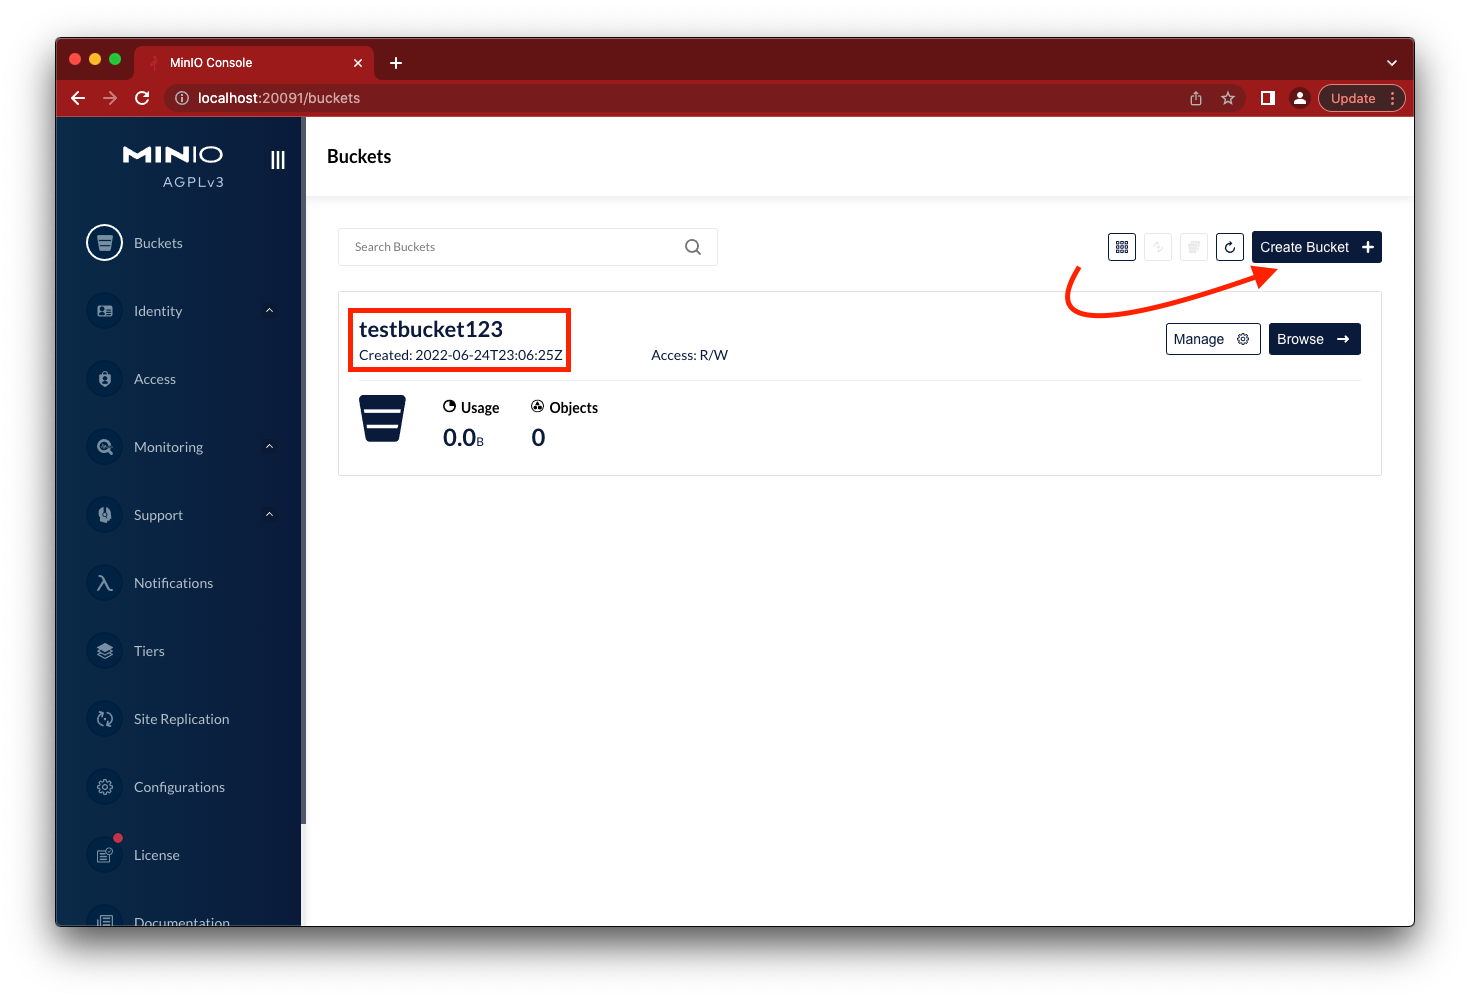
Go to the browser to load the MinIO console using http://localhost:20091, login using minioadmin and minioadmin for username and password respectively. Click on the Create Bucket button and create testbucket123.

Now we have the necessary building blocks to connect other systems to MinIO and transfer data back and forth. Be sure your Windows system can talk to your MinIO instance that you have setup (whether on Docker, K8s, bare metal, etc.) by accessing MinIO’s console from the browser on the Windows machine.
How to Transfer Data Between MinIO and Windows
WinS3FS
Let's connect to MinIO from a Windows machine. There are two ways we can do this. The first is using a utility called WinS3FS and then using rClone, and we’ll show you how to use both.
Go ahead and install WinS3FS from Sourceforge.
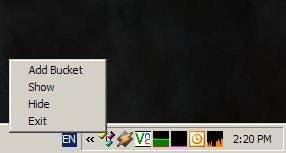
Once installed on the bottom in the status bar click on the WinS3FS icon and then click on ‘Add Bucket’ using the credentials used to login to MinIO console and the bucket that was created.

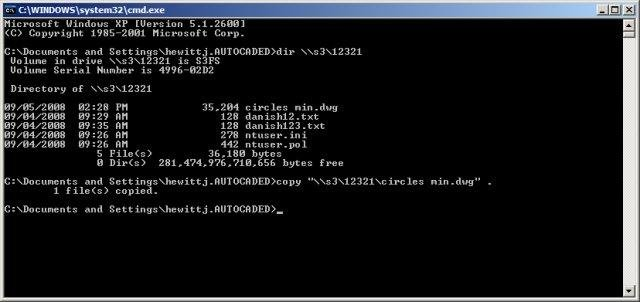
Once the MinIO bucket is added list the contents of the mount point of where the bucket was mounted using the command dir \\s3\testbucket123

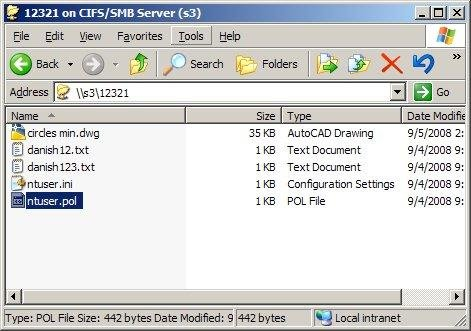
You can also see the contents of the bucket on something like a Windows Samba Client (SMB) GUI such as the one below

Next let's talk about the rClone method.
rClone
Frankly speaking, WinS3FS gets the job done, but is a bit outdated and it has some performance issues. If you are sending a few KB worth of files or data back and forth it will do just fine. But when you start adding GBs worth of data, if not TBs, then you will notice it will soon keel over.
There have been other tools that have been written to address this, one of the main ones being rClone. rClone is multi-faceted in the sense that it will integrate not only S3 but any S3 compatible store such as MinIO, so let's get started.
Go ahead and download rClone for Windows.
rClone does not have any GUI so go ahead and open PowerShell and run the following commands
Create a directory called rClone to store the rclone.exe and other relevant files.
mkdir c:\rclone
Next let's go into the directory to download and extract the binaries
cd c:\rclone
Invoke-WebRequest -Uri “https://downloads.rclone.org/v1.51.0/rclone-v1.51.0-windows-amd64.zip” -OutFile “c:\rclone\rclone.zip”
Expand-Archive -path ‘c:\rclone\rclone.zip’ -destinationpath ‘.\’
Once you have the files extracted in the location C:\rclone\rclone-v1.51.0-windows-amd64, go ahead and copy the rclone.exe and run it in config mode.
cp C:\rclone\rclone-v1.51.0-windows-amd64\*.* C:\rclone\
.\rclone.exe config
Go through this entire configuration process, during which it will ask for the MinIO server URL, Access and Secret Keys, among other information such as encryption settings. Be sure to go through them and choose what makes sense for your configuration. Once you have it configured press `q` to quit and return to the command line.
At the prompt type .\rclone.exe lsd testbucket123 to see the list of buckets.
So which is better between the two? For simplicity, I would go with rClone as you can do everything from a CLI, but if you are more comfortable with a GUI then WinS3FS might be the way to go, especially if you mainly work with small files worth just a few KBs.
How to Transfer Data From Mainframe to MinIO
What about applications that store data on systems that are even more legacy than the apps that run on Windows?
Yes, we are talking about mainframes. On old VMX, IBM and other mainframes, data is not stored in a format where you can just copy and paste files to work with them. Data, for the most part, is streamed and if you want to store it as an object, then the data in VSAM/QSAM files needs to be converted to sequential fixed length files before they can be transferred to a MinIO bucket.
Once you have it converted, how do you actually transfer the file? Do you copy it locally from the mainframe to the laptop and then upload from the laptop to MinIO bucket? Well that would be fine if it was a couple of files that were a few KB each. But if you have to move hundreds of large files worth several TBs or even many small files then it is going to be a monumental task to accomplish in this roundabout fashion.
Secure File Transfer Protocol (FTP/SFTP)
Thankfully, every mainframe system out there comes with one legacy protocol that is still ubiquitous today, FTP/SFTP. Mainframes will often have FTP clients that you can connect to other FTP servers in order to transfer data. But how does it help if you have MinIO, which is not a FTP server? Or is it?
Well, sort of. In the quest to be as compatible as possible, we’ve written a feature that enables you to start MinIO as a FTP and SFTP server. What this essentially does is it allows MinIO to act as an FTP and SFTP server on its own separate ports so that any sFTP client is able to connect to MinIO just like any other sFTP server. The mainframes are none the wiser, they do not know the sFTP server they connected to is actually a bucket that provides data to cloud-native apps via the S3 API. Objects uploaded via FTP are accessible via the S3 API.
We went into detail in a previous blog post on how to set this up, but in short all you need to do is start MinIO server with some additional parameters related to FTP
minio server http://server{1...4}/disk{1...4}
--ftp="address=:8021" --ftp="passive-port-range=30000-40000" \
--sftp="address=:8022" --sftp="ssh-private-key=/home/miniouser/.ssh/id_rsa"
...
...
Once the server is started with the above parameters, you can then connect to it just like any other FTP server.
ftp localhost -P 8021
Connected to localhost.
220 Welcome to MinIO FTP Server
Name (localhost:user): minioadmin
331 User name ok, password required
Password:
230 Password ok, continue
Remote system type is UNIX.
Using binary mode to transfer files.
ftp> ls runner/
229 Entering Extended Passive Mode (|||39155|)
150 Opening ASCII mode data connection for file list
drwxrwxrwx 1 nobody nobody            0 Jan  1 00:00 chunkdocs/
drwxrwxrwx 1 nobody nobody            0 Jan  1 00:00 testdir/
...
Just like the good ol’ FTP you know and love, except the endpoint is cloud-native and software-defined.
Software Development Kits (SDKs)
With legacy applications, a lot of the time it is not possible to modify existing codebase to add new features. Hence, most legacy apps are trapped in time by the limitations of their dependencies But it wouldn’t be fair and this wouldn’t be a holistic blog post if we didn’t mention the different SDK options that MinIO has available. The reason we recommend using our SDKs over the other options we discussed so far is because you can directly integrate your app with MinIO without any intermediary applications or protocols that could affect its performance and, potentially, its security.
MinIO Software Development Kits supports a variety of languages, but the ones that could be of interest in this case would probably be .NET, Java and Python. We mention these out of the list because generally Windows systems and mainframes support these languages. That being said, it’s significantly more effort to integrate something natively with an SDK rather than with just another service. But the increased effort is worth it in order to be able to work with legacy data natively at wirespeed within your codebase where you have full control.
Here is a simple example of how you can get started using our Python SDK to feed Kafka messages into a MinIO bucket.
We’ll import the following pip packages, be sure to have these installed.
Configure the Kafka brokers to connect to along with the topic to subscribe to
When you stop the consumer, generally it spits out a stack trace because a consumer is meant to be running forever consuming messages. This will allow us to cleanly exit the consumer
- As mentioned earlier, we’ll be continuously waiting, listening for new messages on the topic. Once we get a topic we break it down into three components
- request_type: The type of HTTP request: GET, PUT, HEAD
- bucket_name: Name of the bucket where the new object was added
- object_path: Full path to the object where it was added in the bucket
- Every time you make any request, MinIO will add a message to the topic which will be read by our
minio_consumer.pyscript. So to avoid an infinite loop, let's only process when new objects are added, which in this case is the request type PUT.
This is where you would add your customer code to build your ML models, resize your images, and process your ETL/ELT jobs.
Once the object is processed, it will be uploaded to the destination bucket we configured earlier. If the bucket does not exist, then our script will auto-create it.
There you have it. Other than a few lines of boilerplate code we are essentially doing two things:
- Listening for messages on a Kafka topic
- Putting the object in a MinIO bucket
The script is not perfect and is just a sample to give you an idea of what is possible with SDKs — you need to add some additional error handling, but that's pretty straightforward. For more details please visit our MinIO Python SDK documentation.
Not All Roads Lead to Rome
That being said, please note that all the above solutions are, for lack of a better word, merely “stopgap” measures in the grand scheme of things. As we’ve noted in our FileSystem on Object Store is a Bad Idea blog post, no matter how fast your MinIO backend is, when you have intermediary components such as WinS3FS, rClone, FileSystem Mounts and more, it inevitably degrades the overall performance of the system. Throughput will also be gated by the network, even reduced to the biggest bottleneck in the network, whether this is switches, cables, NICs and other applications in between. But in the near term, you need to expose lots of data from legacy systems to cloud-native analytics and AI/ML applications that you want to make use of quickly.
Then what is the MinIO way? Well our recommendation is to use our MinIO SDKs to develop tight integration with the rest of your application without sacrificing on performance and resiliency. If you have any questions about integrating and working with MinIO SDKs please reach out to us on Slack!


